Updated: 2020-07-20
Step 1: Carry forward a TaxCycle return and link it to a DoxCycle file
To post data from DoxCycle to TaxCycle, you must have a DoxCycle file, a TaxCycle file and those two files must be linked. The easiest way to create linked DoxCycle and TaxCycle files is to do it when you carry forward the tax return. Read the following instructions to learn how to do this.
If you have already created a DoxCycle file and you need to link it to the tax return, read the Link DoxCycle and TaxCycle files help topic. If you already have a TaxCycle file but not the DoxCycle file, first read the Create a DoxCycle PDF help topic and then the Link DoxCycle and TaxCycle files help topic.
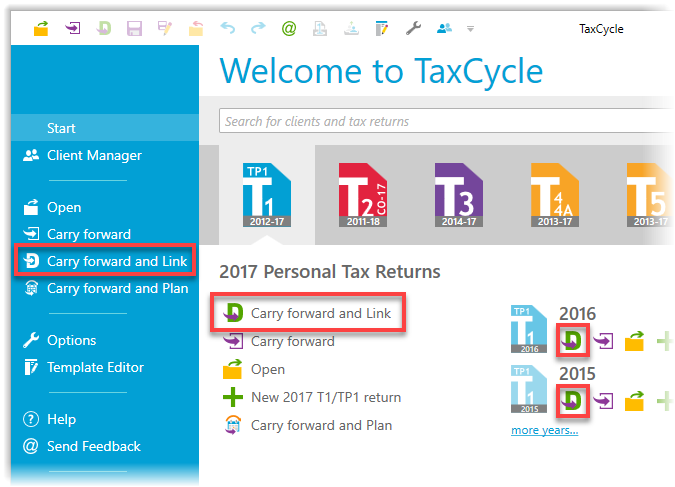
- Open TaxCycle.
- On the Start screen, click on the blue T1/TP1 button.
- Click Carry forward and Link (Ctrl+Shift+R) or the green D with the purple swoosh.
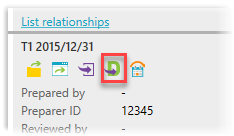
- If you're using the Client Manager, you can click Carry forward and link icon:
- Browse to the folder where you saved last year's tax returns and select the file you want to carry forward.
- Click the Open button.
- TaxCycle takes the identifying information from the prior-year return and uses it to create a DoxCycle file with the taxpayer name(s). At the same time, it creates a TaxCycle tax return containing the carry-forward data.
- Save (Ctrl+S) in TaxCycle and in DoxCycle to retain the link.
Step 2: Scan or import slips into DoxCycle
Use DoxCycle to scan or import slips for the taxpayer (spouse and any dependants), just as you would any other source document:
At the same time as DoxCycle categorizes documents, it automatically extracts box amounts from slips.
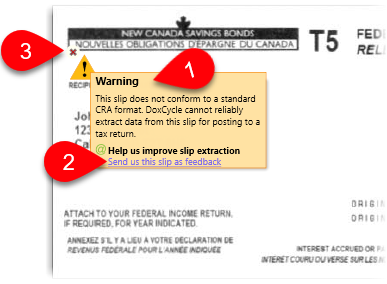
If DoxCycle encounters a non-standard slip during this process, it add a warning to the slip:
- Hover over the icon to read the warning.
- Click on the Send us this slip as feedback link to send us a copy of the slip that is causing issues.
- If you want to remove a warning message from the slip, click the red x that appears when you hover over icon.
Please send us these non-standard slips so that we can add them to our tests and hopefully fix them for others in the future. (Any feedback sent is encrypted during transmission, and we do not share these test slips with anyone. So, your client information is protected.)
Step 3: Review extracted box amounts
Variation in slips and scan quality can result in less-than-perfect data extraction. For example, if DoxCycle can't extract the box number but does grab the amount in the box, it can't figure out where to post that amount in the tax return. For this reason, we required you always review extracted box numbers and amounts before posting them to TaxCycle.
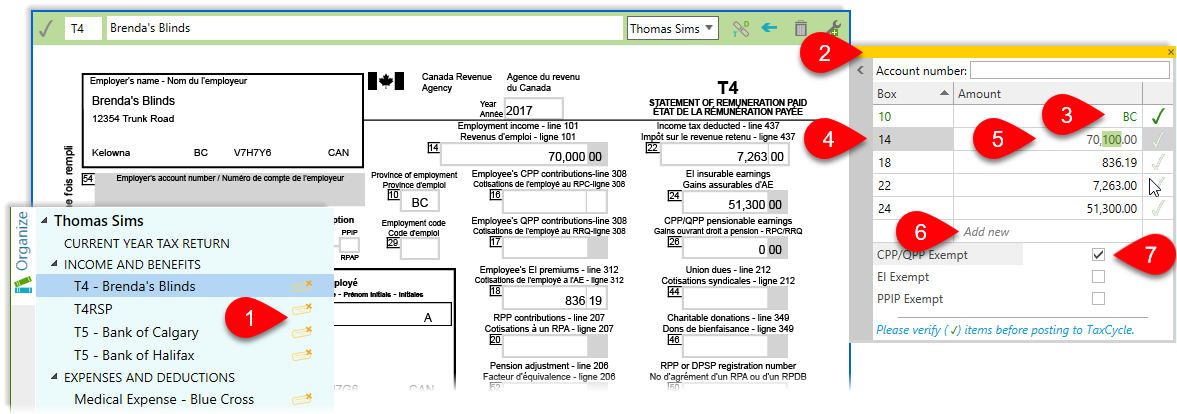
- Slips and receipts with automatically-extracted data have a yellow stamp next to them in the index. Click on a document to review the extracted values.
- Values extracted from slips or receipts appear in a box on the right side of the document. If the box is collapsed, you will see a grey bar. Click the bar to expand or collapse the box. You can also click and hold the bar at the top of the window to drag it to a different location on the screen.
- Compare the values in the box with those in the original document. Click on the row or press Enter to approve. A check mark appears next to the row. Or, click on the check mark to approve the value.
- To change a box number, click on the box number, then type a new number or select from the drop-down list of available boxes.
- To correct a value, click on the value and enter a new number. Or, select from the drop-down list.
- If a box value is missing, click on Add new in the last row, then select the box number and enter the value.
- Some values may be check boxes. Review these as well.
- To delete a row, right-click on it and click Delete.
- When all the boxes are checked, the slip is ready to post. You can post amounts immediately, or save the file and post them later.
Step 4: Post data to TaxCycle
DoxCycle and TaxCycle files must be linked in order to post data. See the Link DoxCycle and TaxCycle help topic.
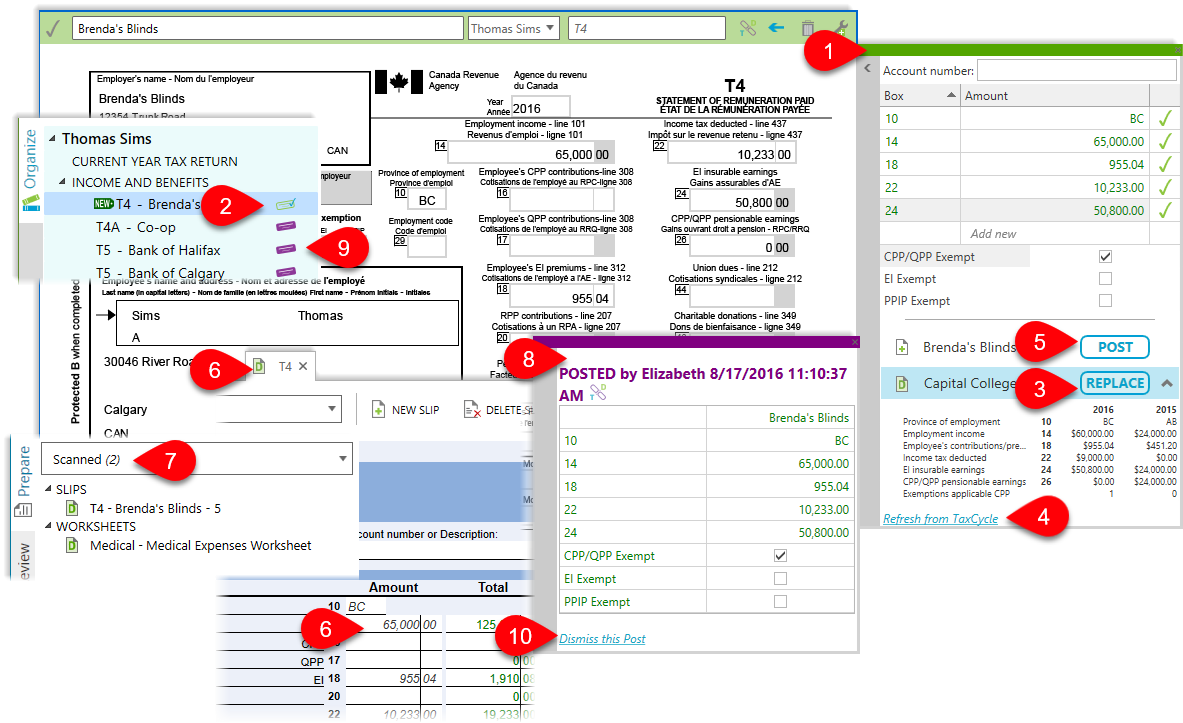
- Once the data is verified and ready to post to TaxCycle, the bar at the top of the box turns green and a Post button appears at the bottom of the box.
- The index also shows a green stamp next to the document name.
- If possible, DoxCycle will suggest matching slip(s) or form(s) in the tax return. Click the arrow next to the Replace button to preview the existing data on the slip. Click the Replace button to overwrite the data in an existing form.
- If you do not see the existing slip in the list, click Refresh from TaxCycle to reload the list of possible matching forms.
- If there is no matching slip, or you would like to create a new slip based on the extracted data, click the Post button.
- TaxCycle opens and shows the slip or form containing the posted data. In TaxCycle, posted values appear in italics and forms with posted values have a green D in their icon. See the Form icons and field colours help topic.
- In the TaxCycle Prepare sidebar, select the Scanned view to see all forms with data posted from DoxCycle.
- Back in DoxCycle, The bar at the top of the box in DoxCycle turns purple and the date, time and person who posted the slip appears at the top of the box
- Documents with data posted to TaxCycle have a purple stamp next to them in the index.
- To post the values again, click the Dismiss this Post to return to the previous step.
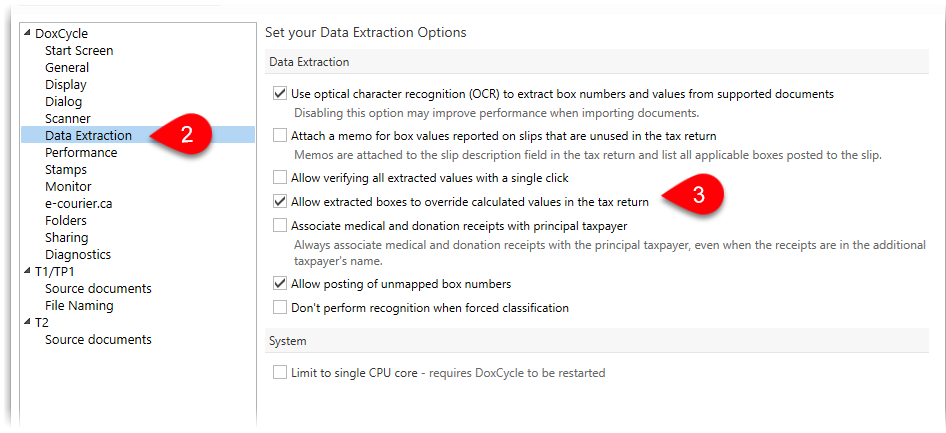
Data extraction and posting options
Additional options allow you to customize what DoxCycle does when extracting and posting data:
- To open Options from the Start screen, click Options in the green bar on the left side. If you have a file open, go to File menu, then click Options.
- On the left side of the dialog box, expand the DoxCycle section, and click on Data Extraction.
- Each option contains a description of when changing the option might be useful.
- Click OK or Apply to save your changes.