Updated: 2022-12-16
By default, the Client Manager is not permitted to access files on another computer or device. It can only read files located on the computer it’s installed on. However, if files are stored on a different computer, it is possible to grant the server access to those files, with a little additional configuration.
A good example of a situation where you might want to do this is if the files are stored on a Network Attached Storage (NAS) device or a USB-connected external drive.
You must have Administrator privileges on the computer in order to perform this configuration.
Step 1—Set up the Client Manager as a Server
Install TaxCycle on the computer and set it up using the server set-up option. Learn how to set up a server in the Set up a Client Manager server help topic.
Step 2—Create or select a Windows user account
By default, the Client Manager application runs under a special Windows user account called SYSTEM. Another user account must be selected to run the application when it is run over the network. You can either use an existing account or create a new account.
If you choose to use an existing account, we do not recommend using the computer administrator account (the one you sign in with to administer the computer). If this is the only other user account on the machine, please create a new account for the Client Manager.
Certain NAS devices limit the number of connections from a given Windows account. If you use a NAS, creating a new account is the best choice.
The new user account must:
- Be an Administrator on the local computer where the Client Manager server resides.
- Have permissions to access the network location where the files are stored.
Step 3—Change the Client Manager server user account
On the computer where the Client Manager server resides:
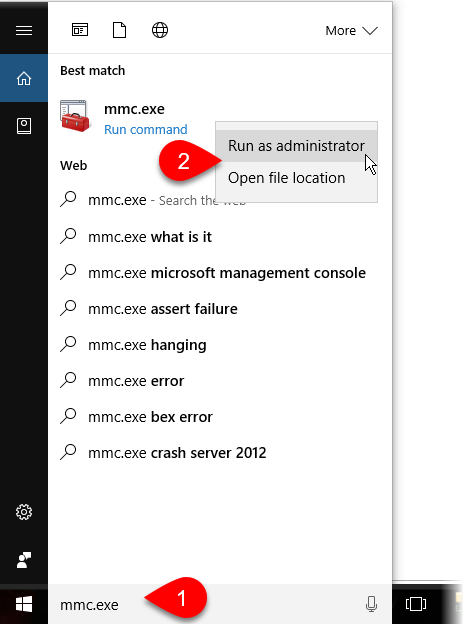
- Click the Windows Start button, then in type mmc in the search box.
- In the list of applications, mmc.exe will appear. Right-click on it and select Run as administrator to open the Microsoft Management Console.
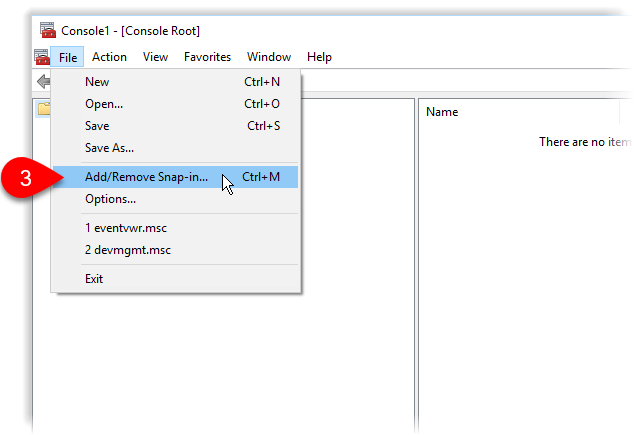
- In the Microsoft Management Console, go to the File menu and select Add/Remove Snap-in.
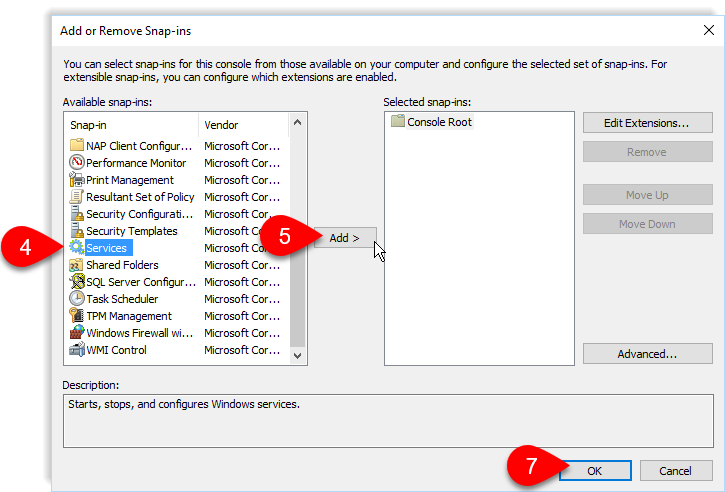
- From the list of snap-ins on the left, click Services.
- Click the Add > button.
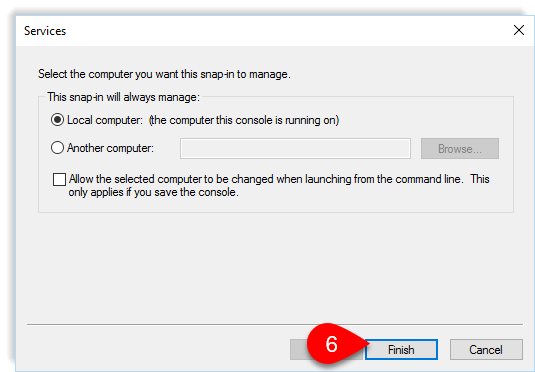
- If prompted with a new dialog box, keep the default values and click the Finish button.
- Back on the Add/Remove Snap-in dialog box, click OK.
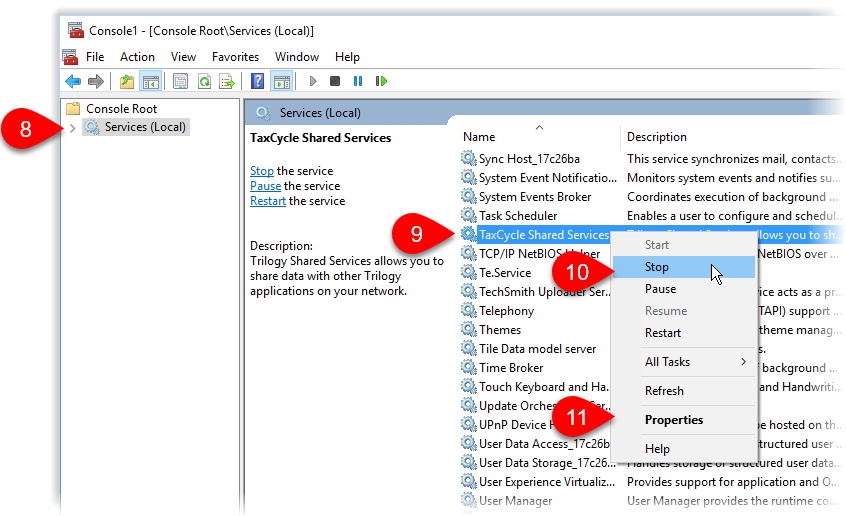
- Back in the Microsoft Management Console, click once on Services.
- Scroll through the list of local system services until you find TaxCycle Shared Services.
- Right-click on TaxCycle Shared Services and select Stop to stop the Client Manager application.
- Once it is stopped, right-click again on TaxCycle Shared Services and select Properties.
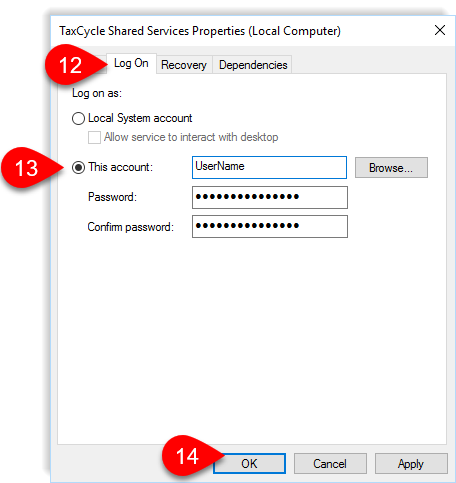
- In the Properties dialog, go to the Log On tab.
- Select This account and enter the account name and password for the user account that will run the Client Manager application. It may help to click the Browse button so you can choose a user account from a list of available user accounts on your computer.
- Click OK to save your changes. You may see a notification telling you that the selected user account has been added to the Services group.
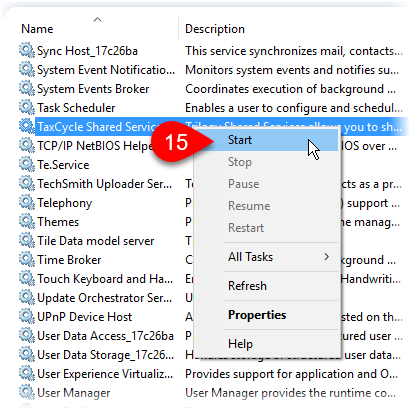
- Back in the Services window, right-click on TaxCycle Shared Services and select Start to restart the service.
Step 4—Re-index the Client Manager
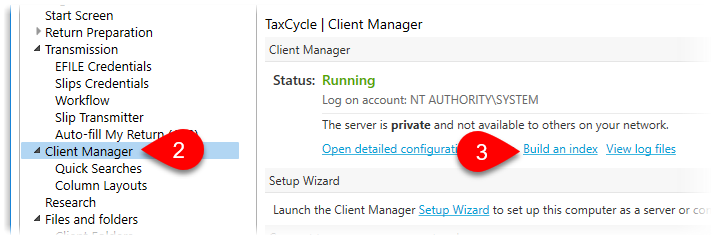
- To open Options from the Start screen, click Options in the blue bar on the left side. If you have a file open, go to File menu, then click Options.
- Expand TaxCycle and then click on Client Manager on the left side of the dialog box.
- On the right side of the window, click on the Build an index link. This opens a new window that displays the Monitored Folders page in the Server Options.
- On the right, scroll down until you see the Index Files section.
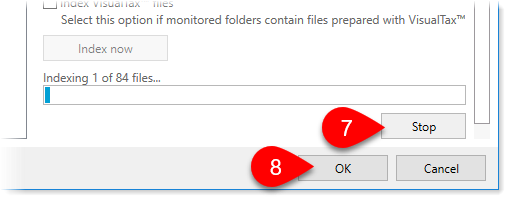
- Check Index VisualTax® files only if you previously used VisualTax®. (The Client Manager does not index VisualTax® files by default because the file name extensions are standardized in a way to make it easy to detect what files are from VisualTax®.)
- Click the Index now button to clear the database and re-index. Depending on the number of files, it may take a while for the Client Manager to completely re-index the monitored folders. The server may also be a little slow to respond while indexing files. Much of this depends on the speed of the computer it is running on.
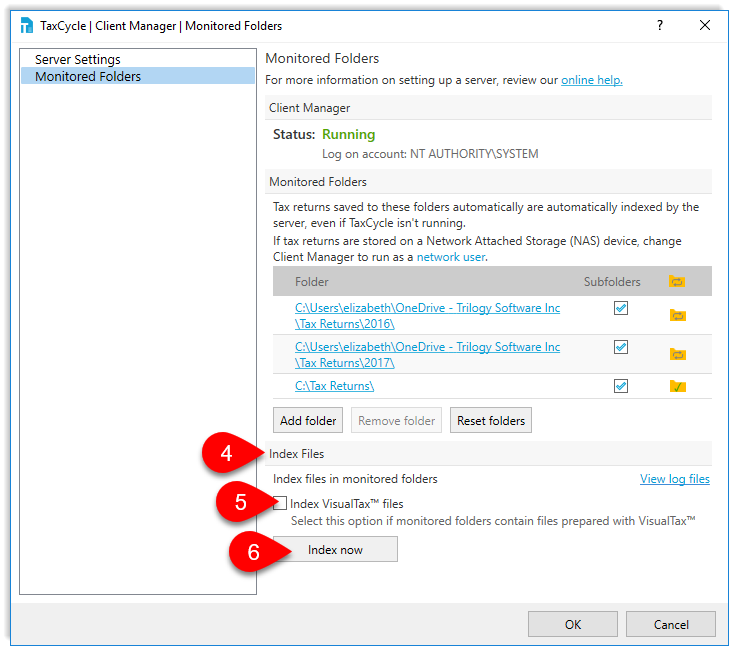
- Click Stop if you want to halt indexing before it is complete.
- Even if indexing is not complete, you can click OK to return to TaxCycle Options. Indexing will continue in the background while you work.