Menu

Batch Email

Updated: 2023-03-01

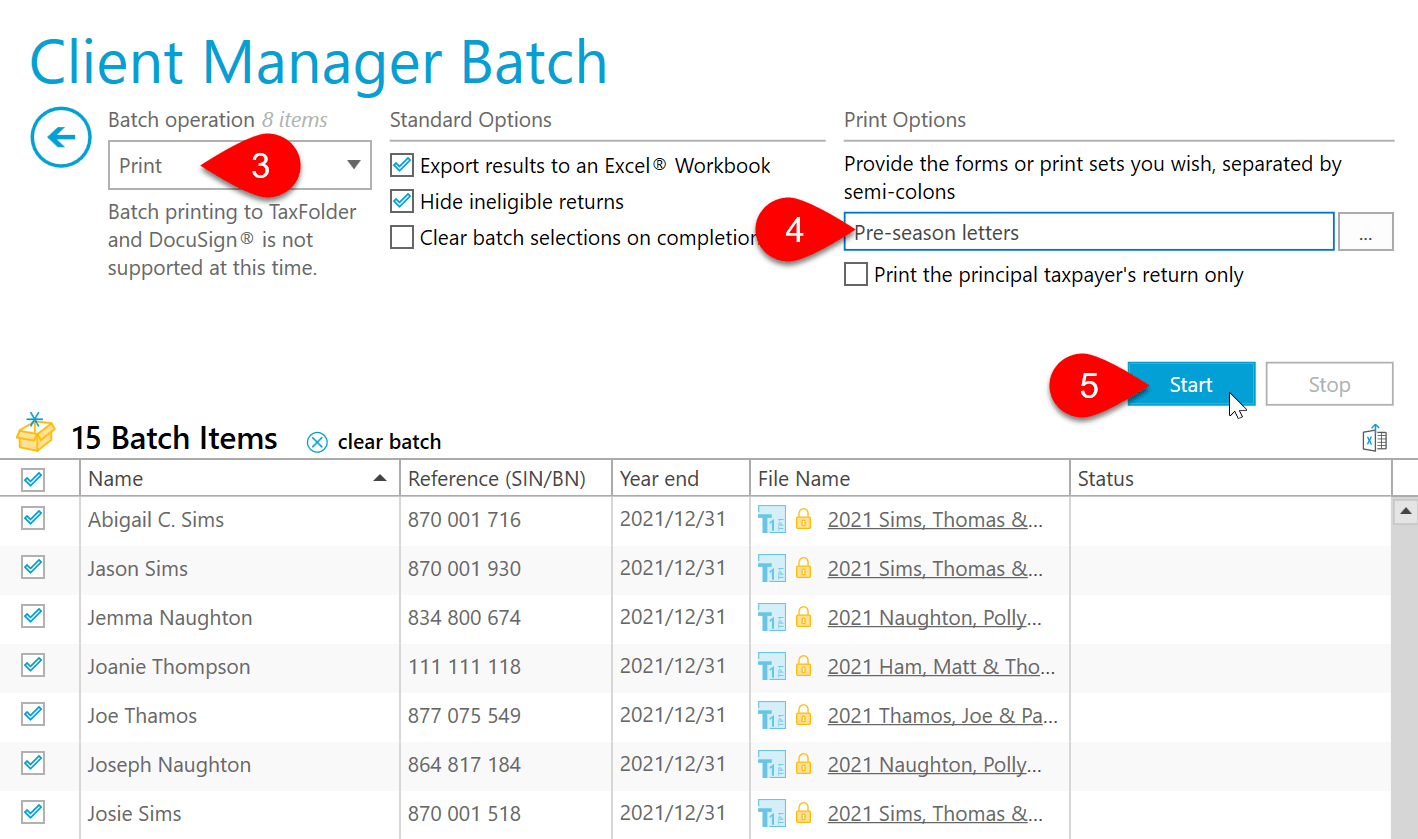
It is possible to queue up a batch of emails with attached PDF files from the Client Manager. It is similar to sending an email with an attached PDF of a print set or single form. You will generate a set of emails for your clients. You still need to press Send on each of those messages. (See also the Email a PDF help topic.)

Batch printing to TaxFolder or DocuSign is not supported at this time.

Warning: Your Anti-Spam Responsibilities

We have written these instructions because our clients have asked for them. However, we advise the cautious and responsible use of batch email as described on this page for the following reasons:

  • Attachments to email are not encrypted or secure. We do not recommend using email to send private data to your clients.
  • Bulk sending through your email provider can result in your email address becoming black-listed and your usual emails landing in your clients' spam folders.
  • You have to click Send on each message created in this way.
  • You have a responsibility to comply with Canadian anti-spam legislation when communicating with your clients by bulk email. Please review Canada's Anti-Spam Legislation.

For sending documents to clients securely, we recommend using TaxFolder.

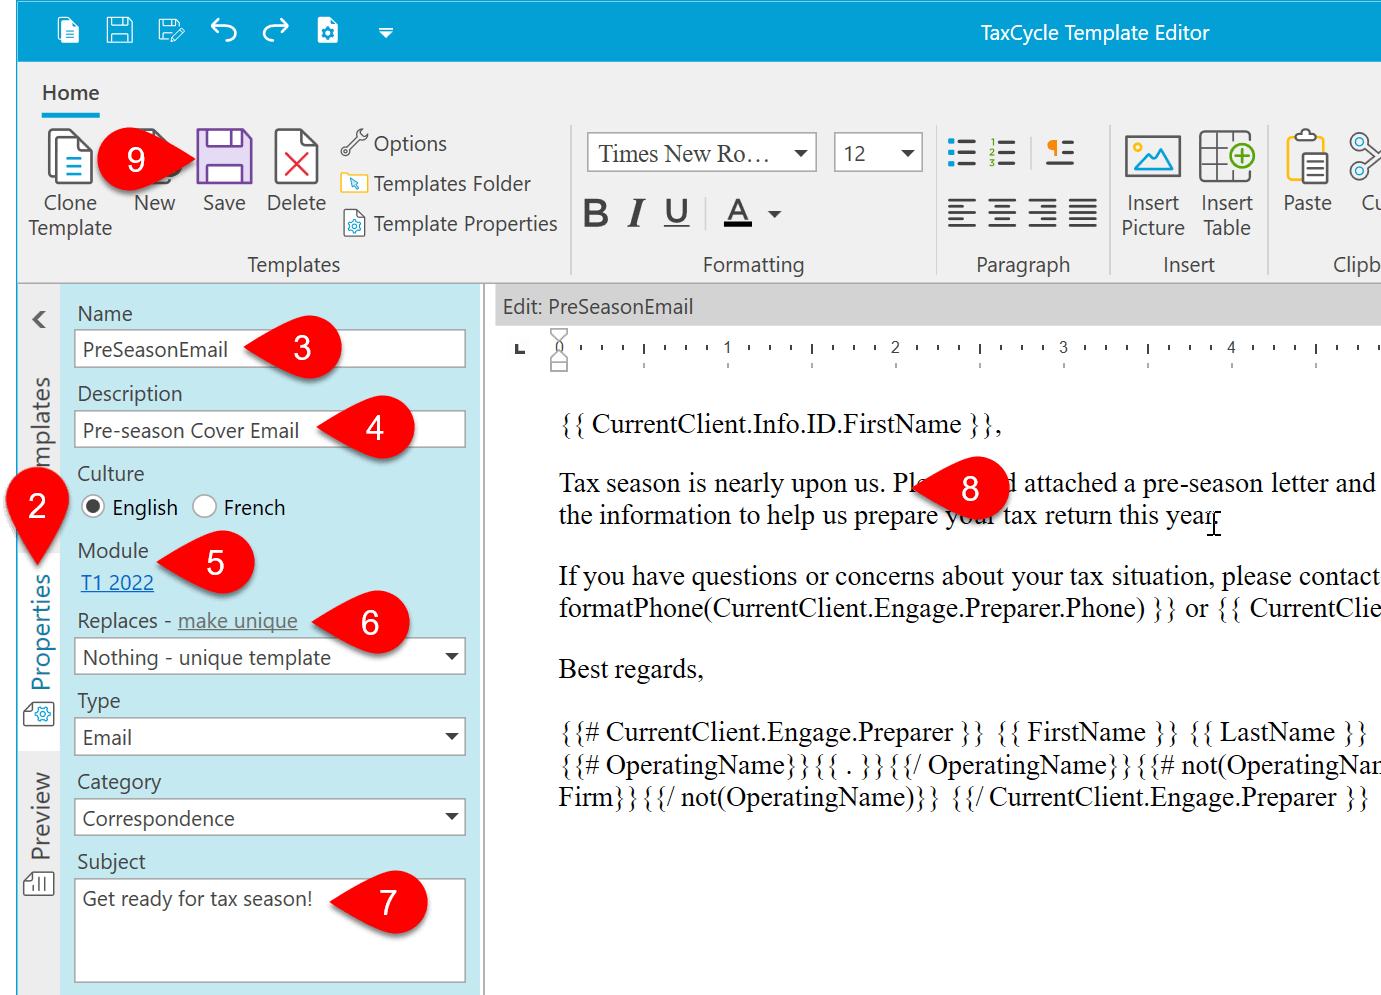
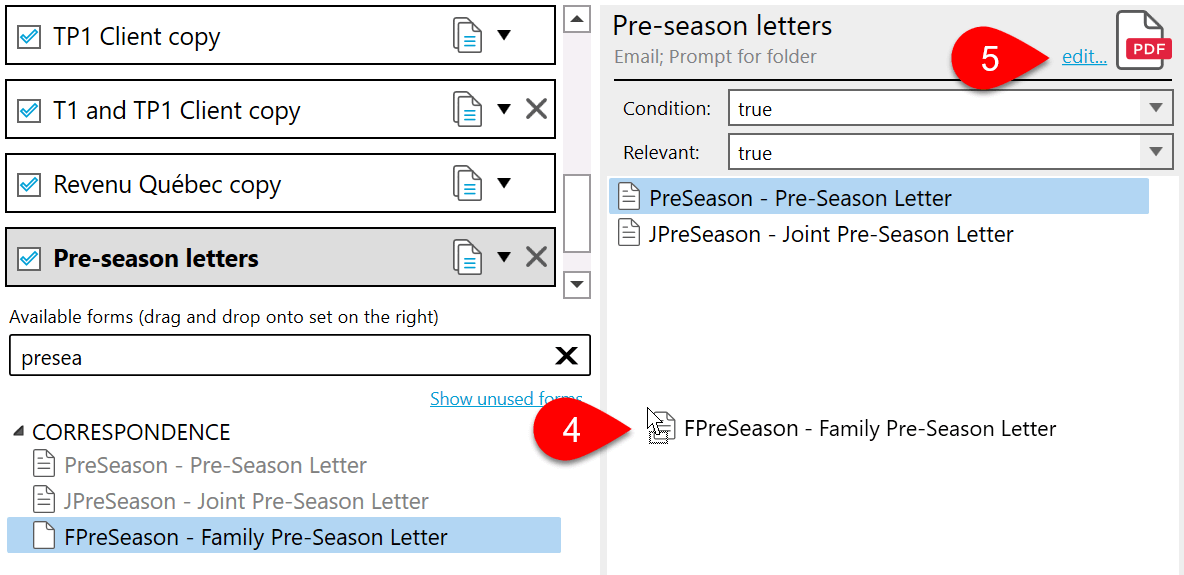
The following example shows you how to create a batch email of the PreSeason letter and checklist.

Step 1: Create an Email Cover Letter

  1. Open the Template Editor and clone the ClientCopyEmail.
    Screen Capture: Clone the ClientCopyEmail
  2. Click on Properties in the sidebar.
  3. Change the Name.
  4. Enter a Description.
  5. To apply the template to more years, click the link under Module.
  6. Click make unique to display this template separately in the print dialog.
  7. Edit the Subject of the email.
  8. Edit the body of the message.
  9. Click Save.
    Screen Capture: Template Properties

Step 2: Create a New Print Set

  1. In TaxCycle, go to Options.
  2. Expand T1/TP1, then Print, and click on the same year as the template you just made.
  3. Scroll to the bottom of the list of print sets, click on New print set 1 and type a name.
    Screen Capture: Create New Print Set
  4. With this new print set selected, drag and drop the PreSeason, JPreSeason or FPreSeason letters to the print set. We recommend reviewing the template used conditions for these letters to make sure they only print when you want them to.
  5. At the top right, click the edit link to change the output options.
    Screen Capture: Form Selection
  6. Choose where to save the generated PDF file.
  7. Select Email in the Email field.
  8. Select your new pre-season cover email created in the Message field.
  9. Select variables to create a File name.
  10. In the SIN/BN field, select an option to mask the first five digits for security.
  11. Click Close to return to print options.
  12. Click OK to save the new print set.Screen Capture: Print Output

Step 3: Generate Emails

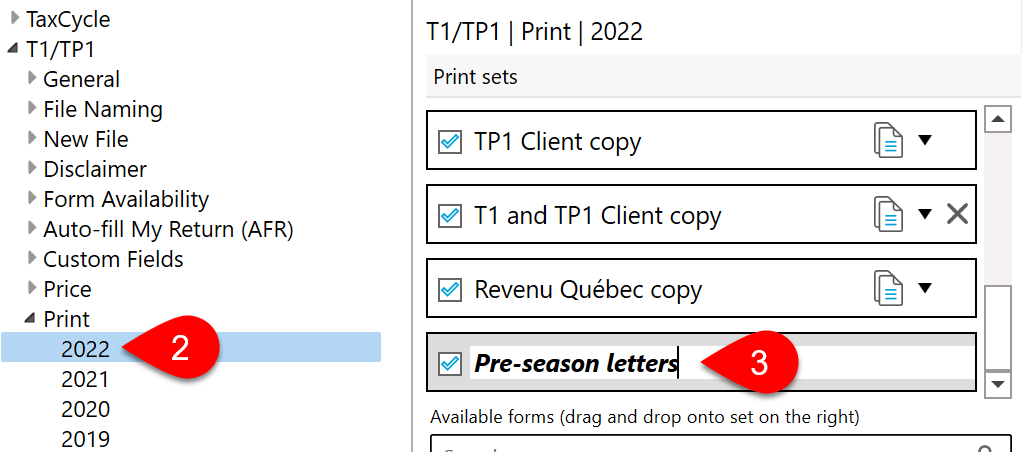
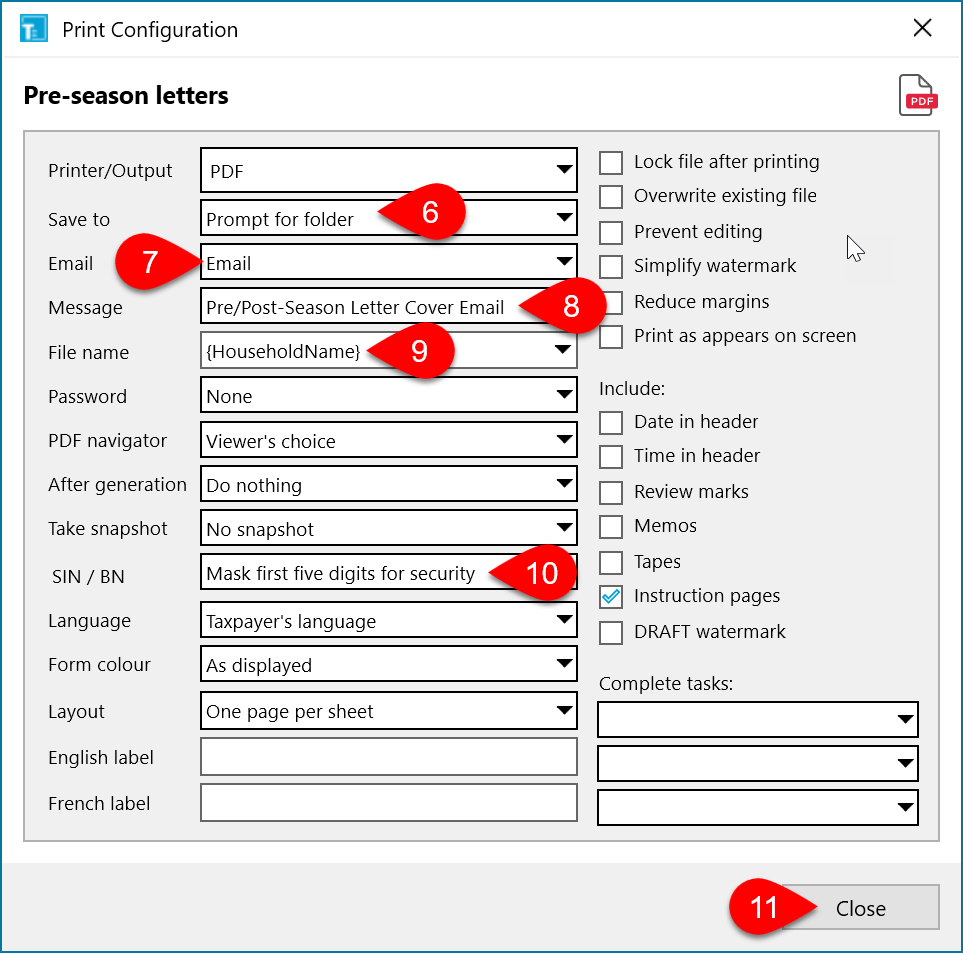
This part of the process performs batch print using the new print set you just created.

  1. Press F3 to open the Client Manager.
  2. Add a group of clients to the batch by checking the boxes in the first column of the list of clients, then click on the batch box to go to the batch screen. Caution! We recommend you do this in small batches of clients at a time as each item creates and opens a new email message in your email client.
  3. Select Print from the Batch operation drop-down list.
  4. On the right, enter the name of the print set you just created.
  5. Click Start.
  6. TaxCycle will create one email message in your email client for each person in the batch. Go to each one of those message and click send.

Screen Capture: Client Manager Batch