Invoice options apply to all tax modules in TaxCycle:
To open Options from the Start screen, click Options in the blue bar on the left side. If you have a file open, go to the File menu, then click Options.
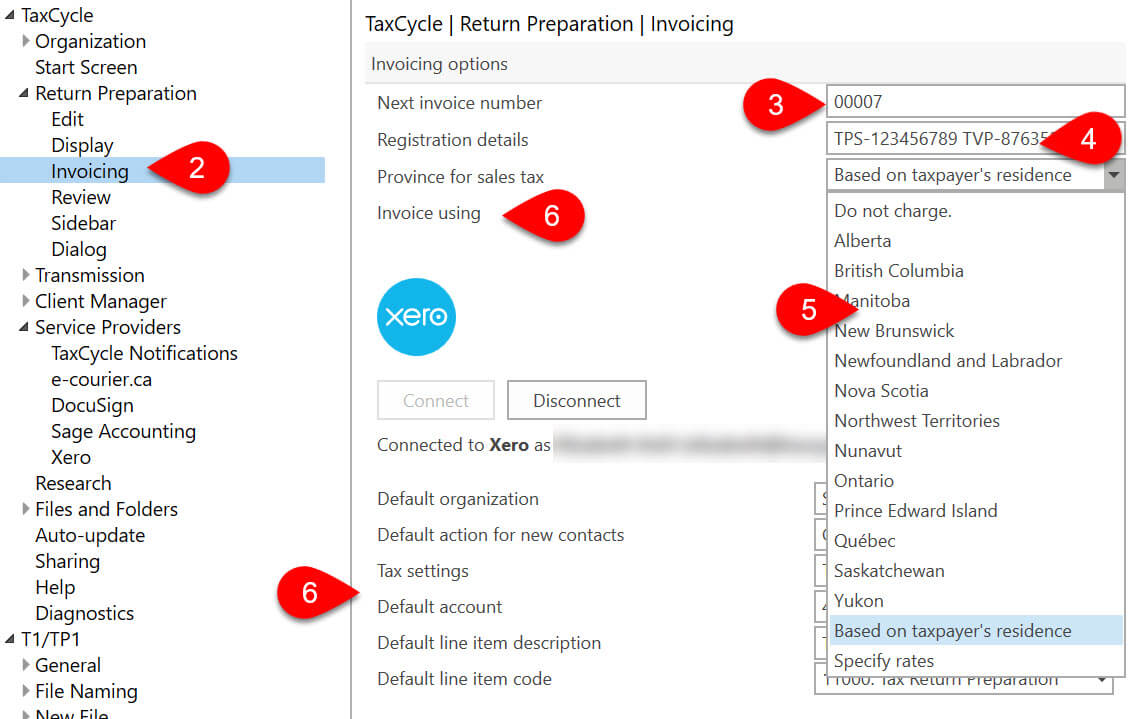
On the left, expand Return Preparation and click on Invoicing.
Enter the Next invoice number to use for the next invoice printed (the starting default is 0001). This is the next invoice number that TaxCycle will insert into a tax return when you print it. (This number appears on the Billing worksheet, invoice templates and Engagement worksheet.) To share this number with others, go to Common Folders page and set a shared folder for storing the Invoice Number. (See the Common folders help topic.) If everyone points to the same folder, the number is incremented as each person creates an invoice.
Enter your sales tax numbers:
If you only have a GST/HST number, use the following format: GST #123456789.
If you also have a PST number, add a comma and then the number in the following format: PST #123456.
Set your province for sales tax, using one of the following options:
Select Do not charge if you aren't collecting sales tax.
Choose a province from the list.
Choose Based on taxpayer's residence to apply sales tax based on the address of the taxpayer for T1 returns or based on the head office address in T2 returns.
Choose Specify rates, if you ever need to customize your sales tax rates. This will reveal options to change the GST and PST rates.
At the bottom of this options page, you can set up a link between TaxCycle and Xero or QuickBooks. Choose your option then follow the directions in the related help topic to learn how. See Xero® Invoicing and QuickBooks® Invoicing.