Menu

Add/Invite a Client to TaxFolder

Updated: 2024-04-18

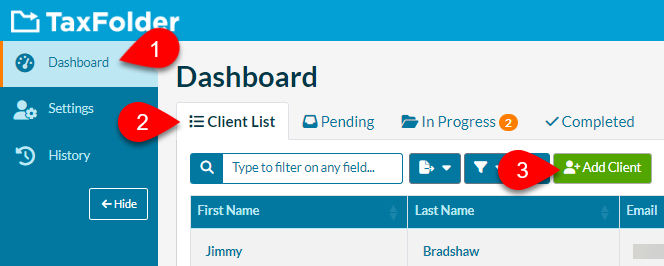
From the Preparer Dashboard, you can invite a client to create an account and share documents with you using TaxFolder.

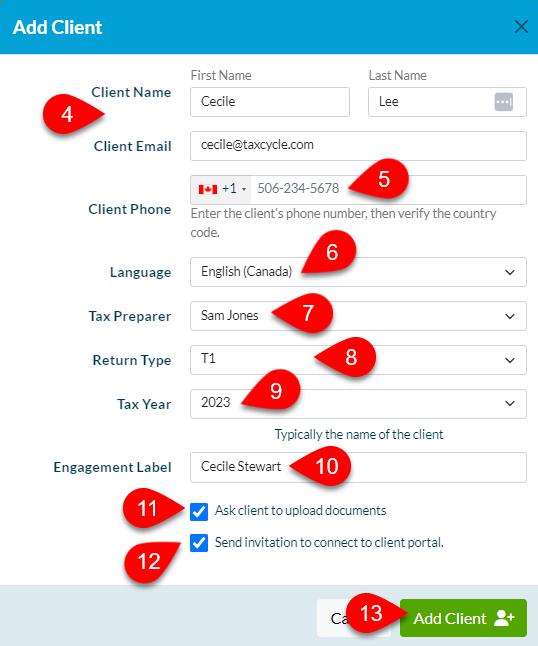
From the Notification Settings page in TaxFolder, you can choose whether to send an activation email to new clients and whether to automatically ask clients to upload documents when creating a new engagement. Review these settings before adding new clients.

New! Use TaxCycle Single Sign-On (SSO) to Sign in to TaxFolder

You can now use the same email address for a client and a preparer in the same firm. You can use the same TaxCycle single sign-on (SSO) email to sign in to multiple TaxFolder accounts. However, the SSO can only be used for one preparer per firm. See the Connect Your Account to TaxFolder help topic for more information.

We recommend using a different browser (not just a different browser window or tab) if you are using two separate SSOs to sign in to TaxFolder. While you can sign out of the browser where you are signed in as a preparer, using a different browser ensures it uses the correct sign in session and cookies.

  1. Go to the Dashboard.
  2. Click the Client List or Pending tab.
  3. Click the Add Client button.
    Screen Capture: TaxFolder Preparer Dashboard
  4. In the dialog box that appears, enter the client’s name and email address.
  5. Enter the client’s phone number and verify the country code. The phone number is the mobile phone used for sending verification codes via text/SMS when sending documents for signature from the TaxFolder Client Dashboard. When requesting a signature from TaxCycle, it will use the mobile phone number in the TaxCycle file.
  6. Select the client’s preferred language from the drop-down menu.
  7. Select a Tax Preparer to assign a preparer to the client (you can reassign the client after if needed).
  8. Select the Return Type. This is the type of tax return the client has engaged you to prepare. For example, T1 is for personal tax returns and T2 for corporate tax returns. When TaxCycle creates an engagement through its print process, it automatically sets this property to the same type as the file from which the form was printed. When you create the engagement through the Preparer Dashboard, you can choose other options, including “Legal,” “Other” and “Forms.”
  9. Select the Tax Year. This is the tax year or tax year end to which the engagement applies. For example, 2023 for a T1 or 2023/12/31 for a T2 tax year end. When TaxCycle creates an engagement through its print process, it automatically sets this property to the same year or year end as in the TaxCycle file from which the form was printed. When adding an engagement through the TaxFolder Preparer Dashboard, you can only select from a list of years.
  10. Enter an Engagement Label. The label is optional and can be any text you wish. When TaxCycle creates an engagement through its print process, it automatically enters the client’s name as the label. However, you can enter other text in the field if you wish, or select an existing label from the list in TaxCycle. In the Preparer Dashboard, you can enter any text you want for a label when creating the engagement.
  11. Check the box if you want to Ask client to upload documents. This sends a separate email to the client. From the Notification Settings page, you can choose whether to ask clients to upload documents when creating a new engagement.
  12. Check the Send invitation to connect to the client portal box if you want to send your client an invitation to join TaxFolder. This sends a separate email to the client with a link to connect to TaxFolder.
  13. Click the Add Client button to save and return to the Preparer Dashboard. From the Notification Settings page, you can choose whether to automatically send an invitation email to new clients added through the dashboard.
  14. To edit the client’s information, see the Managing Clients in TaxFolder and Updating Client Email and Phone Number in TaxFolder help topics.