Use scenarios to compare different possible tax situations for your clients. Enter data in the return, then add a scenario to take a snapshot of that data. View the Scenario summary to key lines on the return.
Add a scenario
Set up the scenario in the return.
Go to the Tools menu and click Add scenario.
Enter a description of the scenario.
A new column is added to the Scenario summary to display a snapshot of the data.
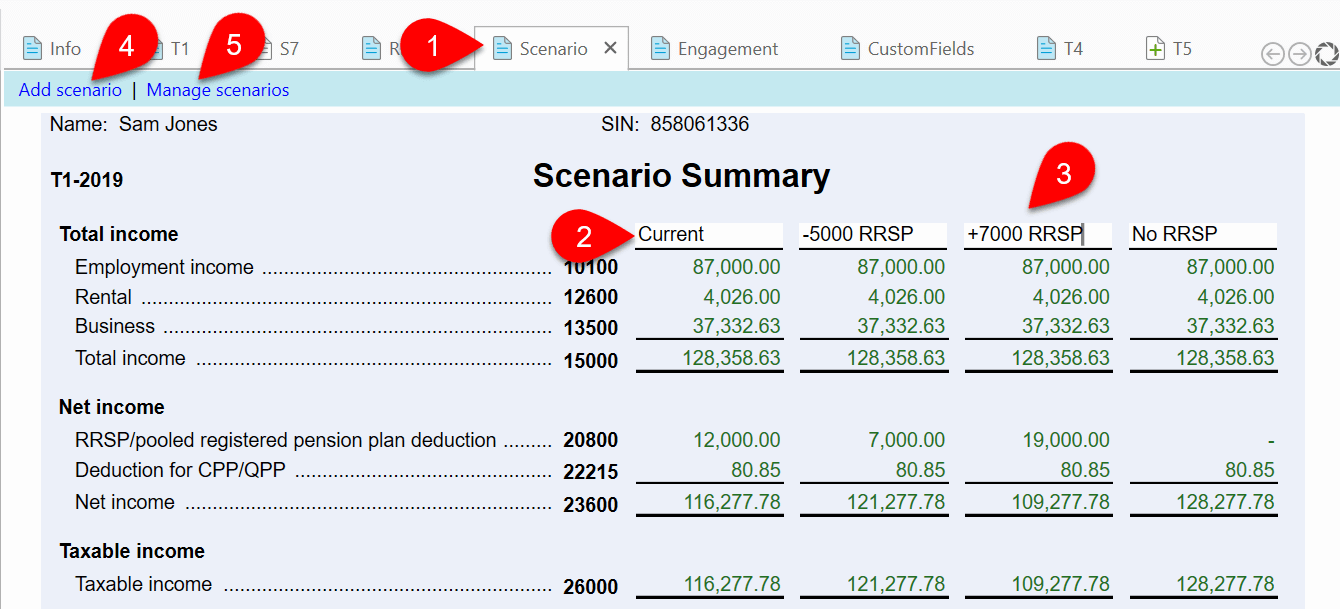
Scenario summary
The Scenario summary shows a comparison of all the scenarios in the return.
The first column in the summary is the current data in the return and updates with any changes you make to the return. It can be helpful to label this column in a way that makes this clear to you.
Each scenario displays in a separate column. These other columns are a snapshot of the return at the time the scenario was added; the amounts in these columns do not update as you make changes to the return. The description of the scenario shows at the top of the column.
To quickly create a new scenario while viewing the summary, click the Add scenario link at the top of the summary. You can create as many scenarios as you like. Only the first four display on the Scenario summary.
To change the order or delete a scenario from the summary, click the Manage scenarios link at the top of the summary.
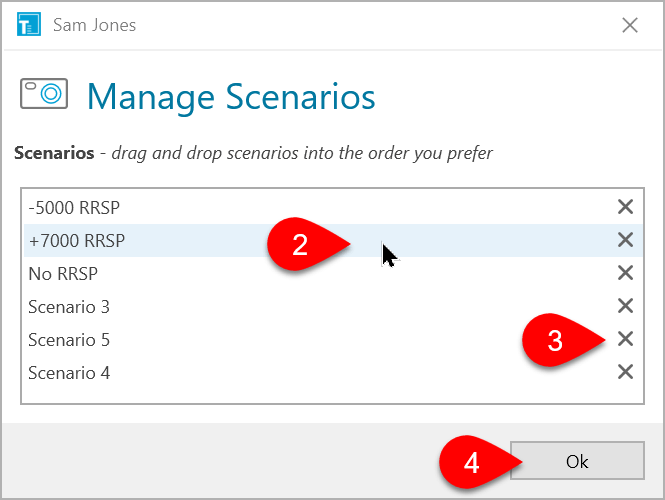
Manage scenarios
Go to the Tools menu and click Manage scenarios.
Drag and drop the scenarios to change the order they appear on the Scenario summary. Only the first four scenarios in the list show on the summary. (This allows you to create many scenarios and display only those you want.)
Click the X on the right to delete a scenario.
Click OK to apply the changes to the Scenario summary.