Getting Started with TaxFolder
Welcome to TaxFolder! This help topic will help you get signed in and set up to use TaxFolder in your firm.
Purchase TaxFolder
If you have already purchased TaxFolder, remember what email address you used to sign into your TaxCycle Account when you purchased TaxFolder. The licence you purchased is associated with the email address you used to create your account. Hence, the first time you sign in, make sure this is the email address you use.
If you need a licence for TaxFolder, purchase TaxFolder from the TaxCycle website. Add TaxFolder to your cart, sign in with your TaxCycle Account and complete the purchase process. This adds the TaxFolder licence(s) to your account.
Make any email address changes before signing in to TaxFolder for the first time!
The first time you sign in to TaxFolder, it will use the email address associated with your TaxCycle Account to set up the firm and for ALL client communications from TaxFolder going forward. If you need to change this email address after setting up TaxFolder, contact our support team to make the request.
If you want to associate the TaxFolder account with a different email address than the one you used to purchase TaxFolder, change the email address in your TaxCycle Account first. See the help topic How to Change the Email Address Associated with your TaxCycle Account for instructions.
Sign in to TaxFolder
- To create a firm, go to www.taxfolder.com/firm/home.
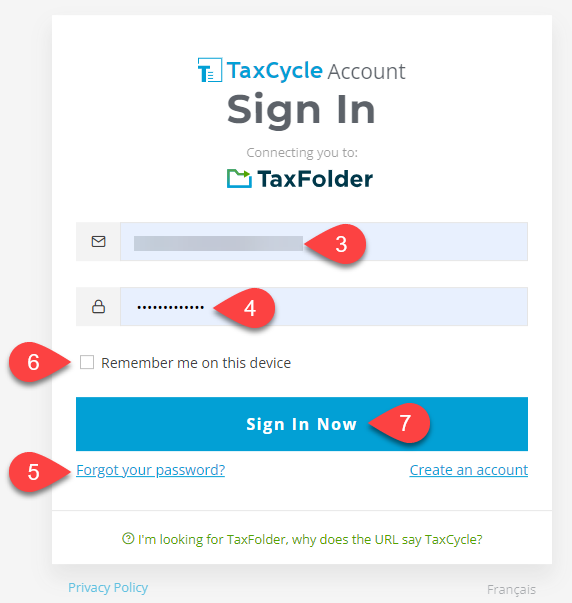
- Click Sign in.
- Enter the email address of the TaxCycle Account you used to purchase TaxFolder.
- Enter the password.
- If you can’t remember your password, click the Forgot your password? link to request an email to reset your password.
- Check the Remember me on this device box if you want the browser to save a cookie so that if you close out the window for the site without signing out, the next time you go back, you will be signed back in automatically.
- Click Sign In Now.
- On the next page, click Create New Firm.
Two-Factor Authentication
We strongly encourage everyone using TaxFolder to set up two-factor authentication—or 2FA—on their TaxCycle Account. When you sign in, you confirm your identity through an authenticator app on your mobile phone or by receiving a unique code via text message or phone call.
This additional step protects your clients and firm from unauthorized access to confidential documents. For step-by-step instructions on configuring and using two-factor authentication, see the Two-Factor Authentication (2FA) help topics.
Set up Your TaxFolder Account
The first time you sign in to TaxFolder, you will be asked to provide basic account information to finish setting up your account.
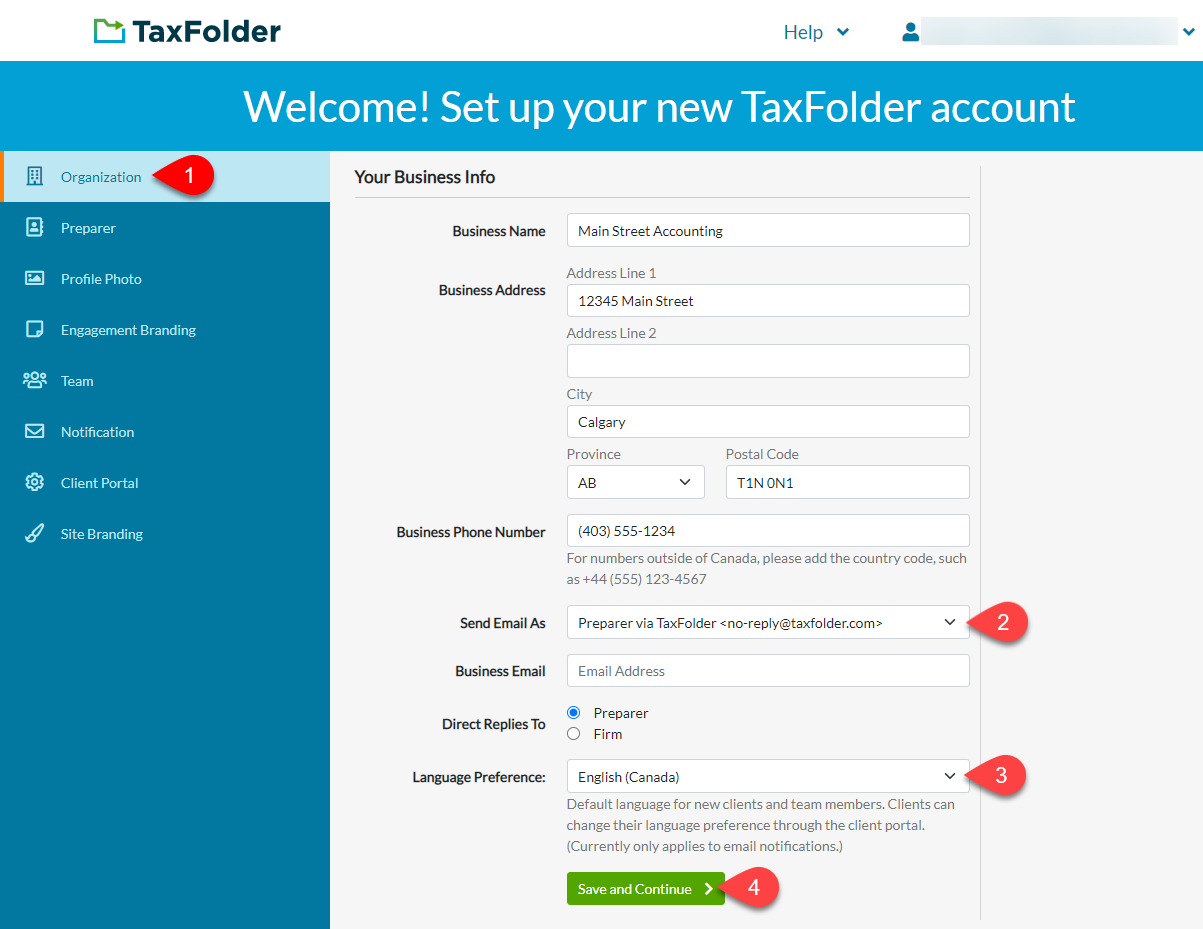
Step 1: Review Business Information (Required)
- Review the information under Your Business Info in the Organization tab. By default, it is populated based on the information in your TaxCycle Account.
- Choose Firm or Preparer name from the drop-down menu, depending on what you want the “From” line in your emails to clients to be.
- Choose the default language for when you add new clients and team members. Clients and preparers can change their individual language preference through their respective portals.
- Click Save and Continue.
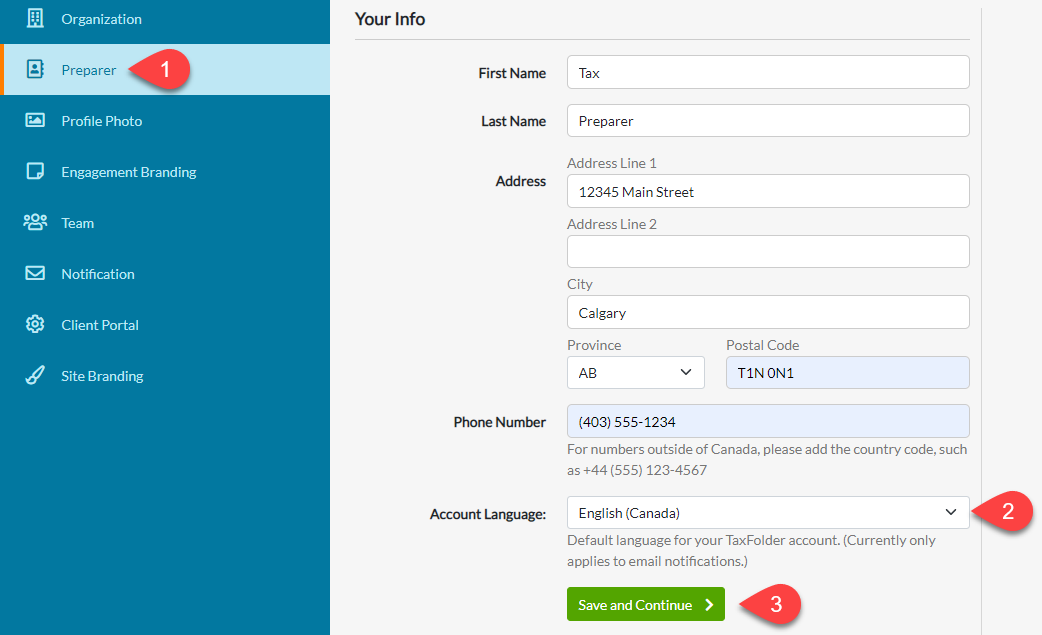
Step 2: Review Personal Information (Required)
- Review your personal information in the Preparer tab.
- Choose the default account language for your own profile using the drop-down menu.
- Click Save and Continue.
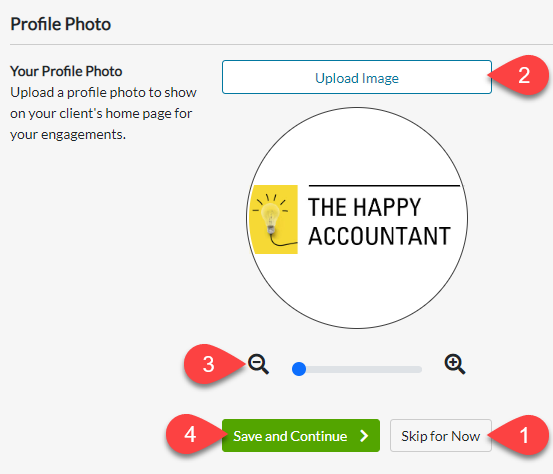
Step 3: Upload Your Profile Photo (Optional)
If you wish to show your photo on pages where your clients interact with you in TaxFolder, upload your photo now.
- If you prefer not to upload a photo, click Skip for Now to move to the next step.
- To upload a photo, click Upload Image to choose a photo.
- Use the zoom slider to change the size of the image if required.
- Click Save and Continue.
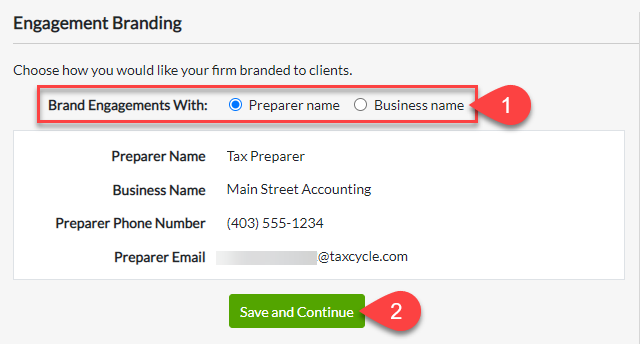
Step 4: Engagement Branding
Choose how you would like your firm branded in the client portal.
- If you prefer to relate the branding of engagements and other communications in TaxFolder to the preparer assigned to the engagement rather than your Business name, select Preparer name.
- Click Save and Continue.
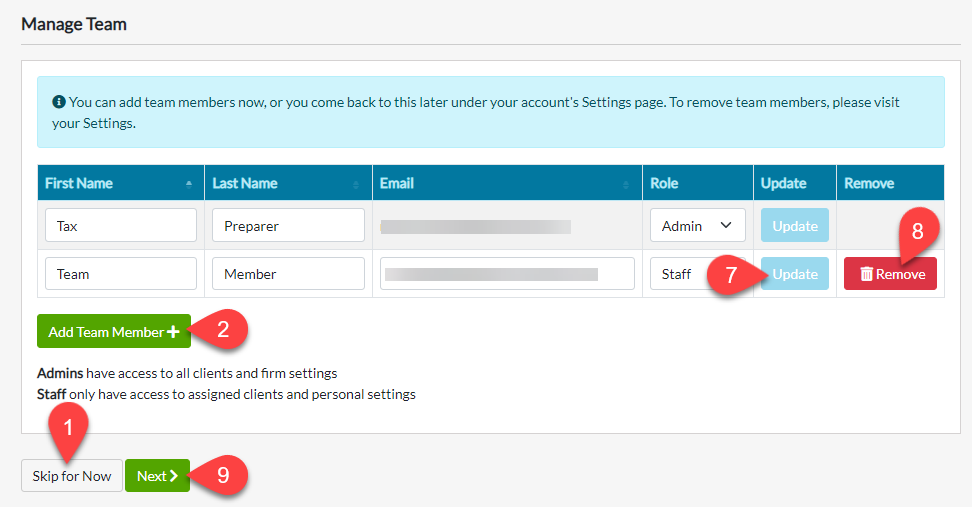
Step 5: Add Team Members (Optional)
If you purchased a TaxFolder licence for more than one user, you can add those team members now or later under your account’s Settings.
- If you are not adding team members at this time, click Skip for Now to move to the next step.
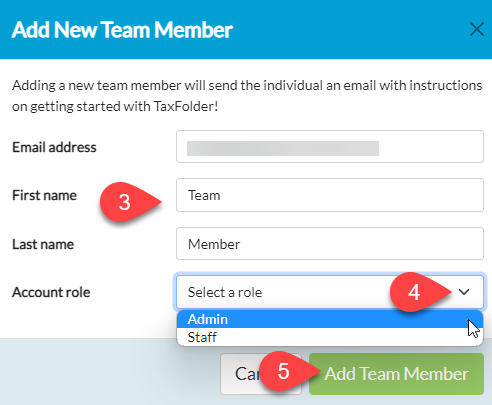
- To begin, click the Add Team Member button.
- In the pop-up window, enter the team member’s email address, first name and last name.
- Team members can either have Admin or Staff as an Account role. Admins have access to all clients and firm settings. Staff only have access to assigned clients and personal settings.
- Click Add Team Member to close the window and send the new team member an email with instructions on how to sign into TaxFolder.
- Repeat steps 2 through 5 for each team member.
- If you make a mistake, you can change the role and Update the settings for that team member.
- To remove a team member, click the Remove button.
- Click Next to continue.
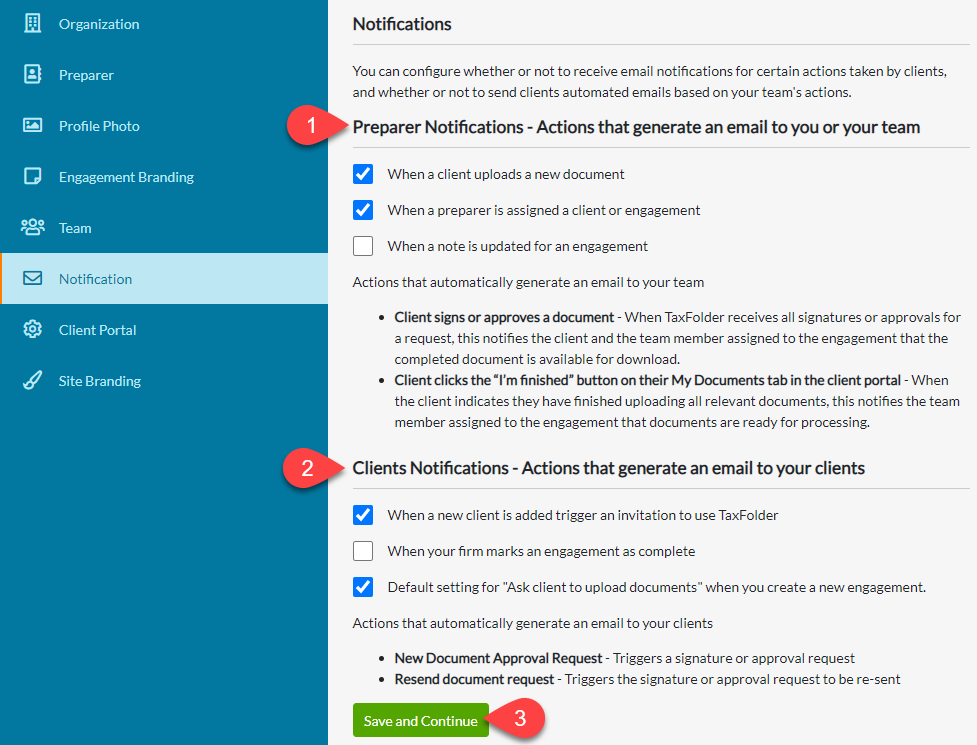
Step 6: Review Notification Settings
Review the Notification settings to control when your clients and team receive emails.
- You can select the actions that generate an email to you or your team under Preparer Notifications.
- You can select the actions that generate an email to your clients under Clients Notifications.
- Click Save and Continue.
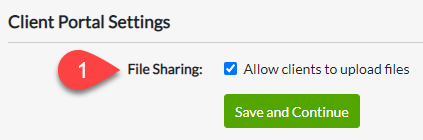
Step 7: Review Client Portal Settings
- You can allow clients to upload files in the client portal by checking the File Sharing box on this page.
- Click Save and Continue.
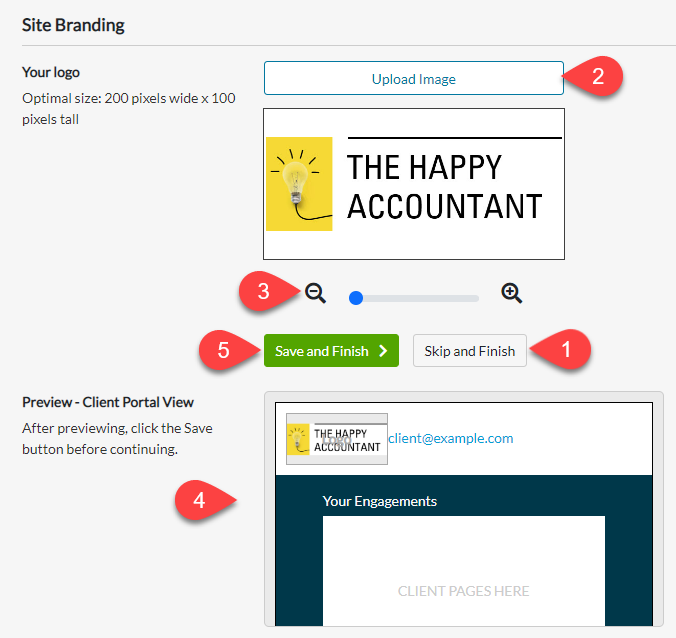
Step 8: Site Branding
Upload your logo to display it in the emails sent from TaxFolder to your clients and on the pages where your clients interact with TaxFolder. If you do not upload a logo, emails and pages will use the TaxFolder logo.
The optimal size for logos is 200px wide by 100px high.
- If you do not want to add your logo now, click Skip and Finish.
- Click Upload Image to choose your logo image.
- Use the zoom slider to change the size of the image if required.
- Review the Preview.
- Click Save and Finish to go to the Client Dashboard.
Sign in to TaxCycle
To connect with TaxFolder for requesting and tracking e-signatures, you must sign in to TaxCycle with your TaxCycle Account. You may already have done this to download your TaxCycle licence code, but it is worth checking to make sure.
- Start TaxCycle.
- In the title bar, click the
 person icon.
- Click the Sign In link.
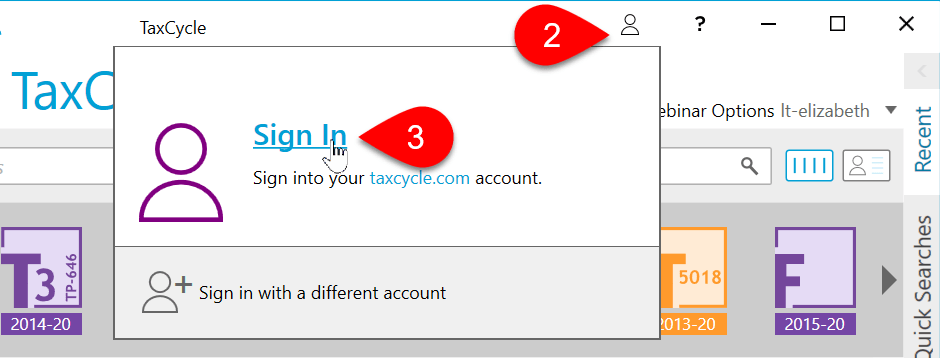
- In the dialog box that appears, sign in with your TaxCycle Account. This is the same account you used to sign in to TaxFolder and to make your purchase on the TaxCycle website.
- Once you are successfully signed in, the person icon will change to show your initials.