Menu

DT Max® Carryforward

Updated: 2020-07-17

The DT Max® to TaxCycle carryforward is a little different than the standard TaxCycle carryforward. Due to the way data is stored in DT Max®, TaxCycle cannot index the DT Max® tax returns in the Client Manager. Also, you must first extract returns from DT Max® before carrying them forward.
Supported returns

  • T1/TP1 returns
  • T2 returns (Please be aware this carryforward is limited by the data that is exported from DT Max® T2 and is not as comprehensive as our other competitor carryforwards.)
  • T3 returns (Please be aware this carryforward is limited by the data that is exported from DT Max® T3 and is not as comprehensive as our other competitor carryforwards.)

Get TaxCycle ready

  1. Download and install TaxCycle. 
  2. Open TaxCycle and activate your license.
  3. If your old copy of DT Max® is installed on the same computer as TaxCycle, skip ahead and Extract returns from DT Max® as explained below.
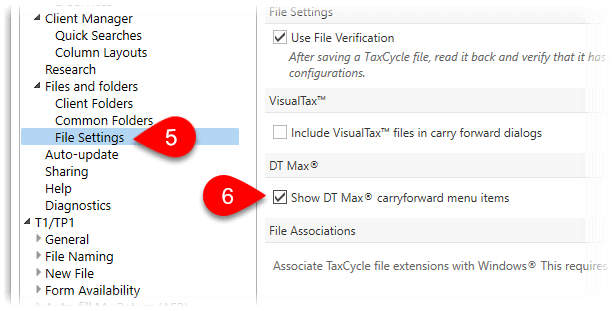
  4. If DT Max® is not installed on the computer, click on Options, in the blue bar on the left side of the Start screen.
  5. On the left side of the Options dialog box, expand Files and folders, then click on File Settings.
  6. On the right side, scroll down and check the box Show DT Max® carry forward menu items.
  7. Click OK to save and return to the Start screen.


2018-dt-max-options

Extract return(s) from DT Max® 

Before you can carry forward returns into TaxCycle, you must extract those returns from DT Max®. You can do this for all your returns at once using the client list. Or, you can do this from within a single open return. Even if you extract all your clients at once, you can select which returns to carry forward within TaxCycle.
  1. Open DT Max®.
  2. Go to your Client List.
  3. Choose which clients you want to extract. To choose a client to extract, click on their name in the Client List. If you want to select several clients, press the Space bar on the names of the clients you wish to extract. A yellow highlight will cover their names in the Client List.
  4. Once you have selected the clients to extract, go to the Tools menu and select Extract.
  5. In the Clients to extract section of the new window, choose which clients you want to extract from the Client List.
  6. In the Data to extract section, select which years you want to extract.
  7. At the bottom of the window, enter a name and choose the path where you want to save the extract. Click on the Browse button, and choose the path. (Remember this path because you will need it later.)
  8. Click OK to extract files.

Carry forward into TaxCycle

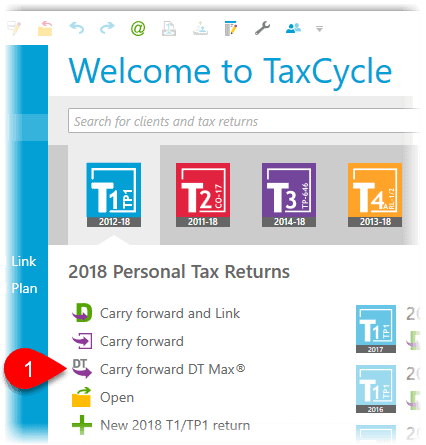
    1. On the TaxCycle Start screen, click on Carry forward DT Max®:
      2018-dt-max-start-screen

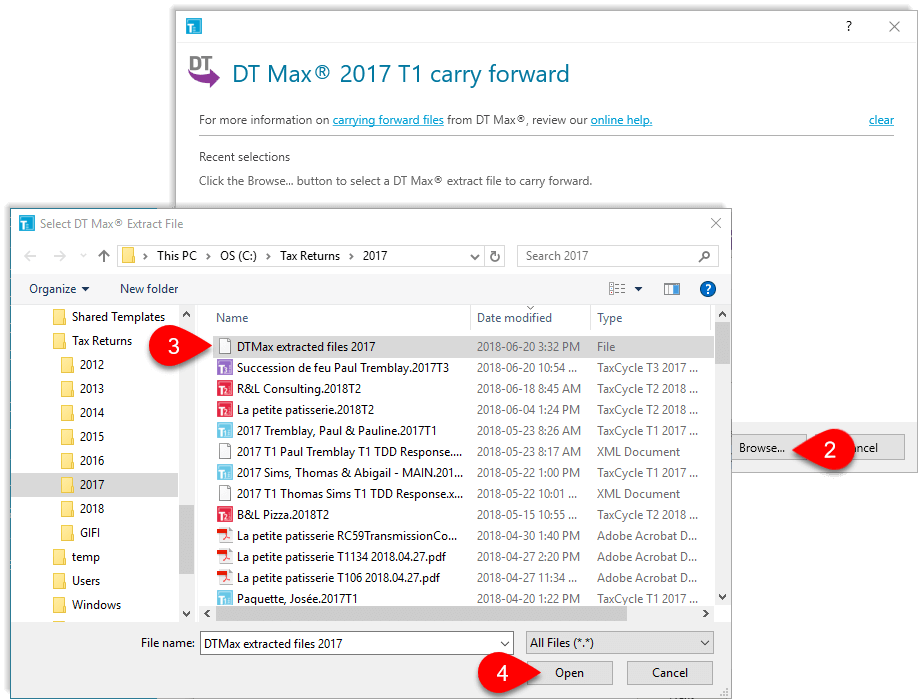
    2. In the dialog box that opens, click the Browse... button and find the file you extracted from DT Max®. 
    3. Select the file.
    4. Click Open.
      2018-select-dtmax-file
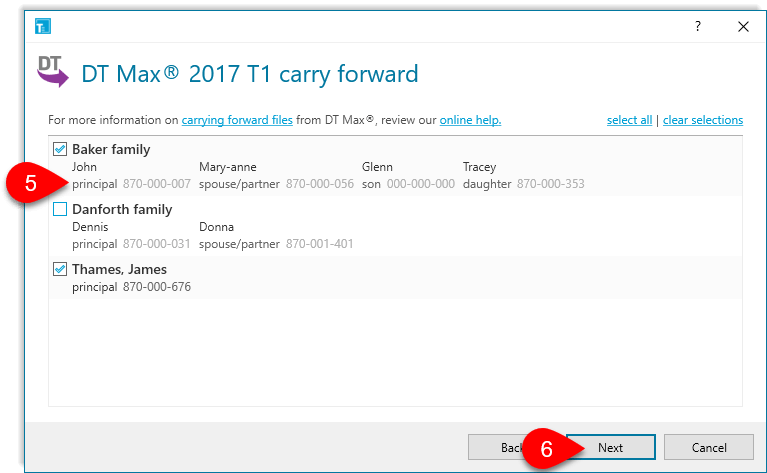
    5. Check one or more taxpayers or families to carry forward. 
    6. Click Next.
      2018-dtmax-select-taxpayers
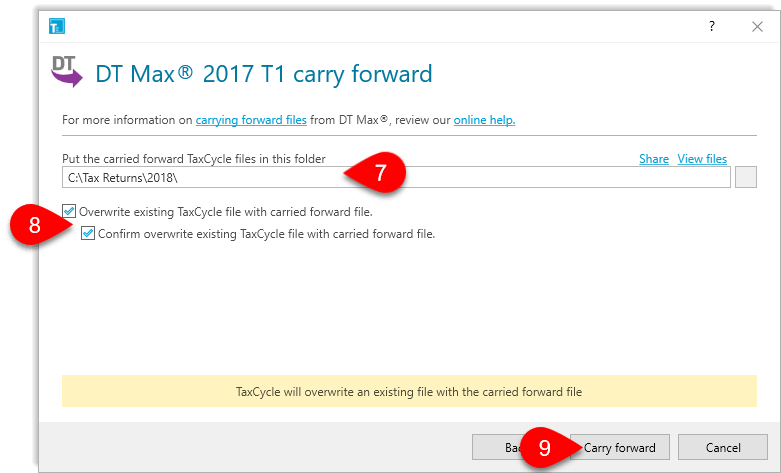
    7. Review the location to save the new TaxCycle file. (TaxCycle takes this from folder options. Learn how to set these in the Folder options help topic.) If you want to change the folder, click the ellipsis button to browse for a different folder. 
    8. If you want to overwrite any existing file in that location, check the box next to that option. You will be asked to confirm this by checking another box.
    9. Click the Carry forward button to start the conversion.
      2018-dtmax-carryforward-folder
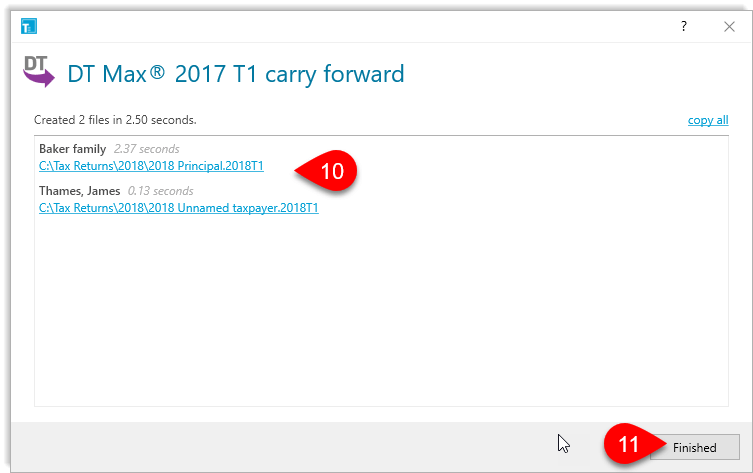
    10. When the conversion completes, a list of the new TaxCycle files appears. Click a link to a file to open it. (These files were also saved in the Client Manager, so you can search for them later.)
    11. Click the Finished button to close the carry forward dialog box.

2018-dtmax-finished