Menu

Workflow Options

Updated: 2020-07-22

Workflow groups and tasks help you track the progress of a return for each person in the file. Customize them in Options to match your practice workflow.

If you change workflow options and then share client files with other preparers, others will see the order, groups and tasks based on their own settings. To have the whole office use the same workflow options, share these settings across with others in an Options Profile. (See the Options Profiles help topic to learn how to share options.)
  1. To open options from the Start screen, click Options on the left side. If you have a file open, go to the File menu, then click Options.
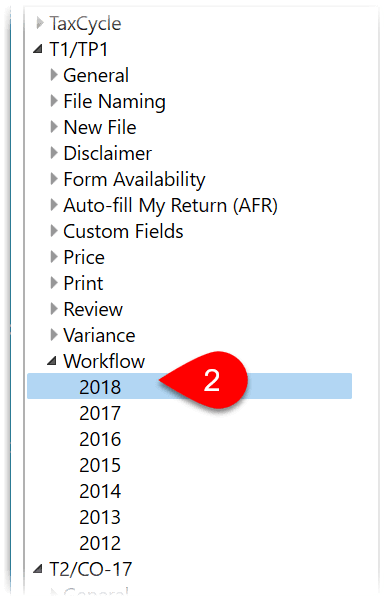
  2. On the left, expand T1/TP1 (or another module, such T2 or T3), then expand Workflow, and click on a year.
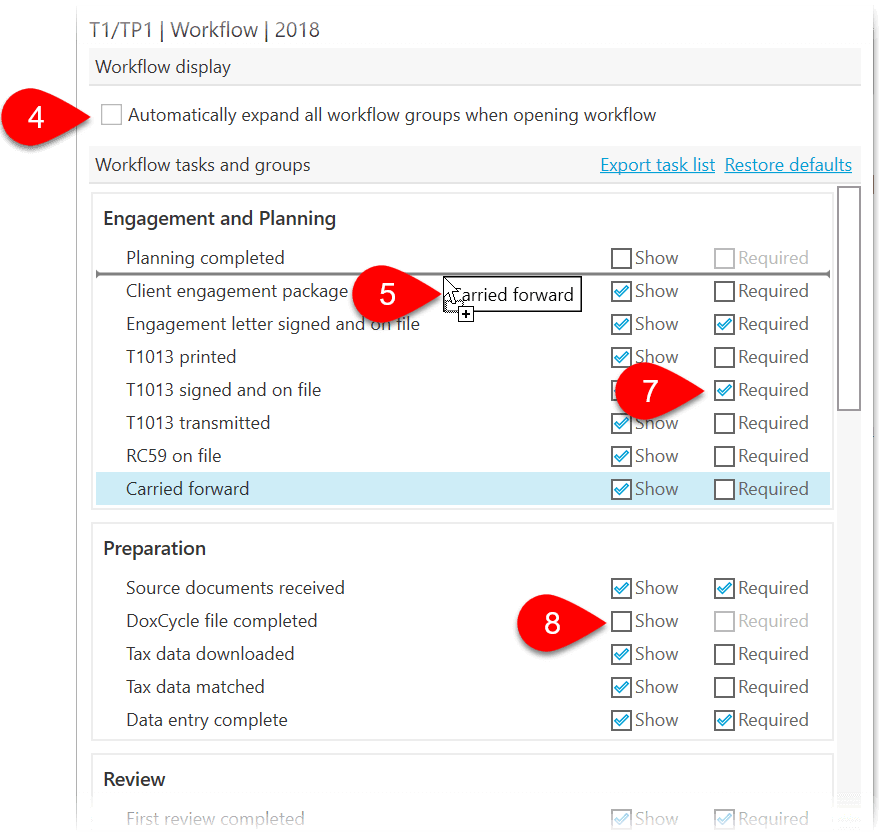
  3. On the right, you will see the list of groups and tasks. 
  4. Check the box to expand all the groups of tasks by default when viewing them for a client.
  5. Drag and drop groups to change the order in which they appear. Drag and drop to re-order tasks or move them to a different group.
  6. If a group contains no tasks, it will not show in file information.
  7. Check the Required box if the task is required in order to consider the group complete. If all the tasks within a group are optional, checking one task within the group in file information marks the entire group complete.
  8. Clear the Show check box to hide a task in file information. For example, if you hide the PAD transmitted task, it will never show, even if the taxpayer chooses to make a Pre-authorized debit (PAD) request. Some tasks appear on the options page, but will only appear for the client's return if they are necessary. For example, if a taxpayer must electronically file a T1135, the T1135 transmitted task will show in the file information. Otherwise it will not.
  9. If all tasks within a group are hidden, the group will not appear in file information.
2019-workflow-options-sidebar
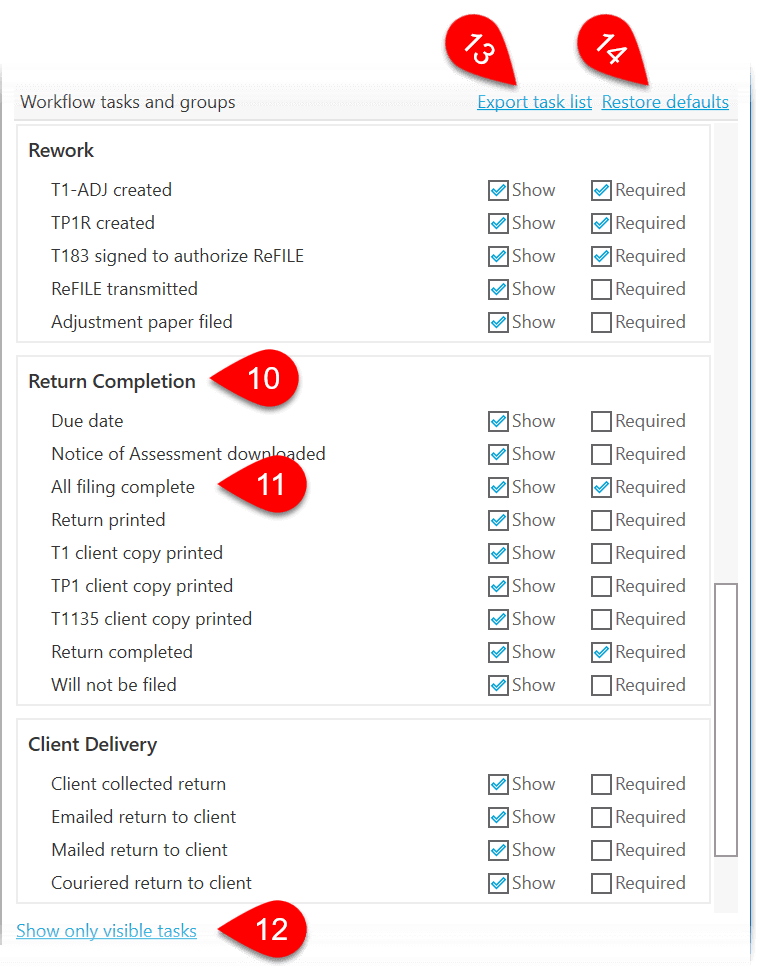
  1. The Return Completion group contains tasks required to consider the entire return completed. This is used in the Client Manager and anywhere TaxCycle reports on return completion.
  2. The All filing complete task looks at all the returns and forms the taxpayer must file and is only marked complete once all are filed electronically or on paper.
  3. Click Show only visible tasks to hide tasks where the Show check box is clear.
  4. Click on Exporter task list to create a CSV (comma-separated values) file that you can open in Excel.
  5. Click the Restore Defaults link to return the tasks and groups to the built-in defaults.
2019-workflow-options-required
2019-workflow-options-return-completion