Transmission Options
EFILE Number and Password
To electronically file with the Canada Revenue Agency (CRA), you must have an EFILE number and password issued by the Canada Revenue Agency (CRA):
- To register for EFILE and receive these credentials, go to the CRA electronic filers page.
- If you already have an EFILE number, you must complete a yearly renewal to receive a new password for the latest T1 tax season. Always use the latest password given to you.
The registration or renewal process includes a suitability screening. This process may take up to 30 days. To allow enough time for the review of your application before the filing season starts, we encourage you to renew your application as soon as possible.
Enter the CRA EFILE number and password in TaxCycle options:
- If you have a file open, go to the File menu, then click Options. To open Options from the Start screen, click Options in the blue bar on the left side. (You can also access these EFILE options any time by clicking on the wrench icon in the Transmit sidebar.)
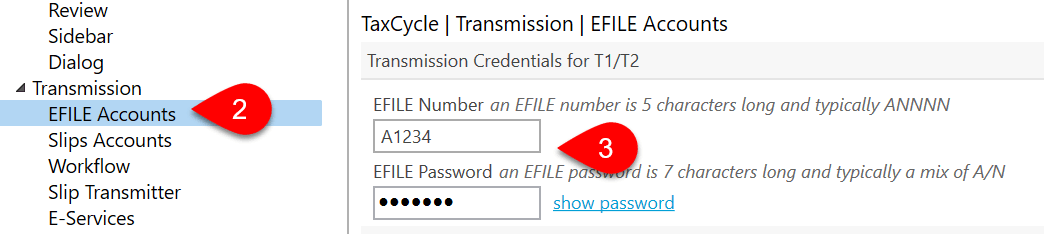
- On the left side of the screen, expand Transmission and then click on EFILE Accounts.
- Enter your CRA EFILE Number and EFILE Password.
NetFile Québec Number and Password
Before you can transmit, you must register for NetFile Québec. Learn more about how to do this on the Revenu Québec Mon dossier pour les représentants professionnels, c'est quoi? (page only available in French).
Enter the NetFile Québec number and password in TaxCycle options:
- If you have a file open, go to the File menu, then click Options. To open Options from the Start screen, click Options in the blue bar on the left side. (You can also access these EFILE options any time by clicking on the wrench icon in the Transmit sidebar.)
- On the left side of the screen, expand Transmission and then click on EFILE Accounts.
- If your NetFile Québec number is the same as the one for the CRA, enter your EFILE Number and EFILE Password, then check the box to Use your EFILE Number for NetFile.
- If your NetFile Québec number is different from the EFILE number, enter it in the NetFile Number field.
- Enter your NetFile Québec password in the NetFile Access Code field.
- Click OK to save the options.

Transmission Options
There are two pages of transmission options for slips: Slips Accounts and Slip Transmitter. These options are transferred to the Transmitter section on the Info worksheet when you create a new slips return. If you edit them there and they are different than in Options, TaxCycle will prompt you to update the information from Options.
Slips Accounts
The Slips Accounts page sets up options for transmitting returns to the Canada Revenue Agency (CRA) using the Internet File Transfer (XML) web pages, and for transmitting the Québec Relevés to Revenu Québec.
- To open Options from the Start screen, click Options in the blue bar on the left side. If you have a file open, go to the File menu, then click Options.
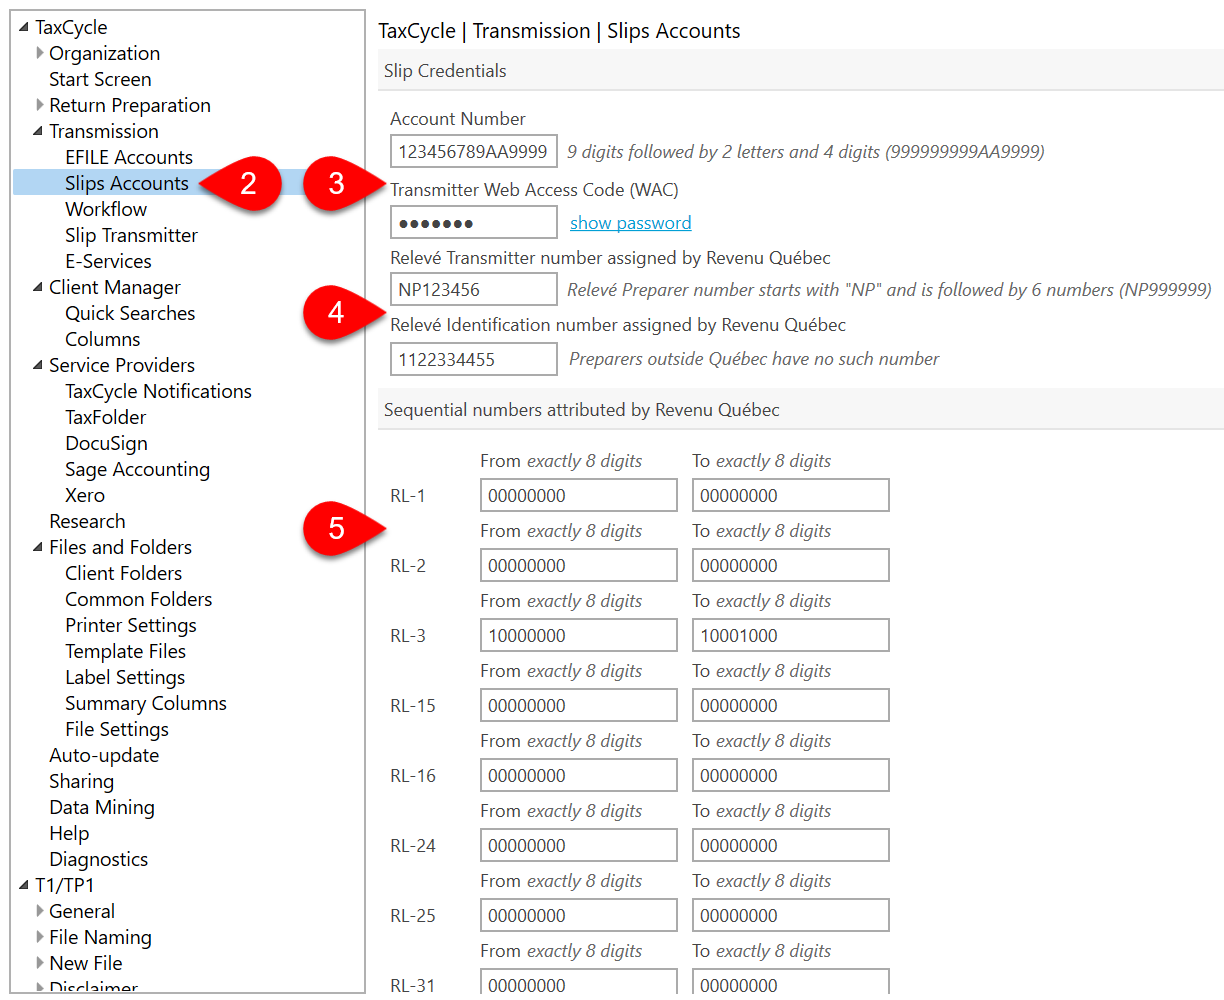
- On the left side of the screen, expand the section for Transmission and click on Slips Accounts.
- Enter a CRA Account Number and Transmitter Web Access Code (WAC). These are used to log into the transmission website and must be related to one another. You can use the preparer’s Account Number and WAC, or the slip issuer’s Account number and WAC, as long as they relate to each other. But, if you use the issuer’s WAC, you must change it for each client in Options and you must use it to sign in when you upload the file. Visit the CRA website to request a Web Access Code (WAC).
- If you are filing Québec Relevés with Revenu Québec, enter the Relevé Transmitter number and Relevé Identification number assigned to you or your firm by Revenu Québec.
- In the boxes below, enter the series of sequential numbers Revenu Québec assigned you for each type of RL slip.
Slip Transmitter
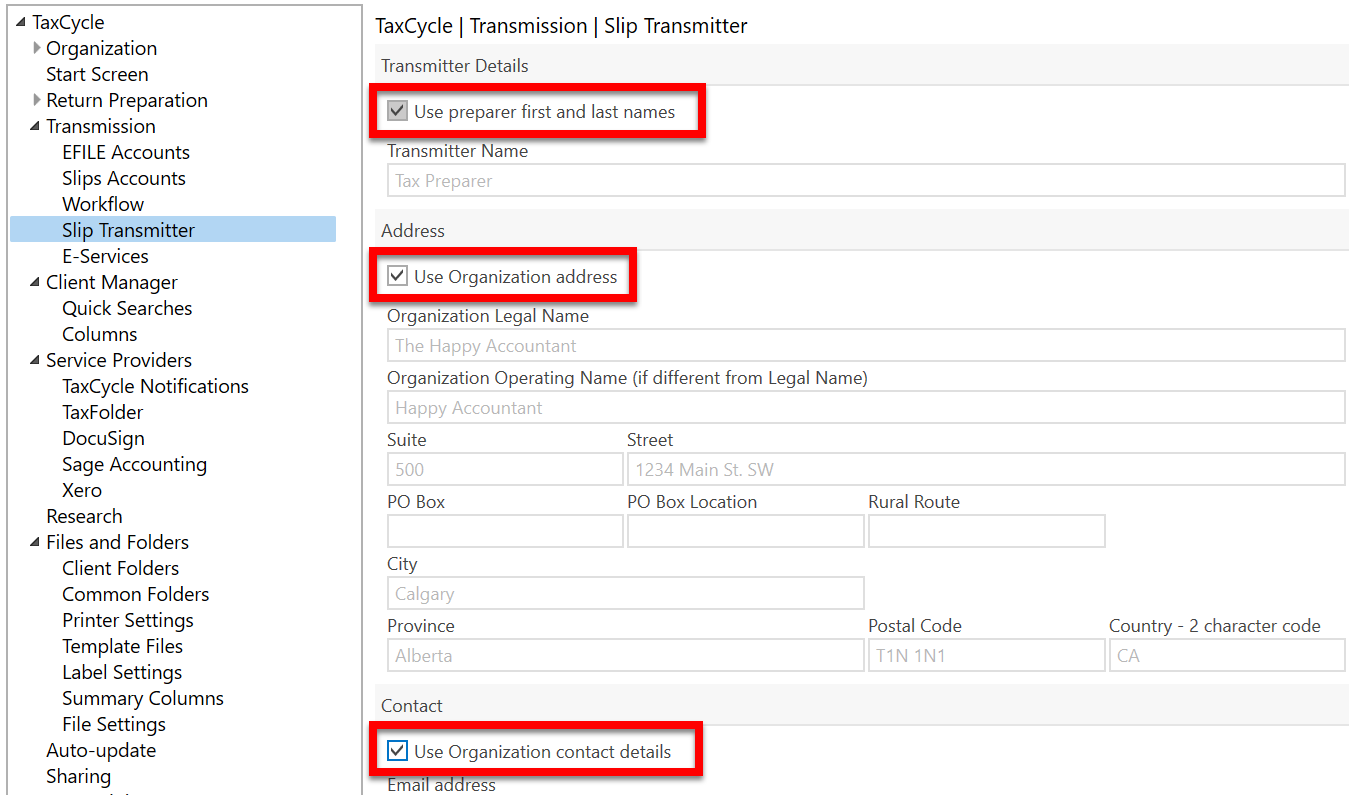
The Slip Transmitter page in Options allows you to enter different contact information than is set in the Contact and Address Options. These details flow to the Transmitter section on the Engagement worksheet.
To edit any of these options, clear the boxes to Use preparer first and last names, Use Organization address or Use Organization contact details, depending on which fields you wish to change.
Set the Language for Transmission Results
You can set in which language(s) messages received in response to transmissions are recorded on the related worksheets (such as EFILE Results). Note that not all jurisdictions support messages in both English and French.
To set this option:
- If you have a file open, go to File menu, then click Options. To open Options from the Start screen, click Options in the blue bar on the left side. (You can also access these options any time by clicking on the wrench icon in the Transmit sidebar.)
- On the left side of the screen, expand Transmission and then click on Workflow.
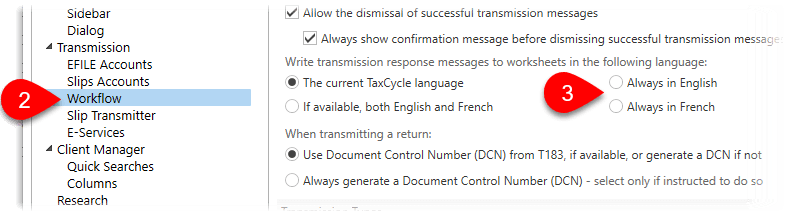
- On the right side of the dialog box, choose one of the following options:
- The current TaxCycle language
- If available, both English and French
- Always in English
- Always in French
Group Transmission Options
- To open Options from the Start screen, click Options in the blue bar on the left side. If you have a file open, go to File menu, then click Options.
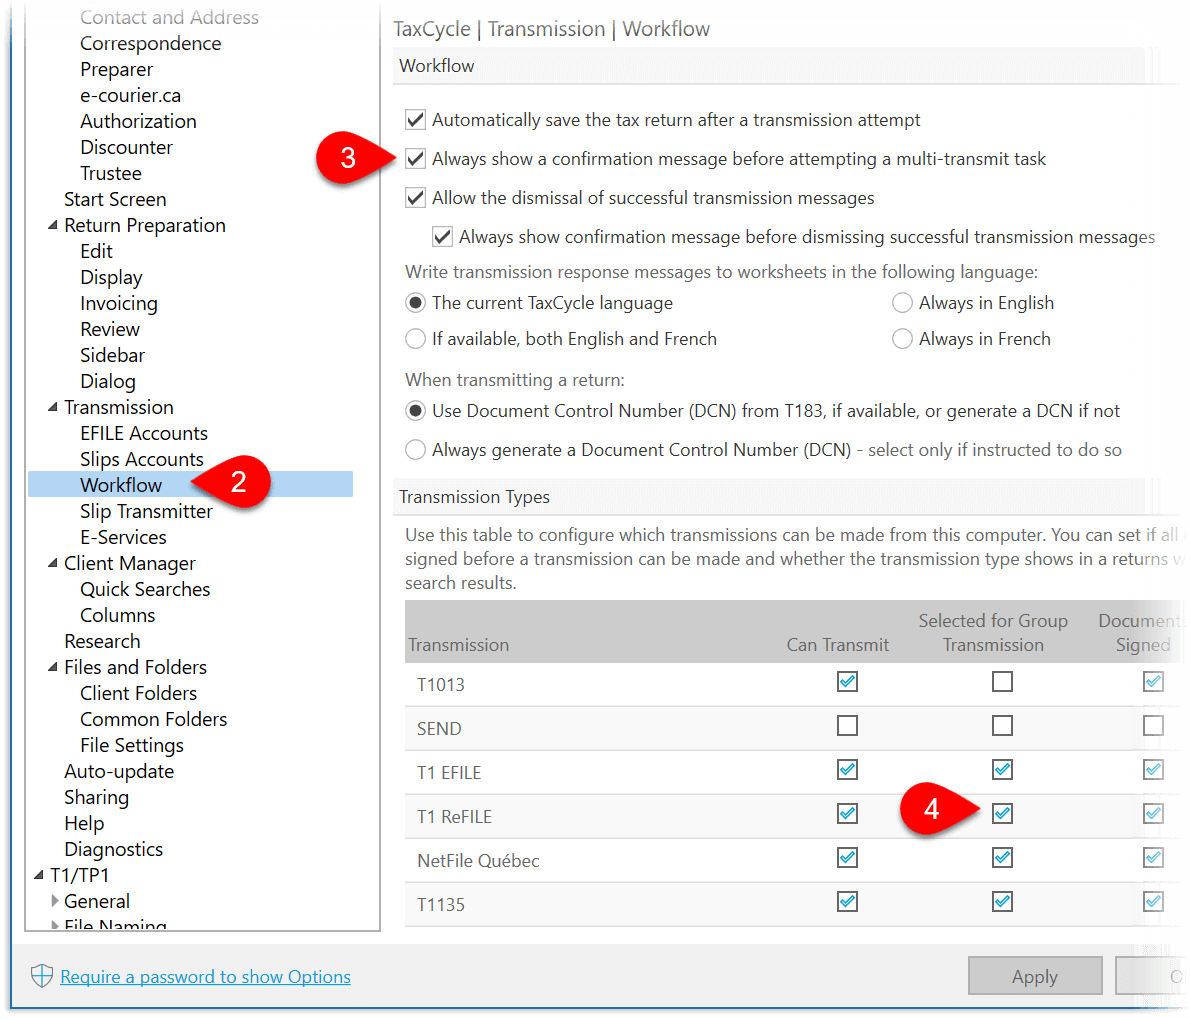
- On the left side of the dialog box, expand Transmission, then click on Workflow.
- If you wish, check the box to Always show a confirmation message before attempting a multi-transmit task.
- For each transmission type, check the box in the Selected for group transmission column, to automatically include it when transmitting multiple types from the Transmit sidebar, or when transmitting returns for an entire family.
- Click Apply or OK to save your changes.
Disable signature confirmation
The CRA and Revenu Québec expect a signed T183, TP1000, T1013, T1135, etc. before you transmit, but you are not required to log the signature confirmation in TaxCycle if your practice has another way of tracking this information. You can disable the signature confirmation step in options.
- If you have a file open, go to File menu, then click Options. To open Options from the Start screen, click Options in the blue bar on the left side. (You can also access these options any time by clicking on the wrench icon in the Transmit sidebar.)
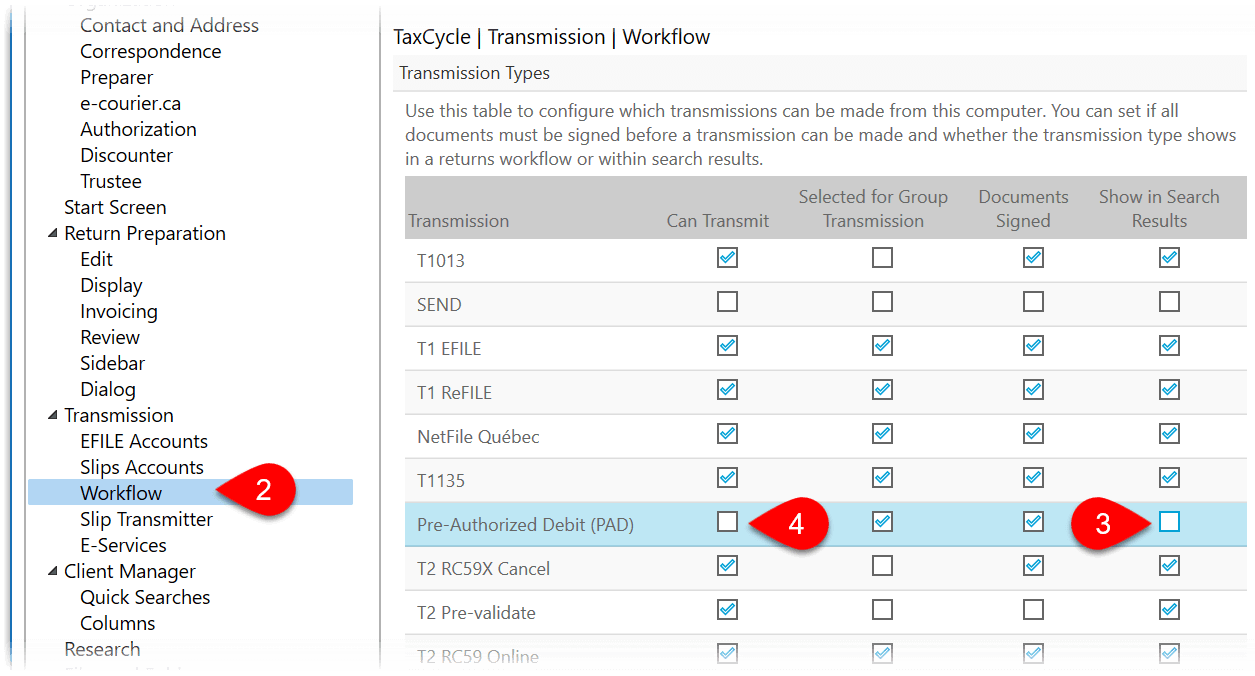
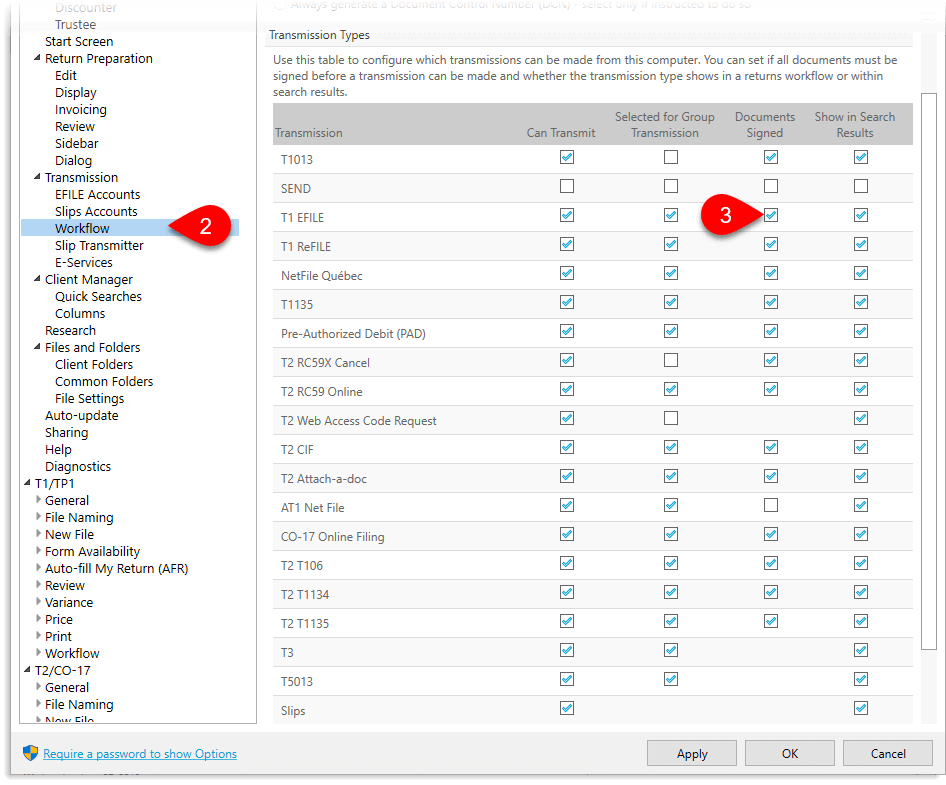
- On the left side of the screen, expand Transmission and then click on Workflow.
- On the right-hand side of the window, scroll to the table. In the row for the transmission type you require (for example, T1013 or T1 EFILE), clear the check box under the Documents Signed column.
Disable a Transmission Type
If you never use a particular transmission type—such as Pre-authorized debit (PAD)—you can disable this type to remove it entirely from view.
- If you have a file open, go to File menu, then click Options. To open Options from the Start screen, click Options in the blue bar on the left side. (You can also access these options any time by clicking on the wrench icon in the Transmit sidebar.)
- On the left side of the screen, expand Transmission and then click on Workflow.
- On the right-hand side of the window, scroll to the table. In the row for transmission type you want, clear the check box under Show in Search Results to prevent filters and searches on the status of the transmission.
- Clear the check box under the Can Transmit column to hide the transmission type completely, including in the Transmit sidebar and any related review messages.