Options Profiles
Options Profiles make it easy to share settings with others and choose which settings to share. You can also use them to easily copy settings to a different computer.
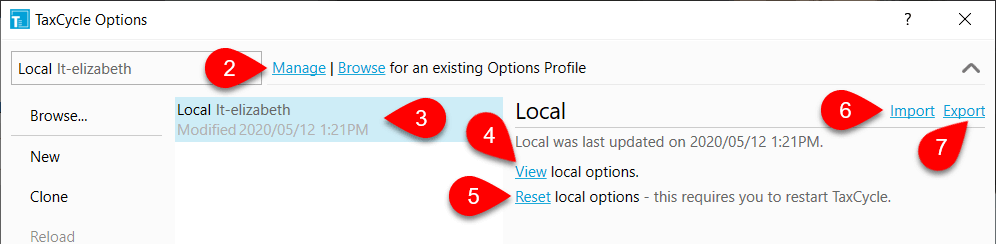
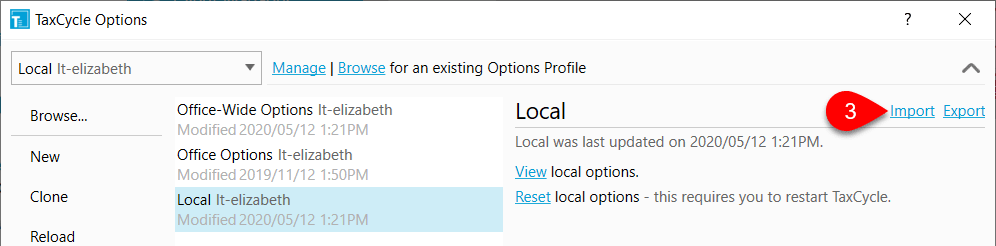
Local Options
TaxCycle and DoxCycle use the same system to store your local options and for options profiles you share. You can import and export options using this Local options profile.
- To open Options from the Start screen, click Options on the left side. If you have a file open, go to the File menu, then click Options.
- Click on Manage to expand the Options Profile section.
- Click on your Local options.
- Click View to see the files stored on your computer.
- Click Reset to revert to the default options installed with TaxCycle or DoxCycle. This requires you restart TaxCycle.
- Click Import to replace your local options with those in an Options Profile zip file.
- Click Export to create a full export of your options—great for moving to a new computer.
Choose an Options Profile on Start
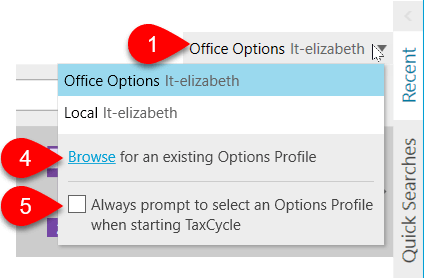
- When you start TaxCycle, you can select an Options Profile at the top right of the TaxCycle Start Screen.
- TaxCycle will remember the last profile you used and load it automatically the next time.
- If you only see one item in the list, it is because you are using the Local (with your computer name) profile.
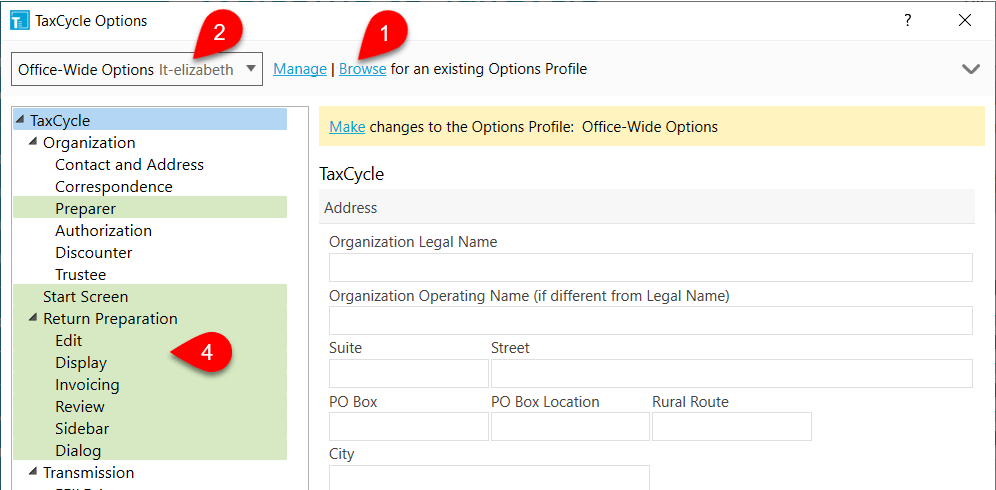
- Browse to load a profile from your computer or network.
- To select a profile when you start TaxCycle, check the option to Always prompt to select an Options Profile when starting TaxCycle.
- You can also choose the profile you want to use from the drop-down list at the top of the Options dialog box.
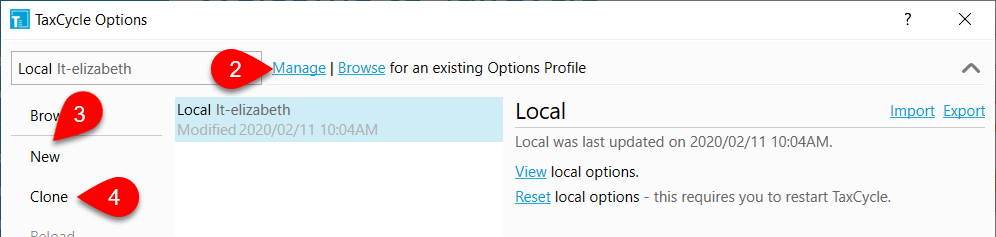
Create an Options Profile
- To open Options from the Start screen, click Options on the left side. If you have a file open, go to the File menu, then click Options.
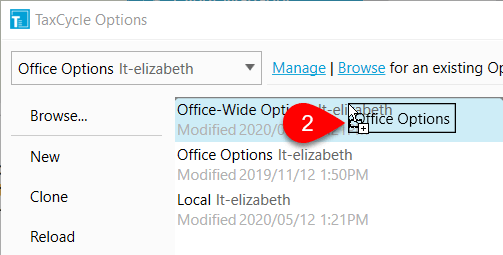
- Click on Manage to expand the Options Profile section.
- Click New, to create a new, blank profile
- Or, click once on your Local profile, then click Clone to use it as a starting point.
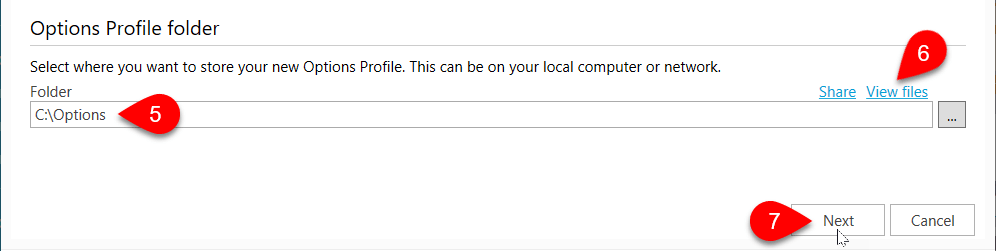
- Browse to the folder where you want to save the profile on your local computer or on the network. To share it on the network, enter a full network path. For example, \\mycomputer\sharedfolder.
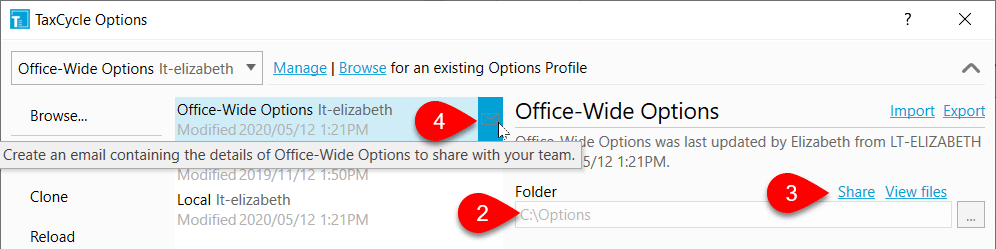
- Click View files to see what is already in the folder you selected.
- Click Next.
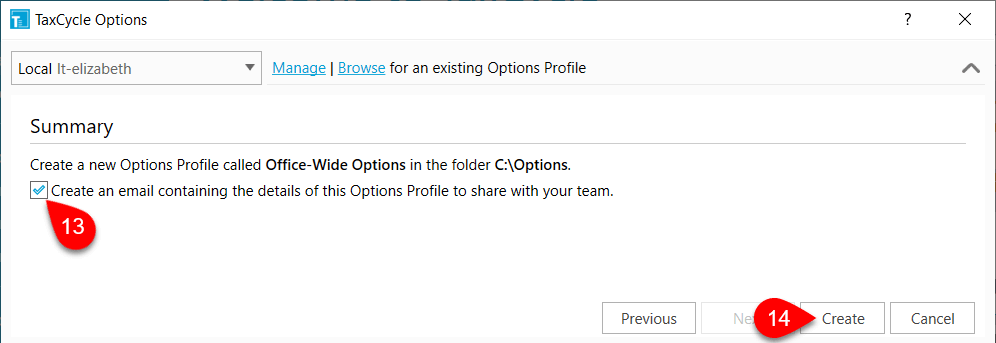
- Enter a name for the profile.
- Click Next.

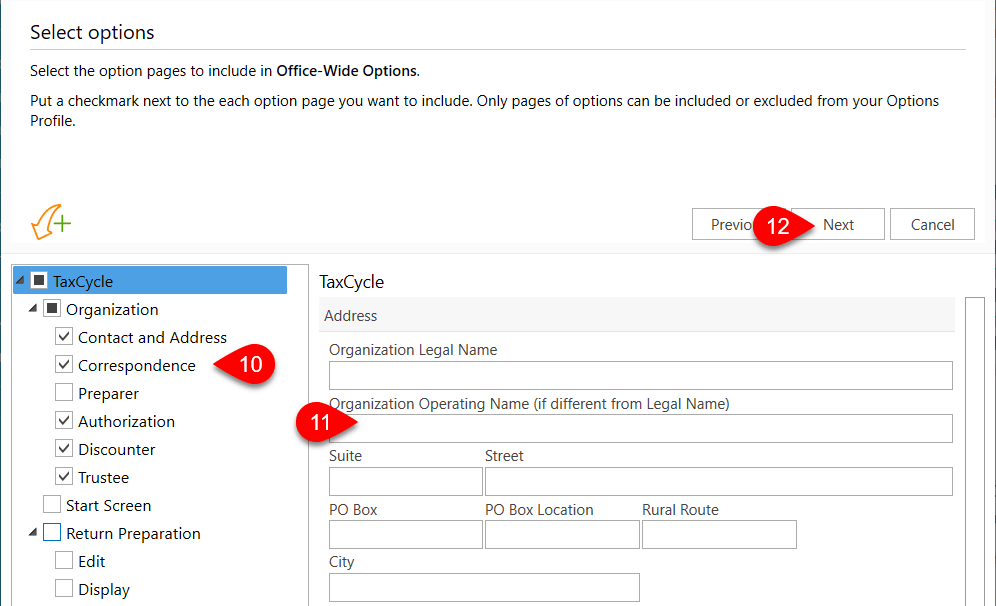
- Check boxes in the tree on the bottom left to include pages of options in the profile. This allows you to share only the options you want. Clear the boxes in the tree on the bottom left to exclude pages of options from the profile. Anyone using the shared profile can set Local options for those pages not in the profile. If you are pointing all computers in your office to the same Client Manager server, remember to select that server and share the page in the Options Profile. The workstation will connect to the Client Manager server provided by the Options Profile.
- Edit any options by selecting a page then changing the settings on the right.
- Click Next.
- Optionally create an email so you can tell your team where to connect to the options—use full network path if you are sharing with others in the office.
- Click Create to complete the profile.
Modify Options Within a Profile
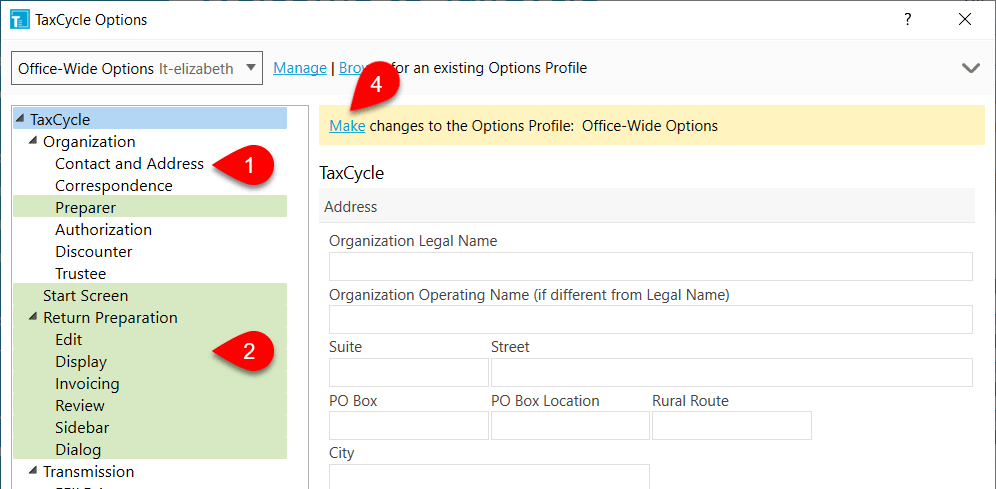
- In the sidebar, any pages in the Options Profile, have a white background.
- Options stored locally have a green background.
- To edit options on a page, click the page on the left then change the settings on the right.
- A yellow message tells you that options on the page come from a profile. Click the Make link to unlock the options below.
- A green message reminds you which Options Profile you are editing. Click the Cancel link to stop changing the Options Profile.

Share an Options Profile
If you want all staff to use the same Options Profile, each person will still be able to choose their Local profile from the Start Screen or the Options dialog box. To prevent this, set an options password on each person’s computer to prevent them from opening options.
- Create a new Options Profile and save it in a folder on your computer or network server. (You do not need to install TaxCycle to create the Options Profile on the server; save the zip file on another computer and copy it to the server.)
- Use a full network path to the profile, so others can also access the folder. For example, \\mycomputer\sharedfolder.
- If the folder is on your computer, make sure you share the folder using Windows® permissions so that others can see it. An easy way to do this is to click the Share link above the path. TaxCycle respects the Windows® permissions set on the folder you share. If only your Windows® user account can make changes to the folder, other computers will be able to read the options but not change them.
- Hover near the profile name and click the Email icon to send the profile to others in your office. When they receive the email, they can click on the link, then drag and drop the zip file onto their options screen to load it.
Load an Options Profile
After someone else shares an Options Profile on your network, or if you copy an options profile to a different folder on your computer, you must load it into your options before you can use it:
- Open Options, then click Browse at the top of the window. Browse to the profile on the network, select the zip file and click Open.
- The profile appears in the drop-down menu.
- If you load an Options Profile that is on your network, but it only contains some options, TaxCycle will look at your Local options to fill in the rest. For example, someone can configure office-wide settings for print sets and transmission credentials, but can leave return preparation preferences up to the user.
- Options pages stored locally will have a green background in the sidebar.
Sort the List of Options Profiles
- The Options Profile that is at the top of the list appears first in the drop-down list on the Start screen and the Options dialog box.
- Change the order in the list by dragging the profiles to a new place.
- Regardless of the order, TaxCycle remembers the last profile you selected and uses it the next time you open TaxCycle.
Export an Options Profile
When you get a new computer, export the options from the old computer to move them to the new computer. Or, if you run a desktop computer and laptop computer, configure options on one, export and import them to the other.

- To open Options from the Start screen, click Options on the left side. If you have a file open, go to the File menu, then click Options.
- Click Manage to expand the Options Profile section.
- Click on a profile.
- On the right side, click Export.
- Save the file to a shared location on your network. If you don’t work in a network environment, save the file to an external media storage device (USB key) or cloud storage.
Import an Options Profile
- To open Options from the Start screen, click Options on the left side. If you have a file open, go to the File menu, then click Options.
- Drag the zip file onto the Options dialog box. This creates a separate profile in the list.
- To replace the contents of an existing profile, click on a profile, then click click Import.
Reload an Options Profile
- To open Options from the Start screen, click Options on the left side. If you have a file open, go to the File menu, then click Options.
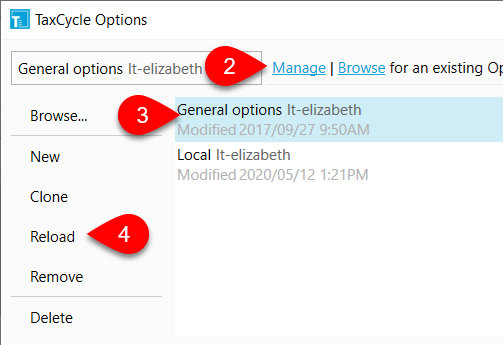
- Click on Manage to expand the Options Profile section.
- Select a profile from the list.
- Click on Reload to refresh the options from the zip file.
Automatic Backup of Options Profiles
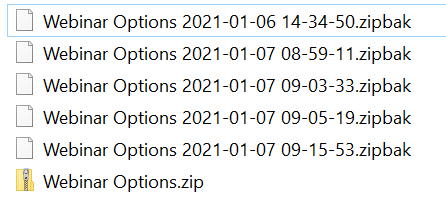
Any time you add a file to an Options Profile, save a template file that is in an Options Profile, or click Apply or OK in the Options dialog to save changes to an Options Profile, TaxCycle automatically creates a copy of the zip file before saving the changes.
You can find backups of the zip files in the same folder as the original Options Profile. The files have the extension .zipbak and the file name includes the date the file was created.
To revert to a backup copy of your Options Profile:
- Close TaxCycle.
- Delete or move the old Options Profile.
- Rename the file to remove the date.
- Change the file extension to .zip.
When you reopen TaxCycle, the restored profile will show in the list of available Options Profiles.
Remove or Delete an Options Profile
- To open Options from the Start screen, click Options on the left side. If you have a file open, go to the File menu, then click Options.
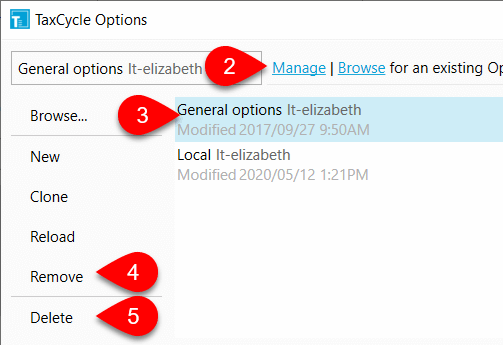
- Click on Manage to expand the Options Profile section.
- Select a profile from the list.
- Click Remove to remove the link to the profile and retain the zip file in the folder.
- Click Delete to remove the link to the profile and delete the zip file in the folder.