Scan Source Documents
DoxCycle works with most scanners supported by Windows®. If it is a TWAIN or WIA compliant scanner, there is no special setup. DoxCycle will connect to the scanner and start the scan.
If you have a Fujitsu ScanSnap scanner that does not support TWAIN, you must configure the scanner slightly differently. See the Fujitsu ScanSnap help topic.
If your office uses a scanning station or has a dedicated person in the office who does all the scanning, you can configure DoxCycle to monitor a folder on the network for new files. This way, whenever a new file appears in that folder, you have the option to import it into DoxCycle. Read the Monitor a Scanning Station help topic.
Recommended Scanner Settings
DoxCycle’s ability to recognize the document type and taxpayer, and extract amounts from documents depends on the quality of the scan. A higher-resolution and more realistic-looking scanned document does not necessarily mean it’s easier for DoxCycle to extract data (that’s why photos don’t always work as well).
We recommend setting your scanner to use the following settings:
- 300 DPI (dots per inch) resolution
- Black and white (not greyscale!)
- Background fill set to off
Scan Slips, Receipts and Other Documents
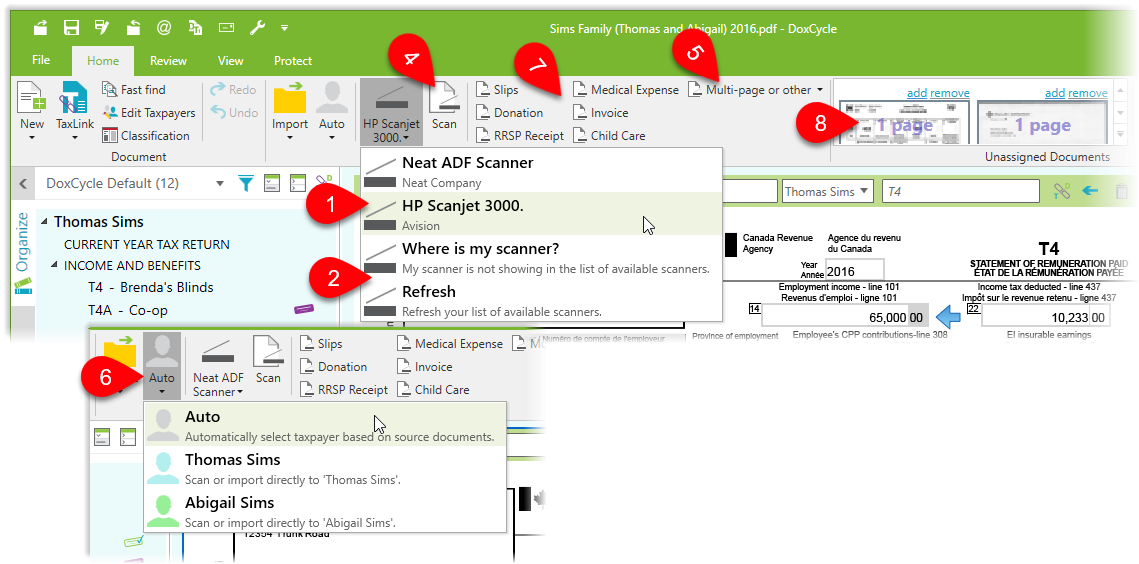
- Click the scanner button in the Home tab to choose which scanner to use.
- If you don’t see your scanner, click Refresh or Where is my scanner?
- Insert all the paper documents in the scanner feeder and make sure the scanner is powered on and connected to your computer.
- Click the Scan button or press F7. DoxCycle scans the pages, determines which taxpayer each one belongs to, what type of document it is, and extracts the amounts. If it can’t figure out what kind of document it is or who it belongs to, DoxCycle will bring up the Classification Assistant to allow you to quickly categorize the documents. See the Unclassified Documents help topic.
- To scan in a multi-page or double-sided document, select the option before scanning. Learn more in the “Scanning Multi-Page and Double-Sided (Duplex) Documents” section, below.
- If you have a stack of documents for the same taxpayer, select the taxpayer before scanning.
- If you have a stack of documents of the same type, select the document type before scanning. You can add document types to this list by checking Scan Shortcut in the document outline. See the Custom Document Outlines help topic.
- If you have a scanning station, monitor a folder on your network, so newly scanned documents appear in this gallery. Read the Monitor a Scanning Station help topic.
Scan Multi-Page and Double-Sided (Duplex) Documents
As long as your scanner supports scanning double-sided documents (duplex), DoxCycle does too. It can treat any double-sided documents as multi-page.
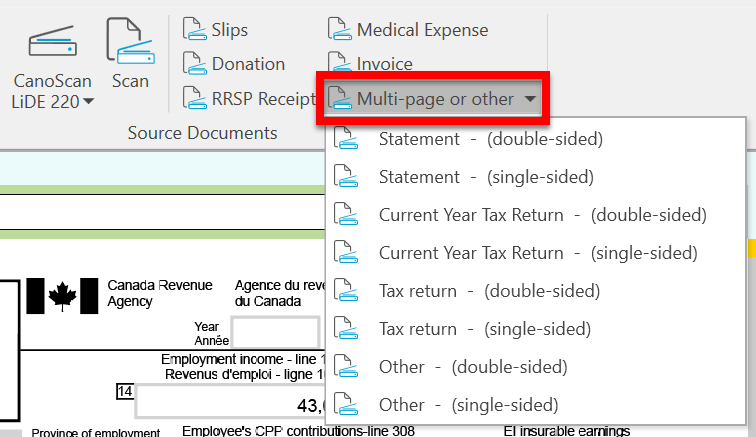
Place the document in the scanner, the click Multi-page or other on the Home tab select one of the double-sided options to tell DoxCycle to capture the data on both sides of the paper.
If you just have a single-sided multi-page document, choose one of the single-sided options.
If all of your documents (slips and everything else) are always printed double-sided, you can tell DoxCycle to scan every document as double-sided. This means whatever document type you select (slips, donation receipts, etc.), DoxCycle will consider it double sided. To change this option:
- If you have a file open, go to the File menu, then click Options. To open this dialog box from the Start screen, click Options in the green bar on the left side of the window.
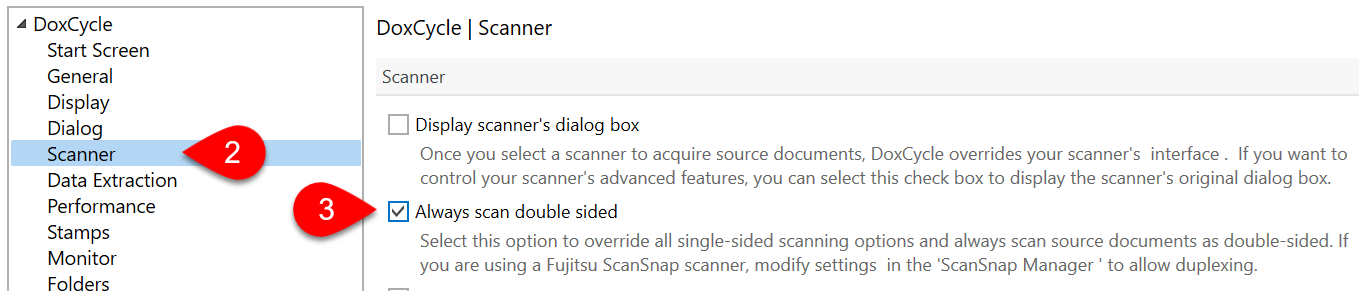
- On the left side of the screen, click on Scanner.
- Check the Always scan double sided option.
If you are using a Fujitsu ScanSnap scanner, you will need to modify the settings in the ScanSnap Manager to allow duplexing.
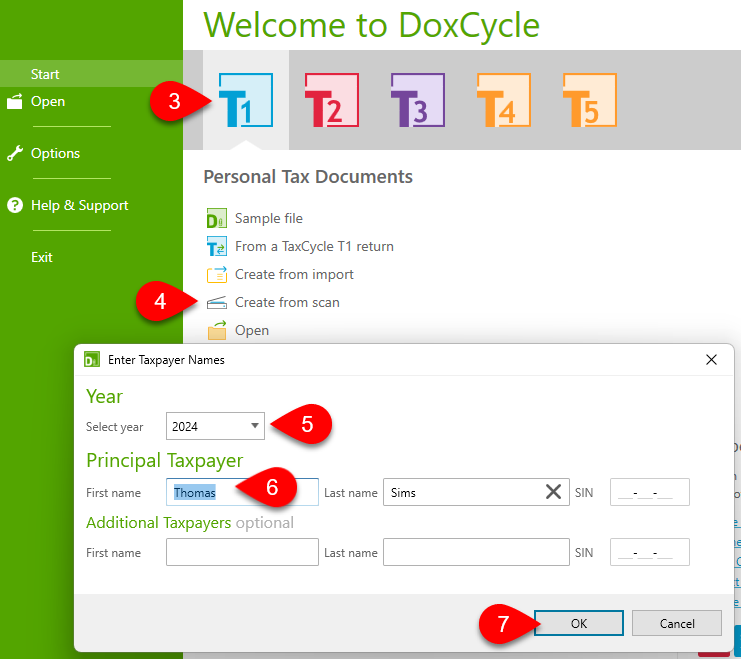
Create a DoxCycle PDF from Scan
Create a DoxCycle PDF at the same time as you scan documents into the file.
- Place the documents in the scanner.
- Open DoxCycle.
- On the Start screen, click on the blue T1 button.
- Click Create from scan.
- Select the tax year.
- Enter the first and last name of at least one taxpayer that will be included in this file.
- Click OK to create the file and start the scanner.
Scanner Options
DoxCycle Options contain additional settings for scanning documents:
- To open Options from the Start screen, click Options in the green bar on the left side. If you have a file open, go to the File menu, then click Options.
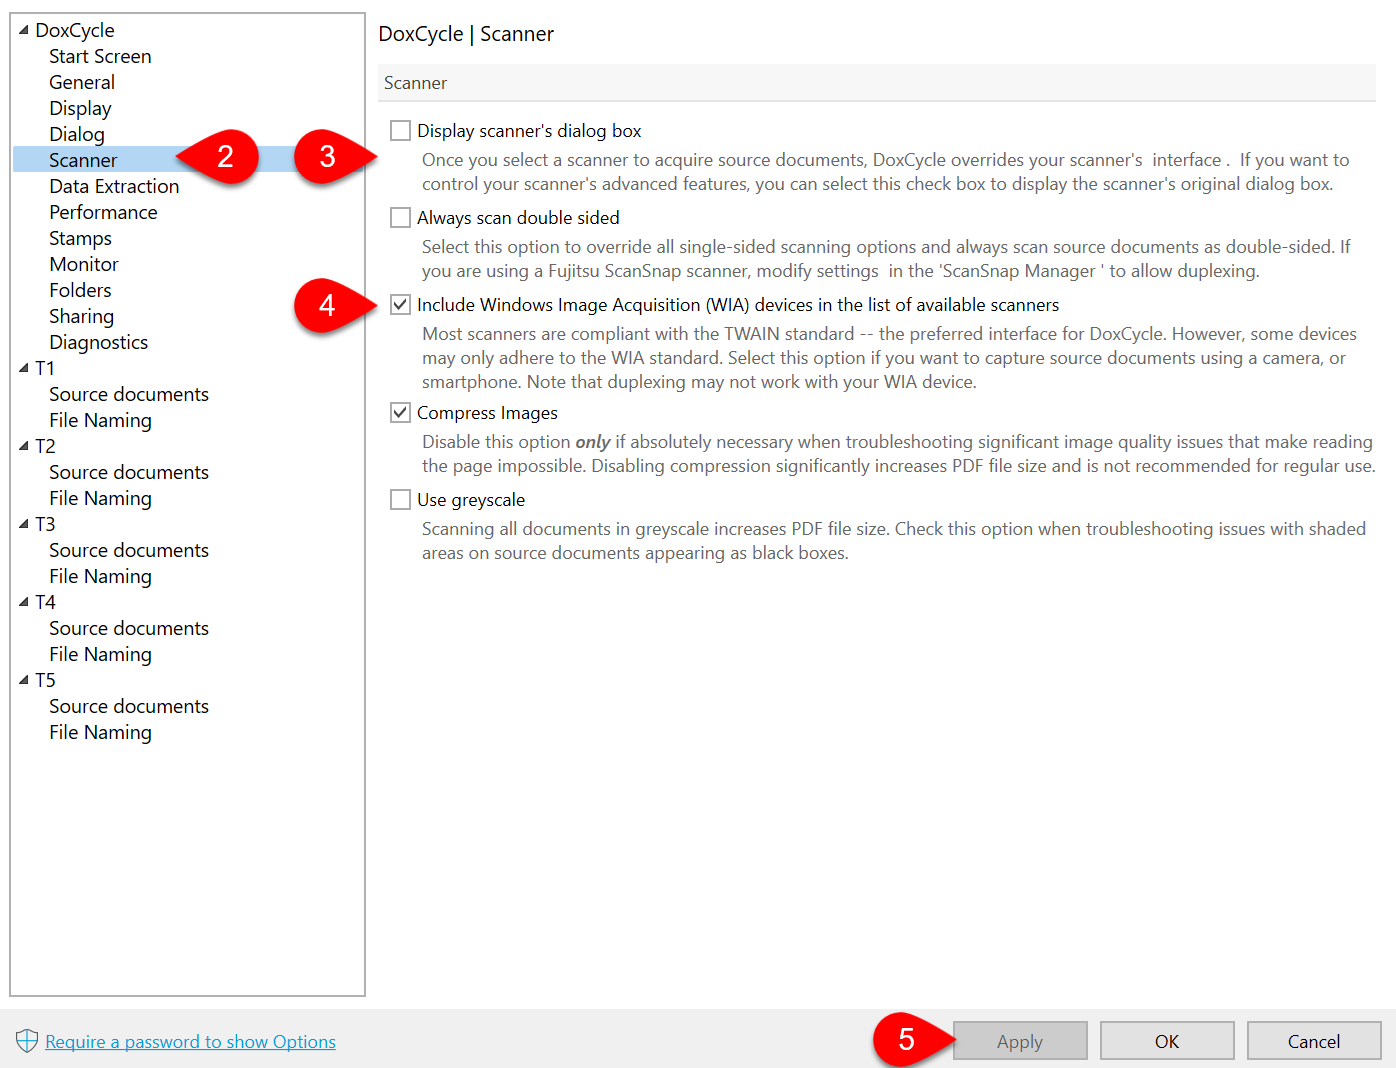
- On the left side of the dialog box, expand the DoxCycle section, and click on Scanner.
- Each option contains a description of when changing the option might be useful.
- Check the box to Include Windows Image Acquisition (WIA) devices in the list of available scanners to connect to a WIA-compliant device.
- Click OK or Apply to save your changes.