Print/PDF Options
To set options for printing in TaxCycle:
- To open Options from the Start screen, click Options on the left side. If you have a file open, go to the File menu, then click Options.
- On the left side of the dialog box, expand the T1/TP1 section (or a section for another tax module).
- Expand Print and click on a year to set print options for a particular year.
- On the right, view or edit print sets. A print set includes:

Default Print Sets
TaxCycle comes with default print sets for printing a Client copy and Office copy. Or for printing forms required for filing, like the T1 EFILE or CRA Condensed print sets. You can edit these or create new print sets.
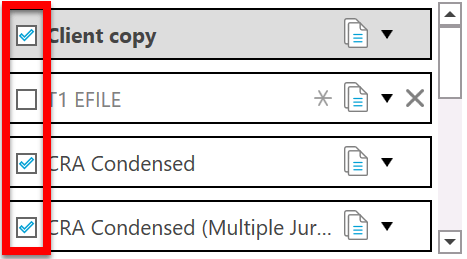
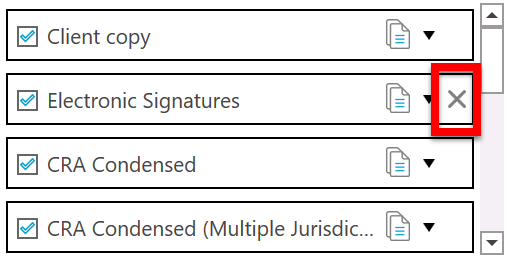
Check or uncheck a print set in options to show or hide it when you print a tax return:
TaxCycle saves printer settings in C:\ProgramData\Trilogy\TaxCycle\PrinterSettings (you can change the location in General options, under Files and Folders, Common Folders). You can copy this folder to another computer to move print sets to another computer.
Duplicate a Print Set
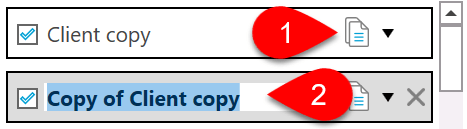
A quick way to create a new print set is to copy an existing one:
- Click once on the Duplicate button on the print set.
- Double-click on the name of the new print set, then type to give it a different name.
- Click anywhere off the print set box to save the name change.
Create a Blank Print Set
To create a new, empty print set:
- Scroll to the bottom of the list of print sets.
- Double click on the New print set name.
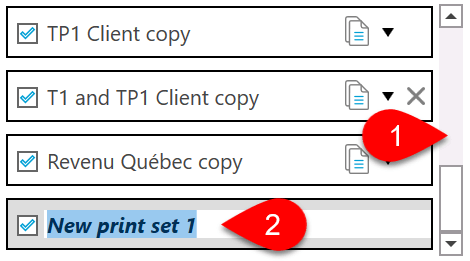
- Type a name for the print set.
- Select forms to include in the print set.
- Change printer and output options.
- Set a condition for the print set.
- Once you select forms for the print set, TaxCycle creates a new, blank print set at the bottom of the list. This way, you can keep adding as many sets as you need.
Set the Printer/Output for a Print Set
- To set the printer or output configuration for a print set, click then print set.
- Click the edit link.
- The Print Configuration box appears. Please refer to the Print and PDF output options help topic to review the available options.

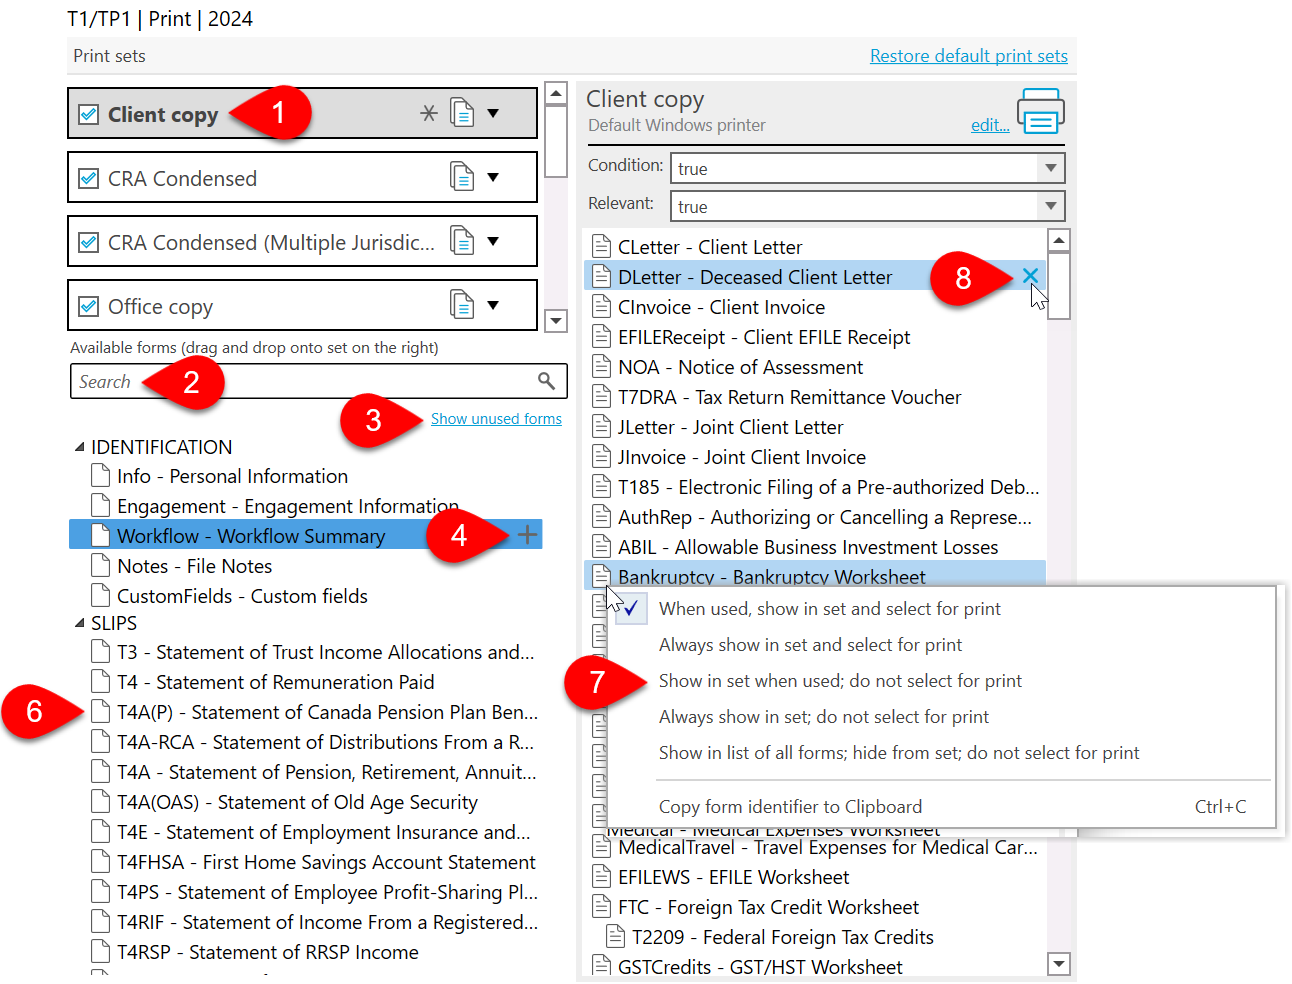
- To add or remove forms in a print set, click on the print set’s name. The print set changes to a grey background to show you that you’re working with that set.
- The list on the left shows all the forms you could possibly add to the print set. Start typing a term in the search box to find the form in the list.
- Click Show all forms or Show unused forms to narrow or expand the list.
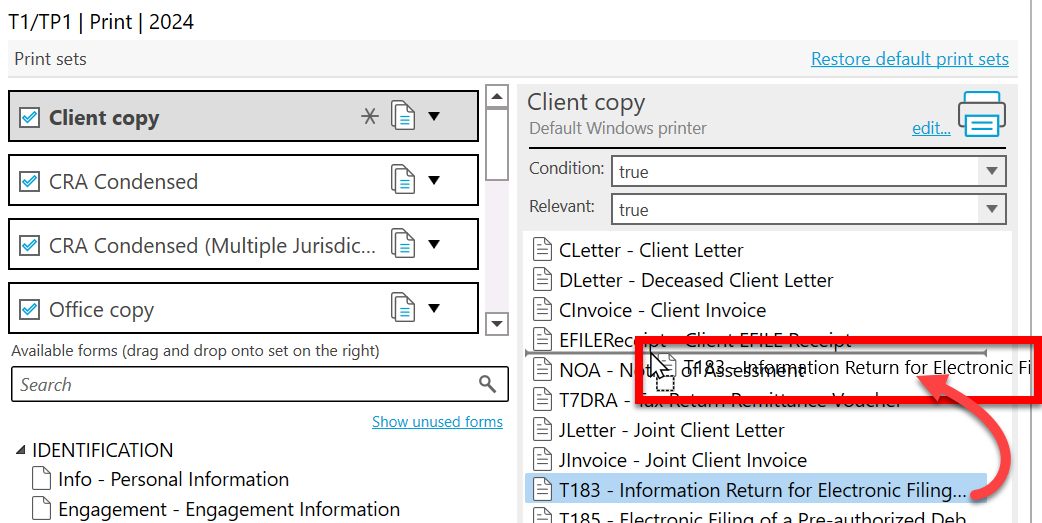
- To add a form to the print set, find it in the list on the left, then drag and drop it to the list on the right. Or click the blue plus sign.
- Forms used in the set are grey and show a form icon with lines.
- Forms not used in the set are black and show a blank form icon.
- Right-click a form on the right to change the condition when a specific form is available in the Print sidebar or automatically selected for printing.
- To remove a form from the print set, hover over the form in the list on the right, then click the X.
Change the Print Order of Forms in the Print Set
The list of forms in the set appears on the right side of the window. To change the print order of the forms, drag and drop forms in the list on the right.
Set the Condition and Relevance for a Print Set
Each print set has a condition and relevance assigned to tell TaxCycle when to show it on the screen and select it for print.
- At the top left, click on the print set you want to configure. It will change to a grey background to show you that you’re working with that set.
- The Condition field tells TaxCycle when to check the box in the Print sidebar, thereby selecting it for printing. Enter true to select a set for printing always. Leave the condition blank to show the set in the sidebar but unchecked, meaning you must check it to include it in printing.
- The Relevant field tells TaxCycle when to display the print set in the Print sidebar. For example, the T1 Condensed print set has a relevance set to show only the set when the return will be paper filed.

Copy a Print Set to a Different Year
TaxCycle automatically carries forward the prior-year print set to the most recent year. We still recommend reviewing these print sets in case new forms exist in the new year, which you should include in the print set.
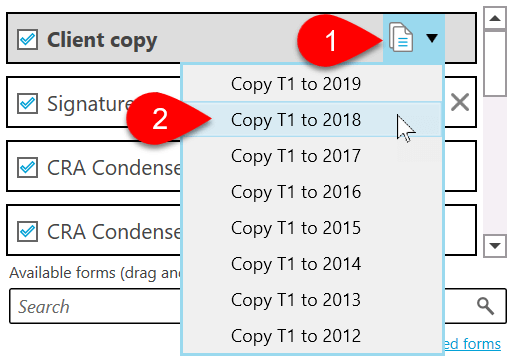
You can also copy a print set to a different year in the same module:
- Click once on the duplicate button, then select the year to copy the set to.
- If that year has an existing set with the same name, you’ll be asked whether you want to replace that set. If not, you’ll be asked to create a new set with the new name.
- Now go to the year in the settings on the left to find and edit the copied set.
Change Print Set Order
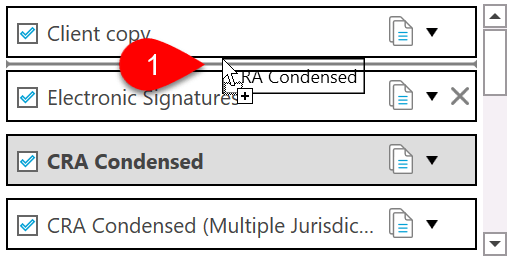
To change the default order in which print sets appear when you print a tax return:
- Click on a print set and hold down your mouse, then drag it up or down in the list.
- Release your mouse button to drop the set where you want it.
Delete Print Sets
To delete a print set, click on the X on the right side print set name. You cannot delete the print sets that come with TaxCycle, only print sets you create. If you don’t want to use a default print set, clear the check mark next to it to hide it from the Print/PDF sidebar.
Revert or Restore Print Sets
- If you make changes to the form selection or other information in a default print set, a grey asterisk will appear. To revert to the defaults for that print set, click the grey asterisk.
- If you want to restore all default print sets, click the Restore default print sets link in the top right of the window.
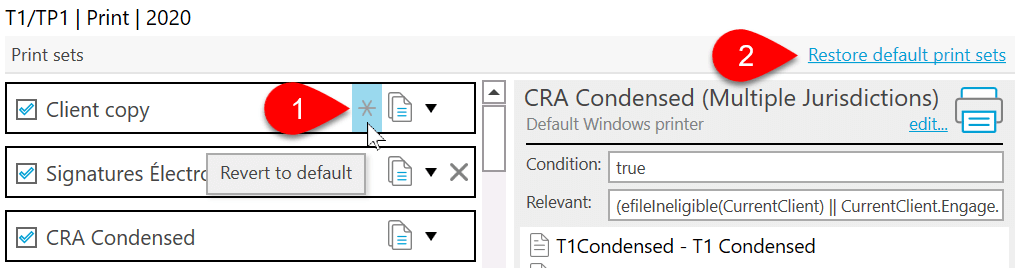
Reverting and restoring print sets does not affect the printer and output options.