Auto-fill My Return (AFR)
Auto-fill My Return (AFR) allows you to use TaxCycle to download tax information for individuals from the Canada Revenue Agency (CRA) website. This includes some of the client information you can view as a tax preparer from the Represent a Client service on the CRA website as well as slips listed there. For a list of what’s available to download, see the CRA’s Auto-fill My Return page.
Authorization to Download Data
To download tax information for a client, you need the exact same credentials and authorization as you do for accessing the Represent a Client service on the CRA website.
You must:
- Have a CRA user ID and password.
- Register with the service to get a representative identifier (RepID) or a group identifier (GroupID).
- Obtain authorization from your client. This is done either by the client going into their CRA My Account and entering your RepID or GroupID, or by requesting access using Represent a Client.
For more information on the Represent a Client service and to register with the service, visit the CRA website.
Download Taxpayer Information
- Create or open a T1 tax return in TaxCycle. Enter at minimum the taxpayer’s name and social insurance number (SIN) for each individual in the file—principal taxpayer, spouse, dependant(s).
- Make sure you have authorization to represent each taxpayer by filing an authorization request through TaxCycle.
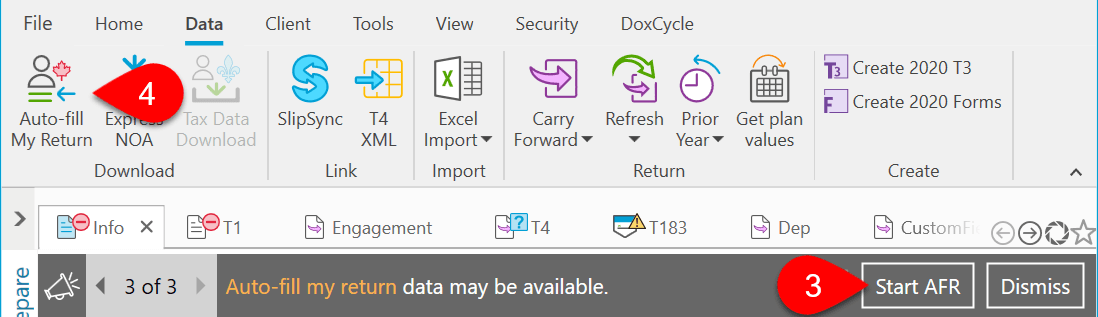
- If TaxCycle has a record of a valid authorization on file, you will see a bulletin at the top of the screen to remind you that Auto-fill My Return (AFR) data may be available. Click the Start AFR button in the bulletin.
- If you don’t see a bulletin, go to the Data menu and click on Auto-fill My Return.
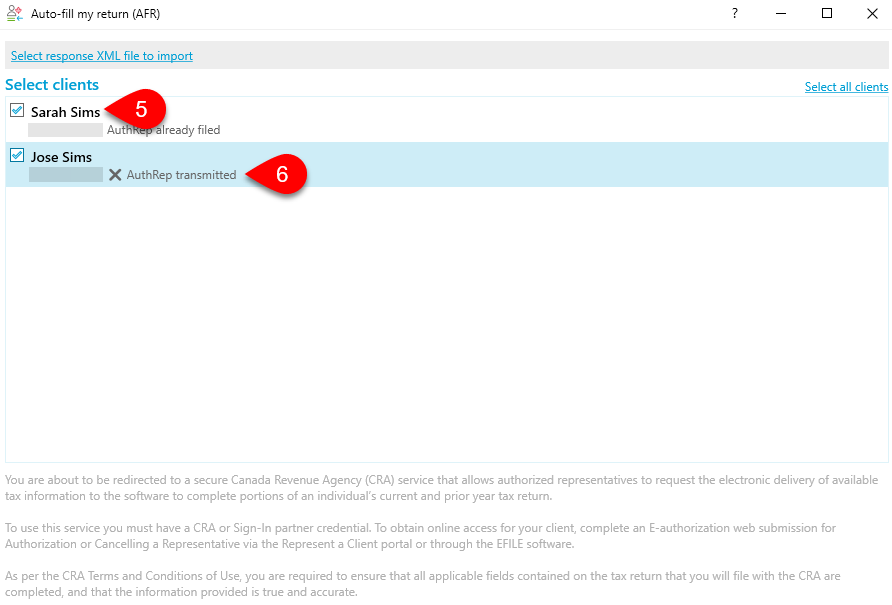
- In the Auto-fill my return (AFR) dialog box, select the clients for whom you want to download information.
- TaxCycle also shows you the status of each person’s authorization in this dialog box. You can still select those taxpayers without a valid authorization recorded in TaxCycle and make a request. If the CRA returns AFR data, then TaxCycle will update their authorization status. (You can request information for up to 10 people at the same time as long as you have authorization from the taxpayers.)
- Click Next to launch your web browser and connect to the CRA.
- The CRA page to log into the tax information web service will display. Choose your usual option—Sign-In Partner or CRA user ID and password—for accessing Represent a Client and enter your credentials.
- The request confirmation page will display, listing the SIN for each requested taxpayer. Click Next.
- As the download begins, a message displays to prompt you to close your browser window or tab. If you intend to return to download more information within the next few minutes (your login will remain open for 18 minutes), you do not need to log out. If you are done with AFR downloads for the time being, click the link to logout from CRA before you close the window.
Match and Import AFR Data
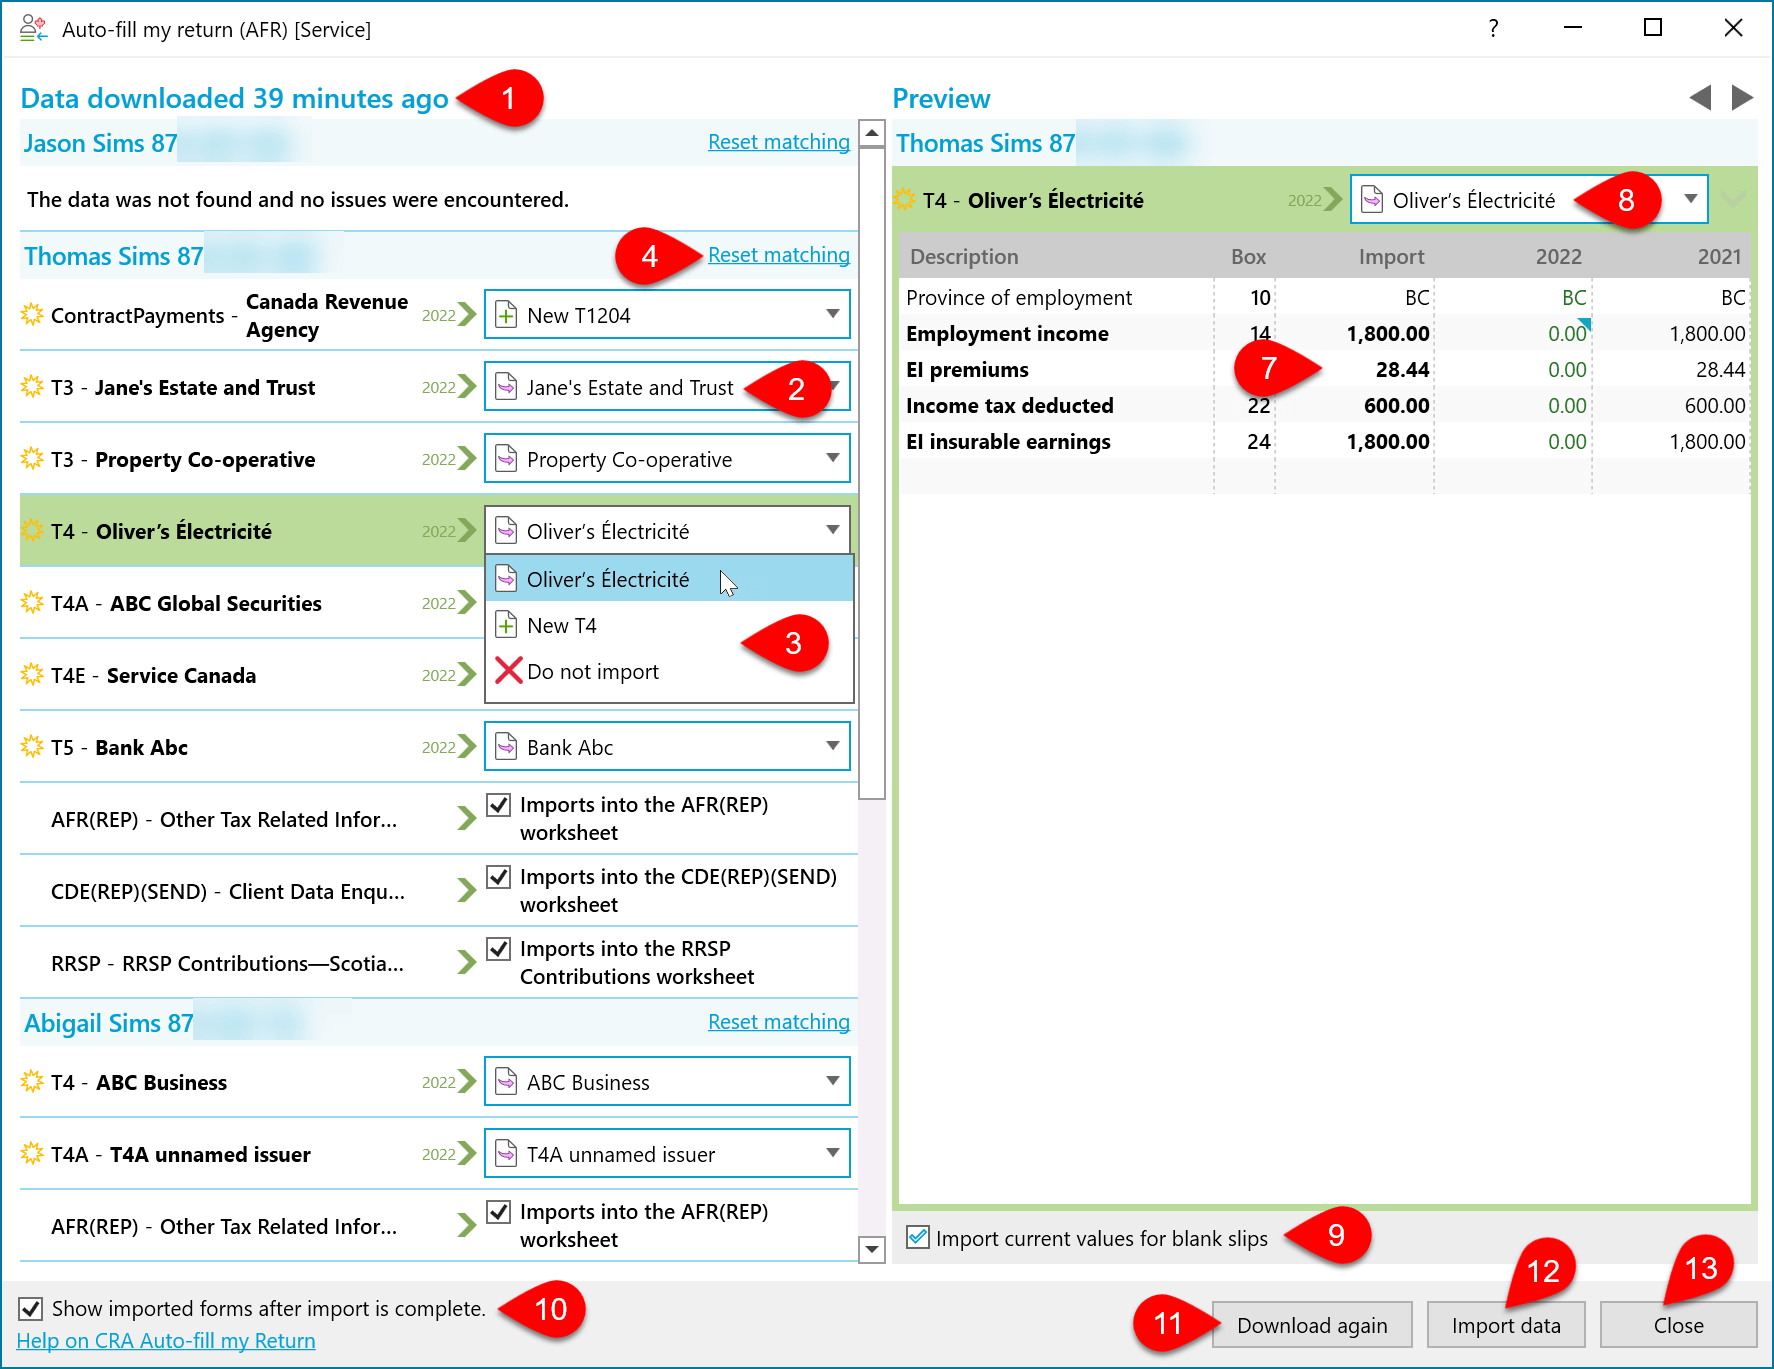
- Back in the TaxCycle AFR window, you will see a summary of what is available to import for each taxpayer. Expand the box, or scroll through the list of slips on the left to see the data available to all taxpayers.
- Based on existing slip names and the type of information, TaxCycle attempts to match the downloaded data with existing forms and slips that were carried forward from the prior year. This matched slip appears in the drop-down menu to the right.
- You can choose a different slip to relate the data to, to create a new slip, or not import the data at all.
- The Reset matching link allows you to reset the automatic matches for all slips under an individual. This removes any changes you made to the import destination and reverts to the automatic matches.
- Some data doesn’t relate to a particular slip. Instead, this data is imported into the Client Data Enquiry (CDE), or other worksheets, such as AFR or RRSP. This data is also used to trigger review messages when it does not match key fields on the return.
- If you downloaded the data a second time to check to see whether there are any new slips available, rows with data already imported into the return appear in faded text.
- Click on a row to display a Preview of the downloaded data and the form into which it will be imported. This includes columns to allow you to see the data already on the slip, or data that was on the slip in the prior year.
- You can also select the slip into which you want to import the data from the drop-down menu on the Preview side.
- If you check Import current values for blank slips, TaxCycle puts the AFR values into the Current Year column on slips. If not, it puts the data into the AFR column on slips and you will need to manually transfer in the values or use the Quick Fix review messages.
- Check Show imported forms after import is complete to open the Prepare sidebar with the imported forms.
- Click Download again to start the download process again.
- Click Import data to put the data onto the worksheet. Until you click this button, no AFR data appears in the TaxCycle file.
- Click Close to close this window. The data you downloaded remains available in this window if you return to the AFR process.
Tooltip Preview of Slip Data
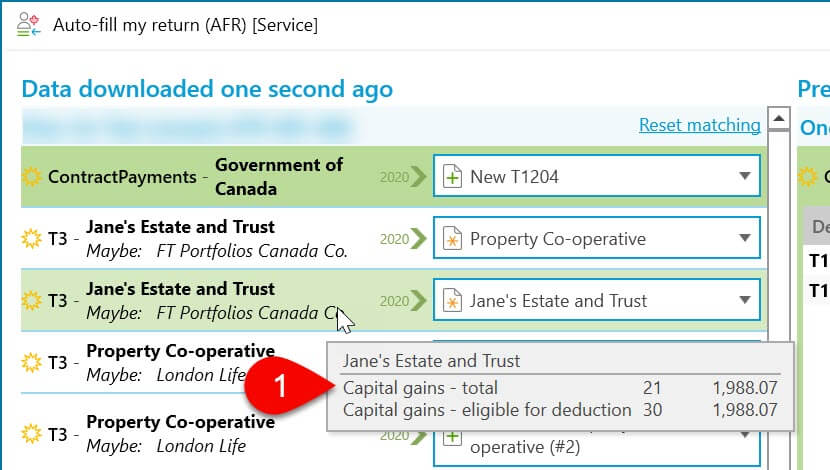
- On the left side of the AFR window, hover over any slip in the list to see a preview of the data on that slip.
- When aggregating slips, expand the list of aggregated slips on the right side of the AFR window, then hover over any slip to see a preview of the data on the slip.
Aggregate Data from Multiple Slips Into one Slip
To help you handle slips that are frequently aggregated into a statement your client receives (such as T3s), you can aggregate downloaded slips into one slip to help you reconcile the two:
- On the left, you can select the same slip in the drop-down on the left for all slips you want to aggregate.
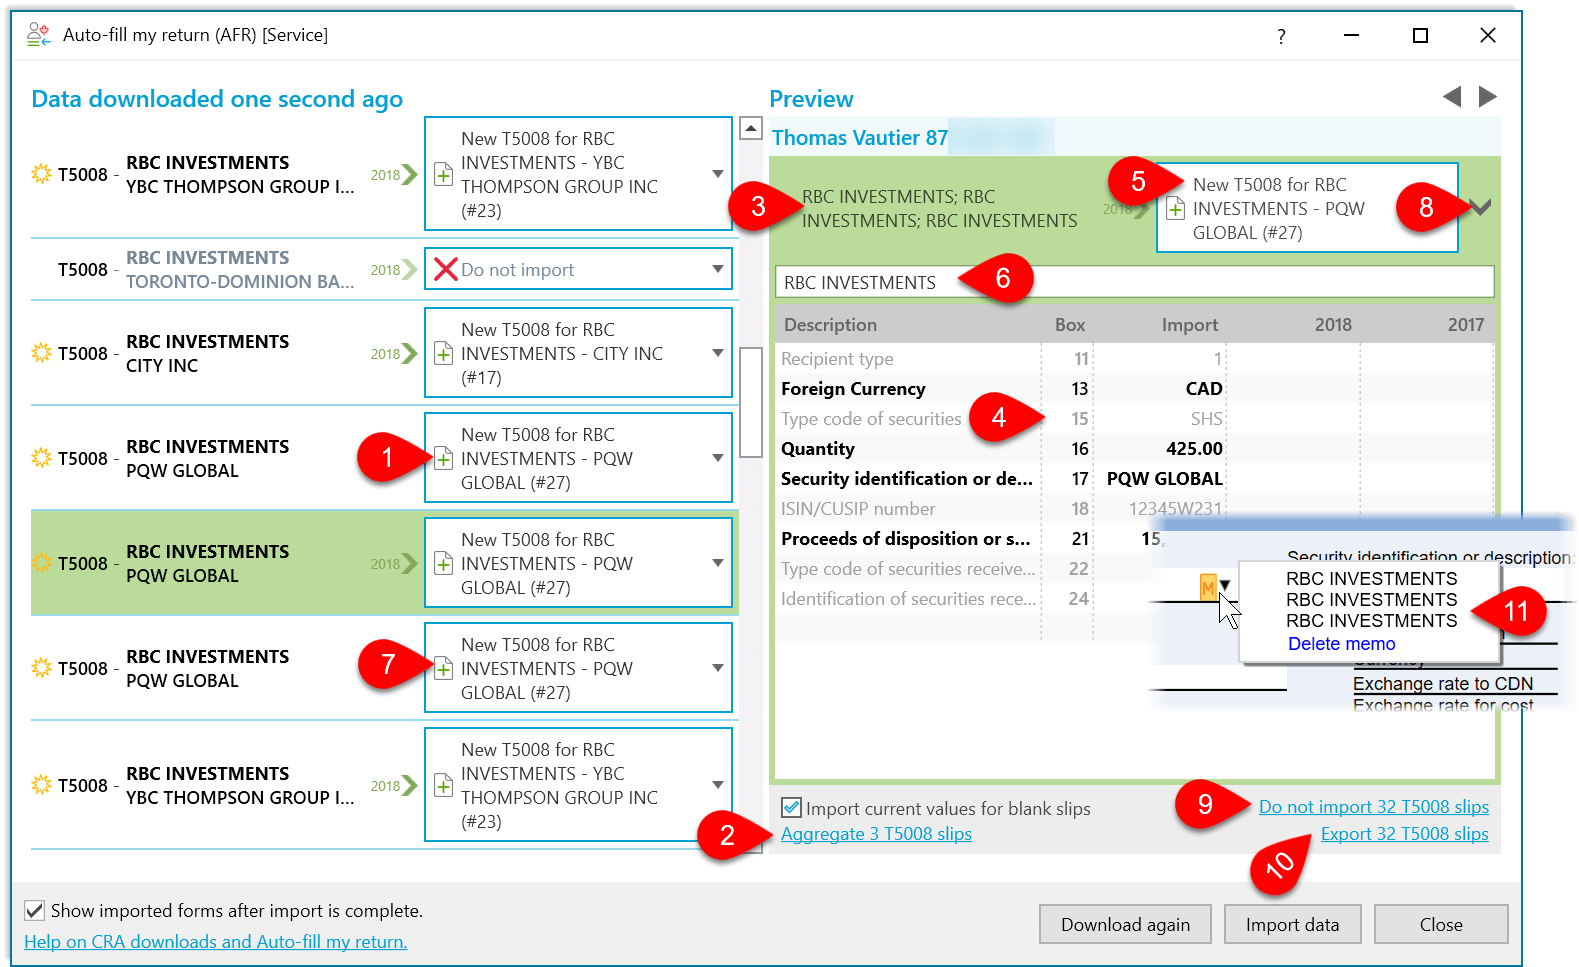
- At the bottom of the right-hand preview, TaxCycle automatically suggests matching slips for example—Aggregate 4 T5008 slips—that have the same issuer name. (If they are T3 slips and you are using SlipMatch, it suggests matching all the slips from the same fund company.) Click the link to aggregate those slips by assigning the same destination slip.
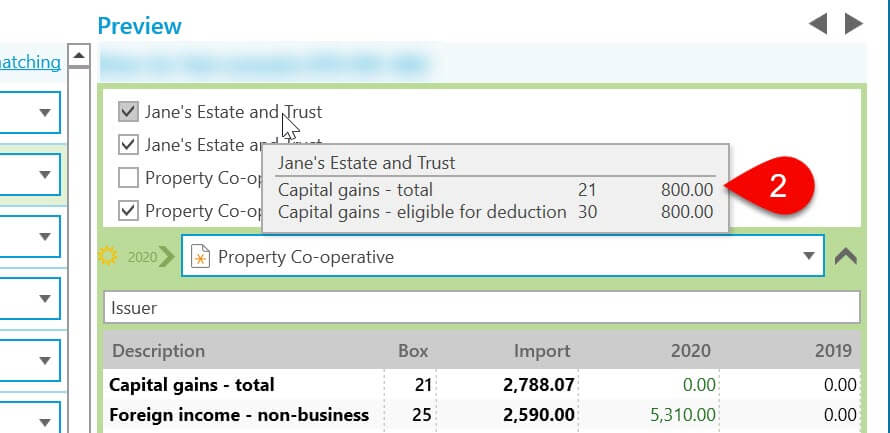
- Once slips are aggregated, all the slips appear listed together on the preview side of the window.
- The aggregated preview shows the totals that will appear on the destination slip.
- Select a different slip from the drop-down to change the destination slip for all the aggregated slips.
- Edit the name of the destination slip in the text field that opens.
- To remove one slip from the aggregated list, find it in the list on the left and change the destination for that one slip.
- For a different way to add or remove slips from the aggregated list, click the down arrow to expand the box and check or clear boxes next to slip names.
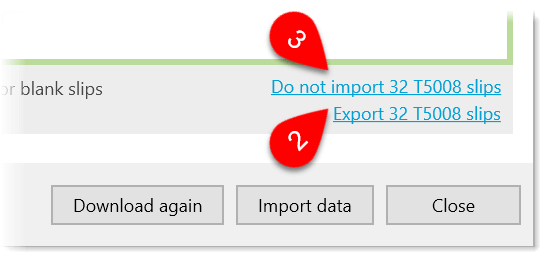
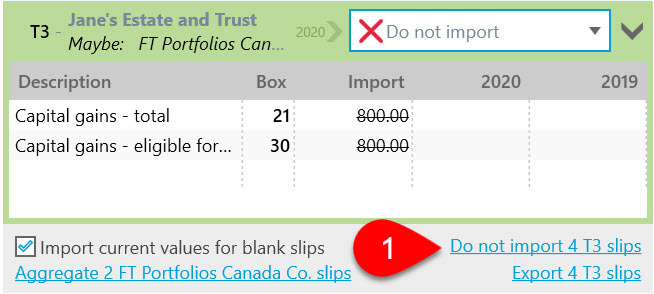
- If you download a large number of slips of a particular type and you don’t want to import any of those slips, click the Do not import slips link for that slip type in the preview page. The link lists the number and type of slip based on what is visible in the preview. This will change all slips of that type to the Do not import selection in the destination drop-down.
- To export all slips of a particular type to Excel, click the export link.
- Once imported, slips with aggregated data have a memo on them listing the names of the source slips. This memo is carried forward from one year to the next and is used to help TaxCycle match downloaded slips with the data already in the return. Do not delete it.
Export Slips to Excel®
To assist with reconciling large numbers of slips with statement information you clients gave you, you can export the downloaded information to Excel®.
- On the matching dialog box, click on one of the slips in the left-hand column.
- Click the Export slips link to create an Excel® worksheet of all the slips in the file.
- To skip importing the slips altogether (for example, if you intend to review reconcile the slips in Excel® and make one entry in TaxCycle later), click the Do not import slips link.
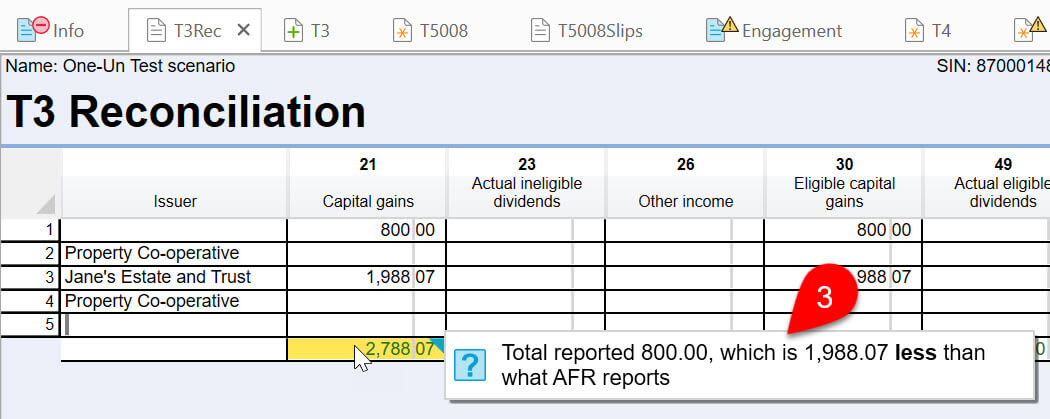
T3 Reconciliation Summary (T3Rec)
The T3 Reconciliation (T3Rec) helps you reconcile multiple T3 slips downloaded from Auto-fill My Return with the statements you receive.
To trigger review messages on the T3Rec:
- Choose Do not import for all the T3 slips in the AFR import dialog box. TaxCycle then takes this data for comparison purposes but will not add it to data entry slips in the tax return.
- Then, enter the data from T3 slips you received by other means onto the data entry slips in TaxCycle.
- On the T3Rec, TaxCycle will detect any variance in the totals between the AFR data and the data you entered, and display a review message.
Download Data Again
Does not change the AFR data over the course of a day (it happens overnight). This means that if you download data in the morning, it will be the same in the afternoon. With this in mind, if you attempt to download a second time, it will jump straight to the match and import screen. From there, you can always click Download again button on this screen to start again.
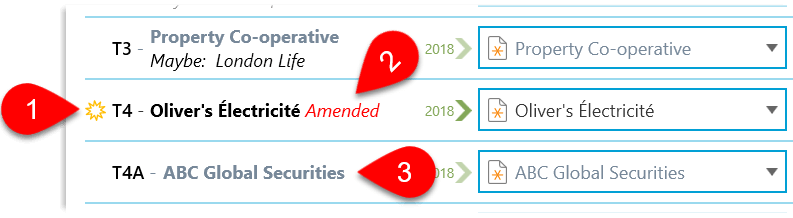
If you download a few days or weeks later, TaxCycle includes some visual indicators to help you see what is new and changed:
- Any new data since the last download has a yellow starburst next to it.
- Any amended slips have the words Amended in red text next to them.
- Rows with data already imported into the return appear in faded text.
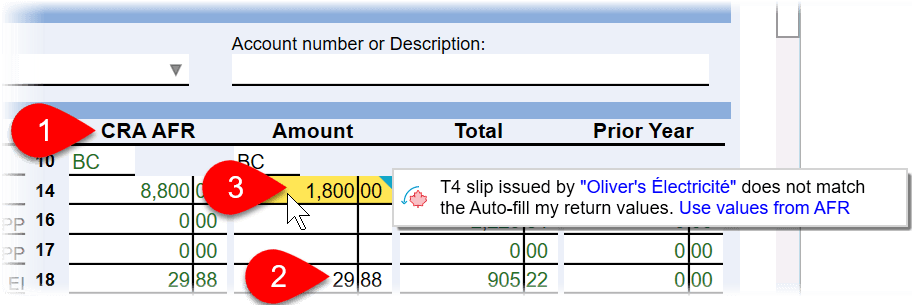
CRA AFR Column on Slips
- On slips with downloaded data, you will see a CRA AFR column.
- If the Amount column is blank, TaxCycle automatically transfers the data from the CRA AFR column to it.
- If TaxCycle finds differences between the CRA data and the data in the Amount column, a review message appears alerting you to the difference and giving you a Quick Fix option for resolving the discrepancy. Click the Use values from AFR link to replace the data in the Amount column with the data downloaded from AFR.
- If the data downloaded does not match directly with a box number and you need to choose which box to place it in, TaxCycle shows a review message Quick Fix option for resolving the discrepancy.
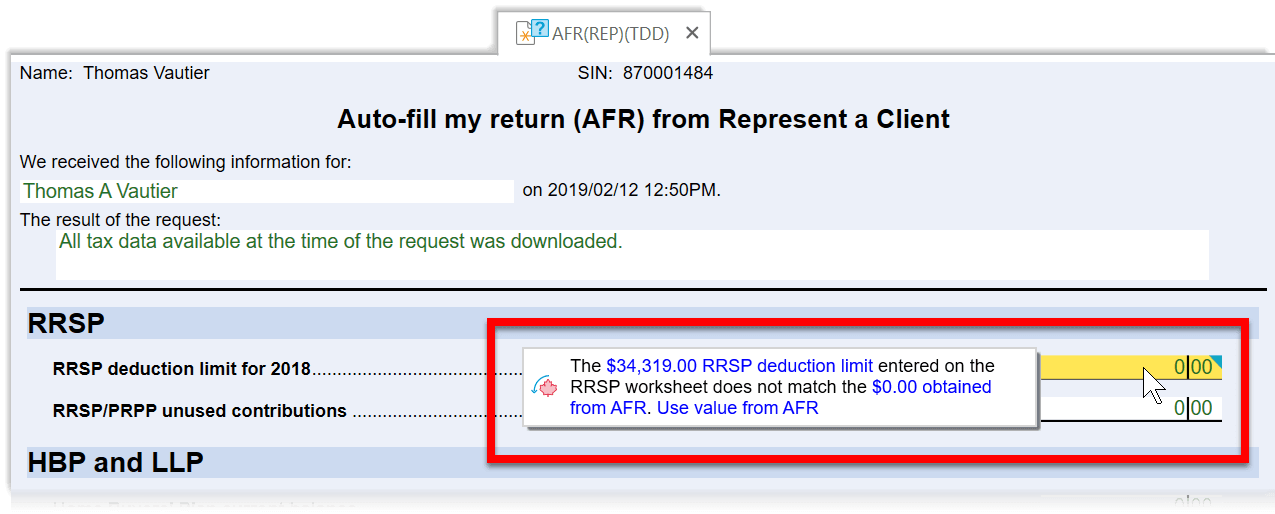
AFR(REP)(TDD) Worksheet
The AFR(REP)(TDD) worksheet summarizes information downloaded from Auto-fill My Return that does not belong on a particular slip. This is information you would see if you were to log into the Represent a Client system.
TaxCycle uses the information inserted in the AFR(REP) summary to check for mismatches between the information in the tax return. For example, it uses this data to trigger review messages if the RRSP deduction limit or Home Buyers’ Plan repayment amounts do not match those on the RRSP worksheet.
(These review messages are only triggered if there is imported data on the summary. If the summary is empty, you will not see the review messages.)
CDE(REP)(SEND) Worksheet
The Client Data Enquiry worksheet—CDE(REP)(SEND)—shows information about the client’s status with the CRA. This includes debt owing to the CRA, bankruptcy, direct deposit, online mail and more. This replaces the information you could previously download using the CRA’s System for Electronic Notification of Debt (SEND).
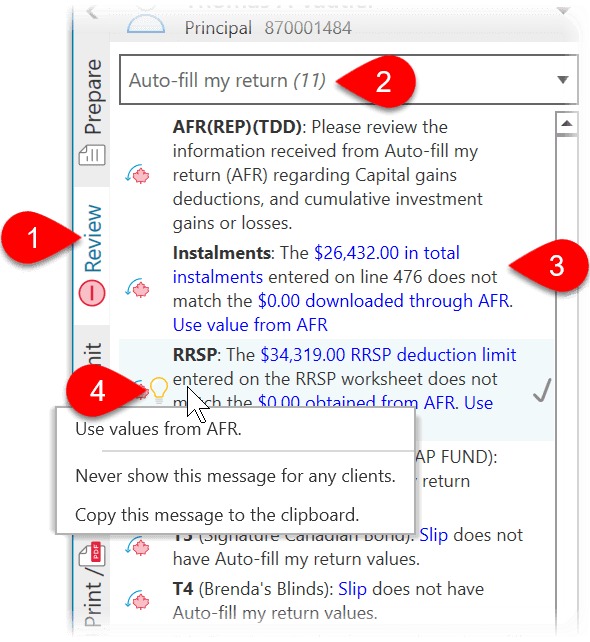
Show All AFR-related Review Messages
- Click on the Review sidebar.
- Choose Auto-fill my return from the views menu at the top of the sidebar to see a list of AFR-related review messages.
- Double-click on a message to jump to the related field.
- Hover over the message, then click on the light bulb to see any Quick Fix solutions. Select one to apply it to the related field.
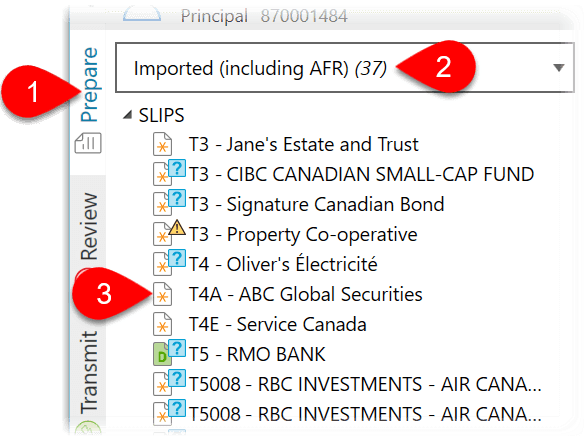
List Forms With Downloaded Data
- Click on the Prepare sidebar.
- Select Imported (including AFR) to see all forms and slips with imported data.
- All slips with imported data have a yellow starburst on the form icon. This makes it easier to recognize these types of slips.
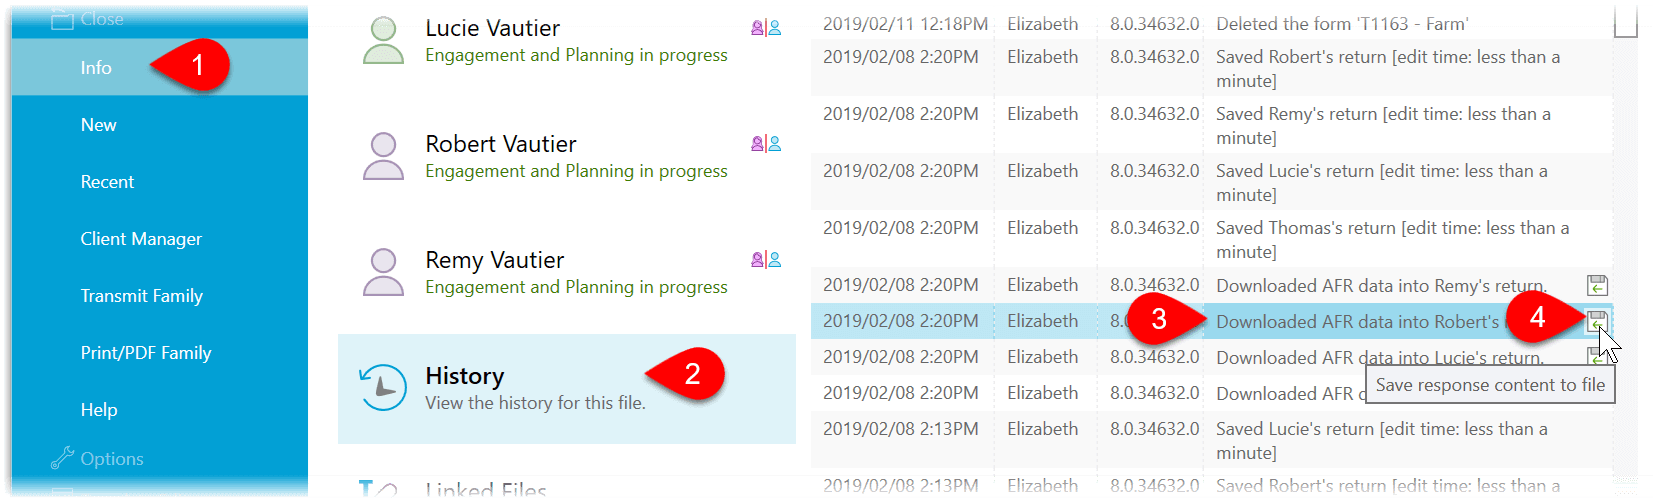
AFR History
Each download and import of AFR data is recorded in the history for the taxpayer.
- Go to the File menu, then click on Info.
- Click on History.
- You will see an entry in the list for the download and one for the import into the
- Click the save button to save a copy of the XML file that was downloaded from the CRA.