T2 Attach-a-Doc
T2 Attach-a-doc allows you to electronically file a corporation’s supporting documentation with the Canada Revenue Agency (CRA) directly from TaxCycle. These are usually documents required for the assessment of a T2 tax return.
Requirements for T2 Attach-a-doc
To upload documents using the T2 Attach-a-doc service, you must:
- Use your EFILE number and password to file. Or, have a Web Access Code (WAC) for the corporation. For information on where to enter these credentials, read the T2 Corporation Internet Filing (CIF) help topic.
- Have filed the initial or amended T2 corporate tax return electronically within the last 24 hours.
- Keep the confirmation number of the T2 return (TaxCycle will automatically retain this for you).
- Limit the size of all documents in a single transmission to 150 MB. You may upload multiple documents in one transmission as long as it doesn’t exceed this size. Or you can make multiple transmissions to send documents that exceed the limit.
Attachable Documents
The type of documents you can transmit with the T2 Attach-a-doc service is limited to a specific list of certificates and documents. This list appears on the AttachADoc worksheet in TaxCycle T2.
You cannot upload documents other than those on this worksheet. Likewise, you cannot use it to transmit documents usually submitted through a CRA My Business Account, or to file T106, T1134 or T1135 returns.
The documents must be in one of the following file types: pdf, doc, docx, xls, xlsx, rtf, txt, jpg, jpeg, tiff, tif, xps.
Complete the AttachADoc Worksheet
To transmit documents to the CRA, you must first complete the AttachADoc worksheet:
- Press F4, type AttachADoc and then press Enter to open the worksheet.
- At the top of the worksheet, check the box to Transmit documents electronically. This opens the rest of the form and the T2 Attach-a-doc box in the Transmit sidebar.
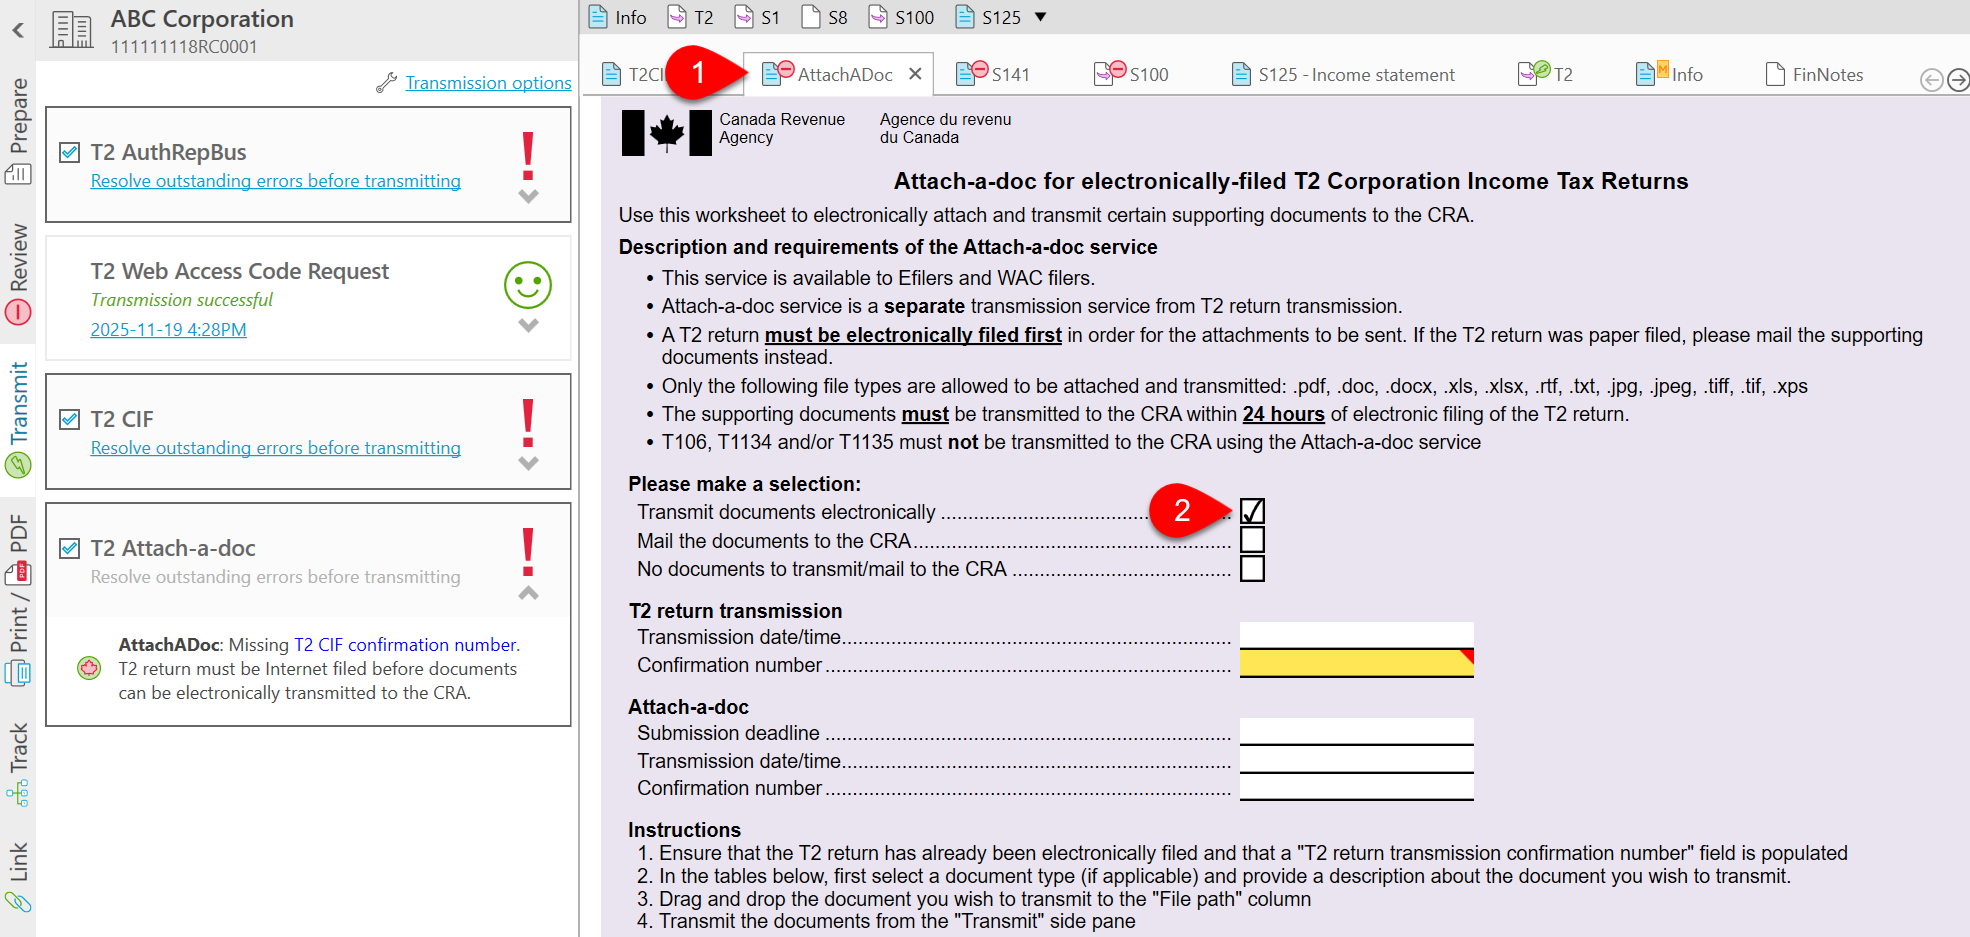
- TaxCycle records the Transmission date/time and the Confirmation number on the worksheet when you file the return. If the confirmation number is missing, TaxCycle shows a review message so you can copy it from the file history. Or you can type it in.
- You must upload documents within 24 hours of filing the return. TaxCycle calculates the Submission deadline based on the Transmission date/time and records it on the worksheet. If you do not transmit by the deadline, you must mail the documents to the CRA.

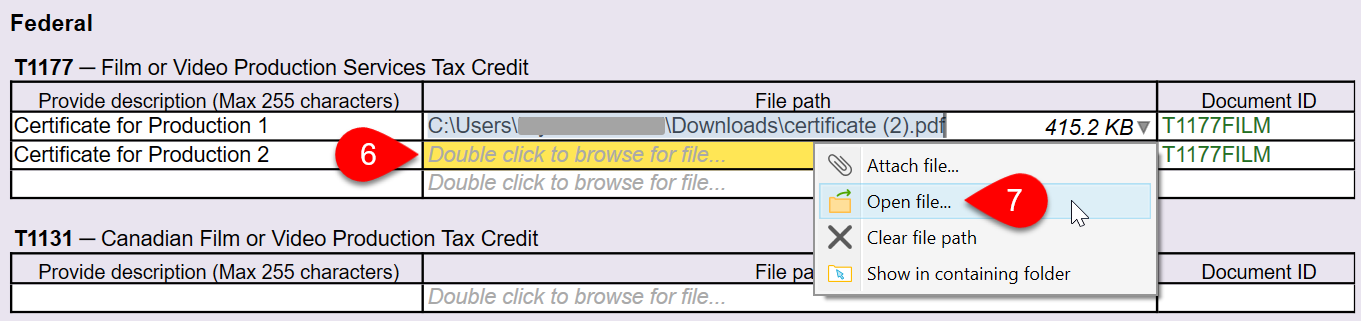
- Find the section on the AttachADoc worksheet that applies to your submission. Complete a row in the table for each document you are attaching.
- Double-click on the File path field to browse for a document. Or, drag and drop the document onto the field. This inserts the path to the document so that TaxCycle can find it upon transmission.
- You can also click the arrow on the right side of the field, or right-click on the field, to attach a file, open an attached file, clear the file path, or show the file in the containing folder.
Transmit Documents
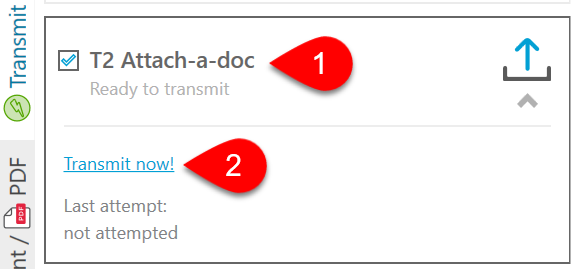
- Once you attach the required documents to the AttachADoc worksheet, the return changes to Ready to transmit in the Transmit sidebar.
- Click the Transmit now! link to begin the transmission.
Successful Transmission Results
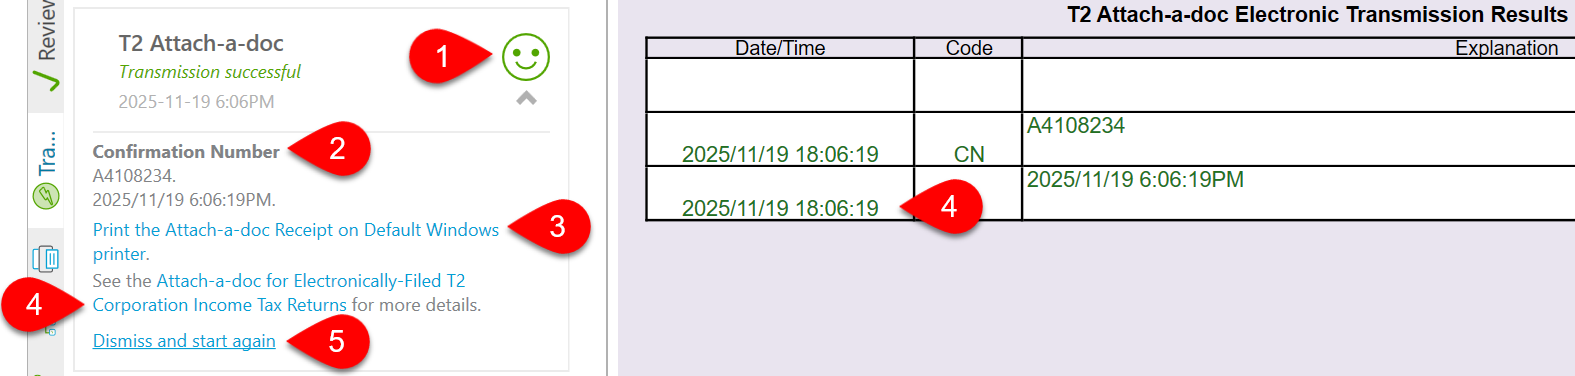
If a transmission is successful, you will see:
- The words Transmission successful in green and a green happy face.
- The box also shows the Confirmation Number for future reference.
- Click the Print the Attach-a-doc Receipt link to print a copy of this information for your records.
- Click the link to view the transmission results table at the bottom of the AttachADoc worksheet. It contains a full list of the results from all transmission attempts.
- To transmit a second document, click Dismiss results and start again.
Rejected Transmission
If a transmission is rejected by the CRA due to errors, you will see:
- The words Transmission rejected in red and a red sad face.
- Any error messages received from the CRA also appear in this box, starting with the error number. This number may be useful if you need to contact the CRA regarding an error. The longer error description usually contains information on what went wrong with the transmission, so you can work to correct it.
- Click the link to view the transmission results table on the AttachADoc worksheet. It contains a full list of the results from all transmission attempts.
- When you have resolved the issue, click Dismiss all CRA messages and start again to retransmit.