Corporate Information (Info) Worksheet
The first form you see when you create or carry forward a new T2 file is the Corporate Information or Info worksheet.
Enter the corporation’s contact and filing information on this form. If you carried forward the return, much of the information already comes from the prior year (it will appear in purple text), but you’ll still want to review it to make sure you’ve answered all applicable questions.
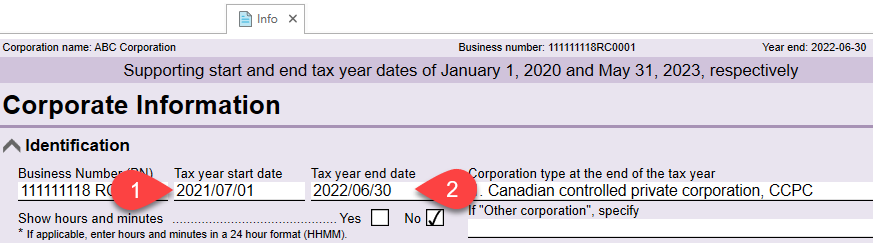
Corporate Tax Year
At the top of the form, set the tax year:
- In the Tax year start date field, enter the start date (yyyy/mm/dd) and press Tab or Enter.
- TaxCycle automatically adds the Tax year end date. For a short tax year, you can click in the Tax year end date field to change the end date without using an override.
- To enter a new tax year date, clear both Tax year start date and Tax year end date and start again.
Tax Year End Date Not Supported
If you enter a year start and end date and the year end falls after the CRA certification period, you will see a message on the Tax year end date field on the Info worksheet:
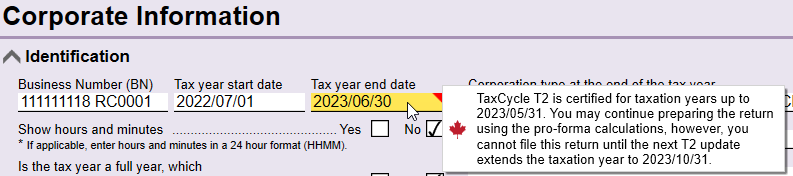
A similar message will appear if you try to create a new file and enter the dates on the Start screen:

These messages appear when the corporate tax year falls outside of the dates for which TaxCycle T2 is certified to file returns with the CRA (and other provincial government authorities).
It is most common to see these messages when there is a gap between the certification period and an updated version of TaxCycle T2. If you see this message, you can continue creating the return and entering data. TaxCycle will use pro forma calculations and rates.
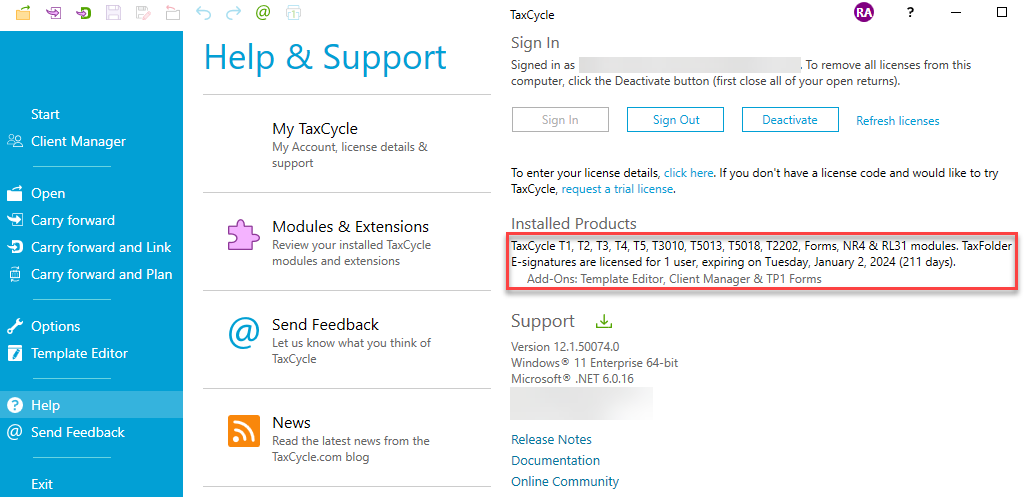
It does not mean your license has expired. During your license period, you get free updates to TaxCycle T2. This includes updates that extend the T2 certification. You can check to see when your license expires by going to the File menu then clicking on Help. The date appears in the list of Installed Products.
Usually, the certification is extended twice a year, around October/November, and again around May/June. Keep an eye out for a TaxCycle T2 software update that extends the certification and be sure to install it when it comes out. Then, you’ll have the latest forms and calculations and you can file the return.
Jurisdiction and Residency
TaxCycle uses the jurisdiction information to show and hide forms and sections on forms based on what jurisdictions apply.

- Set the jurisdiction in the Residency section at the top of the second page of the Info worksheet.
- For multiple jurisdictions, check all the provinces and territories that apply.
For example, sections on the Info worksheet that apply to Alberta only appear if you check Alberta as a jurisdiction. At the same time, the section for Ontario disappears. (This also applies to forms like Schedule 5.) Similarly, the AT1-related forms are only available to you if Alberta is the jurisdiction. CO-17 forms appear if the corporation is based in Québec.
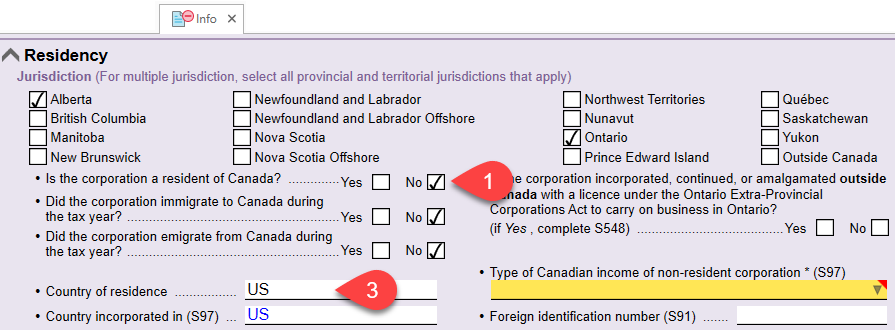
Non-Resident Corporations
For non-resident corporations:
- Answer No to the question Is the corporation a resident of Canada? in the Residency section on the Info worksheet.
- Additional fields (and forms) related to the non-resident status appear only once you check this box.
- Enter the Country of residence and other information about the corporation’s non-resident status.
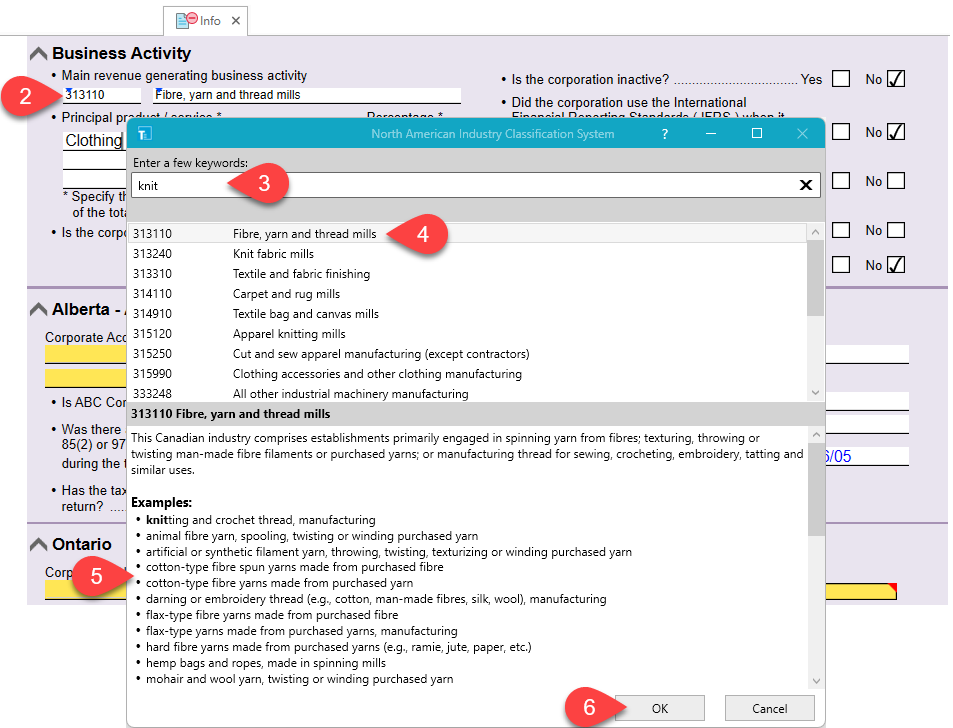
NAICS Industry Code Search
- In the Business Activity section, click in the field labelled Main revenue generating business activity.
- Press F6, press the Jump button in the Home menu, or right-click on the field and choose Select Industry Code.
- In the dialog box that appears, type a keyword to narrow the results.
- Click once to select a code.
- In the preview pane at the bottom of the box, you will see detailed information and examples of the types of industries matching that code.
- Press OK to save the selection and return to the field.
- You can also type the code in the field if you know it. Or, type a keyword to narrow the results. When you find a matching code, press Enter to select it.