Menu

Background Layers

Updated: 2021-01-25

You can add an image as the Background Layer of any template. When printing to PDF or paper, TaxCycle inserts the image as a layer under the text of the template. This image does not show in the preview on-screen.

This setting makes it possible to add an image as letterhead that spans the entire width of the page—just like with preprinted letterhead—or to add a footer to every page of the printed or PDF document.

Supported image formats are: PNG, BMP and JPG
Add a Background Layer to a Template

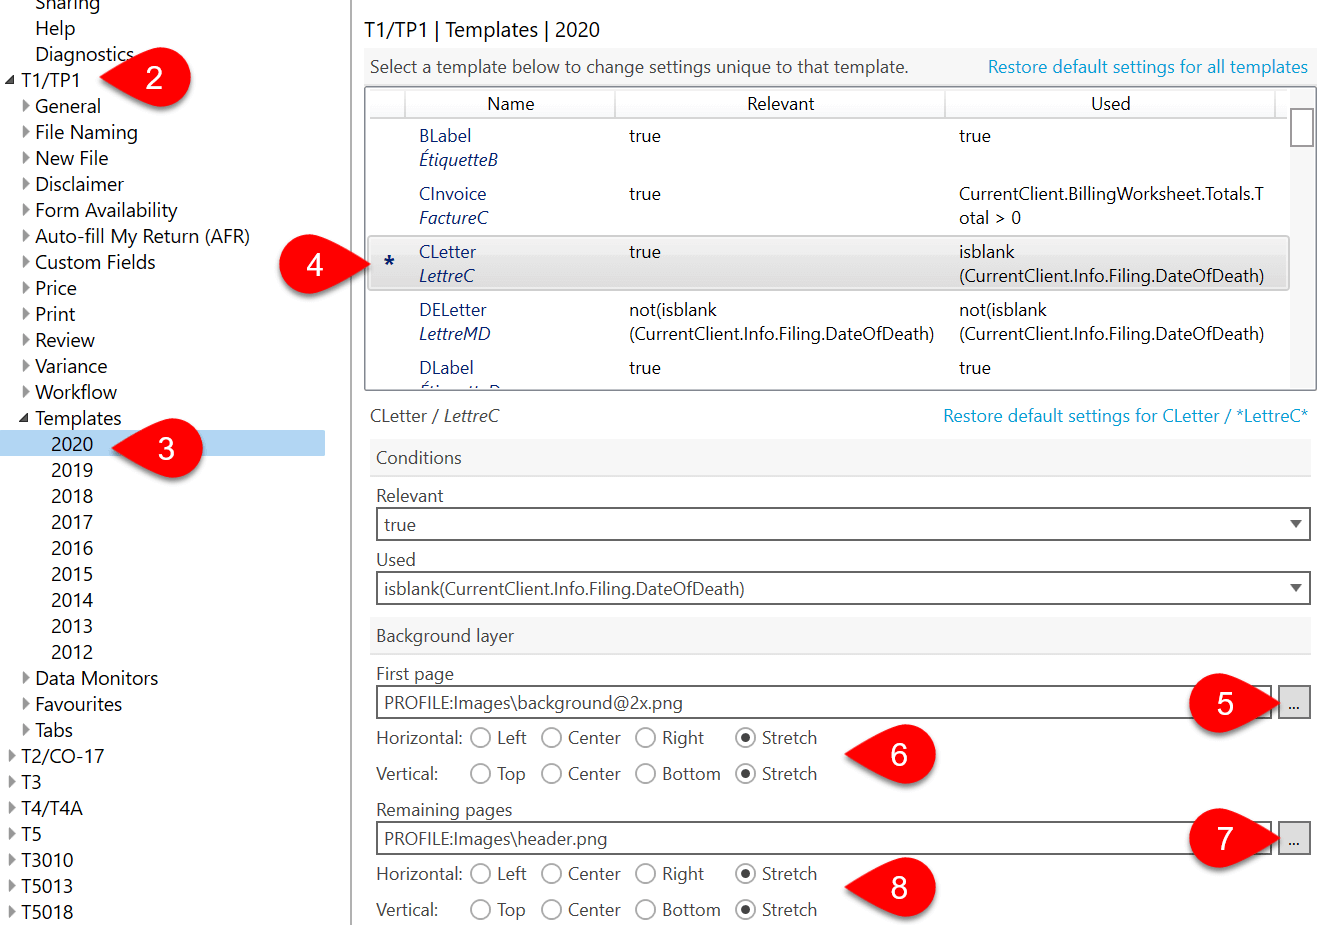
  1. To open Options from the Start screen, click Options on the left side. If you have a file open, go to the File menu, then click Options.
  2. On the left side of the dialog box, expand the T1/TP1 section (or a section for another tax module).
  3. Expand Templates and click on a year to set print options for a particular year.
  4. Select a template from the list to change its settings.
  5. In the Background layer section, browse for an image to add only to the First page of the template.
  6. Choose how to position this image on the printed page.
  7. To add a background layer to all the Remaining pages of the template, browse for an image.
  8. Set the position for the image on the page.
    Screen Capture: Template Module Options
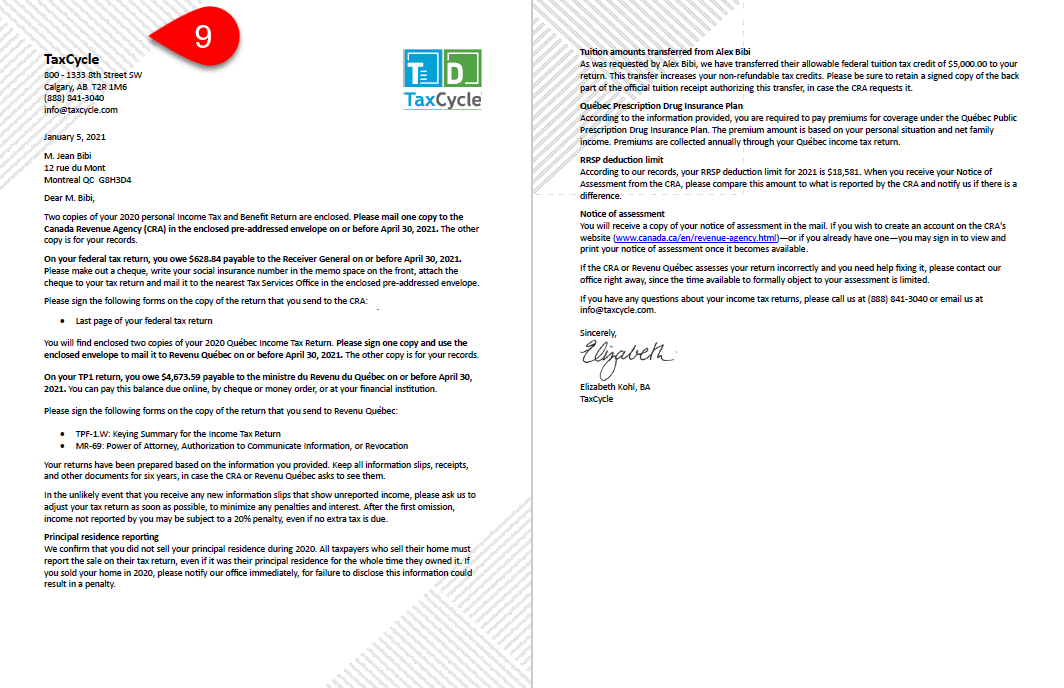
  9. Test the display and printing of the background image by printing or generating a PDF of that template from a TaxCycle tax return.
    Screen Capture: Background Image Preview
  10. If you want to remove the built-in letterhead, we recommend cloning and editing the Letterhead snippet (rather than cloning and editing your letters to remove the reference to the snippet). Delete all the content and insert line breaks (press the Enter key) to make blank space at the top of any template that uses the letterhead. You may need to test this out to get the right amount of blank space for your background layer letterhead.