Custom Fields
In any TaxCycle file, you can add custom, personalized fields and use the data in templates and data monitors.
Custom Fields Options
Configure default custom fields in options to add them to the CustomFields worksheet when you create a new file or carry forward a file from the prior year.
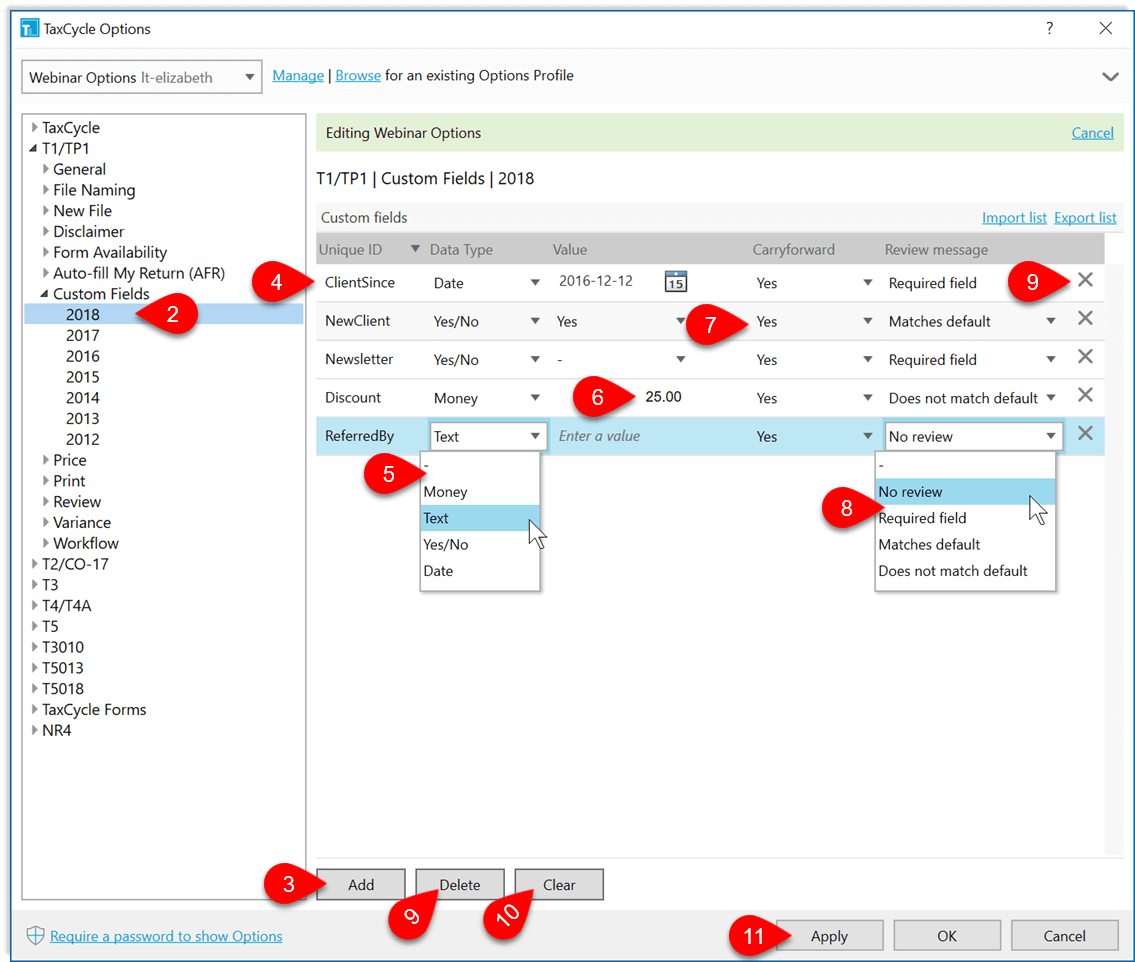
- From the Start screen, click Options in the blue bar on the left side. If you have a file open, go to the File menu, then click Options.
- On the left, expand T1/TP1 (or a different module), expand on Custom Fields and click on a year.
- On the right, click the Add button to create a new field.
- In the Unique ID column, you can either use the value created, or enter your own. It can be helpful to enter your own as it will be more recognizable when using the field in templates. IDs cannot contain spaces.
- In the Data Type column, choose the type of field to create. It can be any of the following:
- Text—This is a text field you can type into.
- Money—This field allows you to enter a number that is money with a two-digit decimal place.
- Yes/No—This shows two check boxes allowing only one to be checked.
- Date—Enter a full date, year, month and day.
- In the Value column, set the default value for the field on the CustomFields worksheet.
- In the Carryforward column set the default whether to carry forward the data entered in the field on the CustomFields worksheet to the following year:
- Yes—Defaults the Carryforward column to Yes on the CustomFields worksheet.
- No—Defaults the Carryforward column to No on the CustomFields worksheet.
- Always—Always carry forward the value, regardless of what is selected on the CustomFields worksheet.
- Never—Never carry forward the value, regardless of what is selected on the CustomFields worksheet.
- In the Review message column, choose whether a review message should display and in what circumstance:
- No review—Never triggers a review message for this field.
- Required field—Triggers a review message to remind you to complete the field on the CustomFields worksheet.
- Matches default—Triggers a review message if the contents of the field on the CustomFields worksheet match the default value set in options.
- Does not match default—Triggers a review message when the contents of the field on the CustomFields worksheet is different from the default set in options.
- To delete a custom field from options, click the X on the far right of the row. Or, select one or more fields and click the Delete button.
- To remove all fields from the options page, click the Clear button.
- When you finish your changes, click the Apply or OK button to save them.
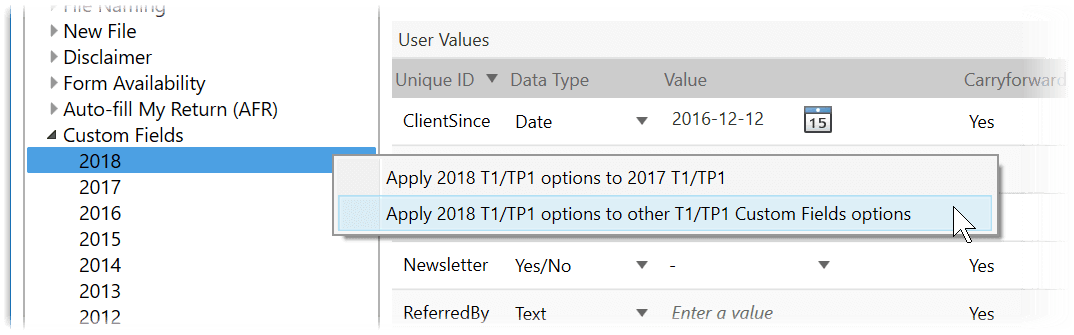
Copy Options to Other Years
Right-click on the year in the sidebar to copy the default fields to other years.
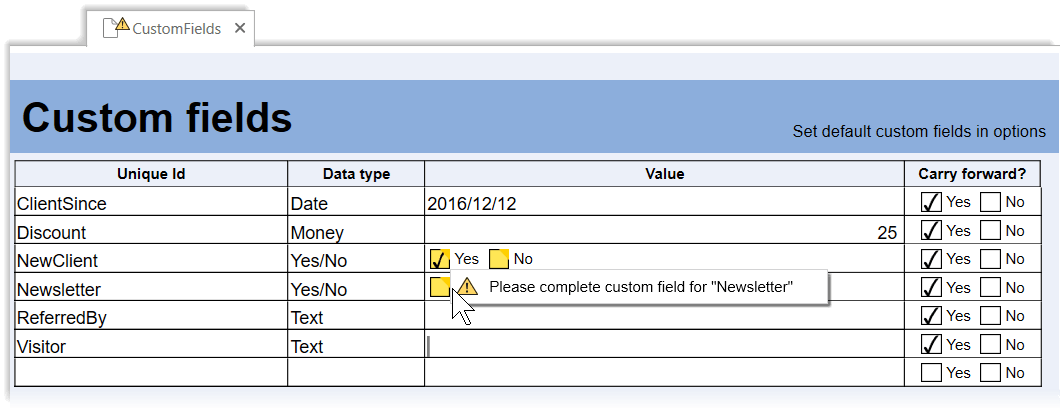
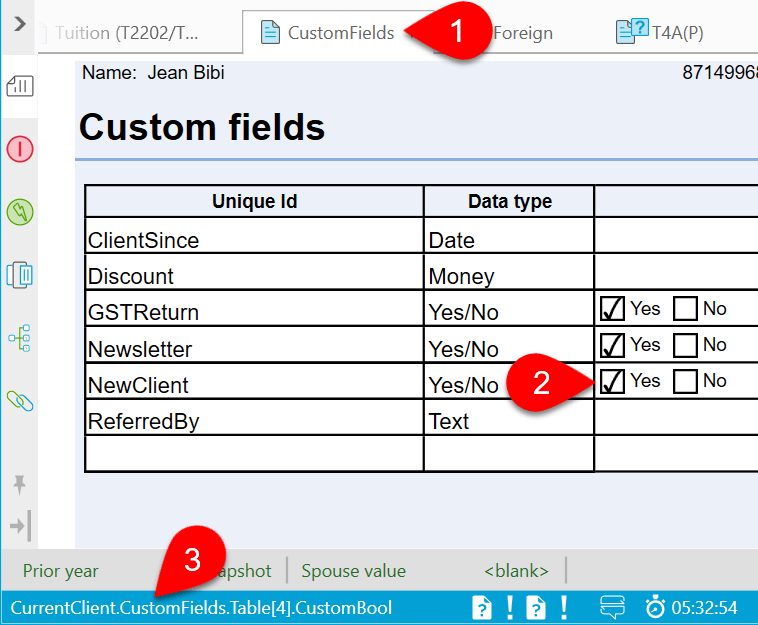
CustomFields Worksheet
Custom fields and the data they contain reside on the CustomFields worksheet. The table in the worksheet allows you to add as many custom fields to a file. However, if you want to set up fields that are added to all files, you should first configure the fields in module options.
Use Data From CustomFields in Templates
You can reference the Unique ID in a template code to reference the data in the custom field. Use this to display the contents of a custom field, show or hide parts of a template based on the contents of a custom field or set a template condition. See Custom Fields in Templates.
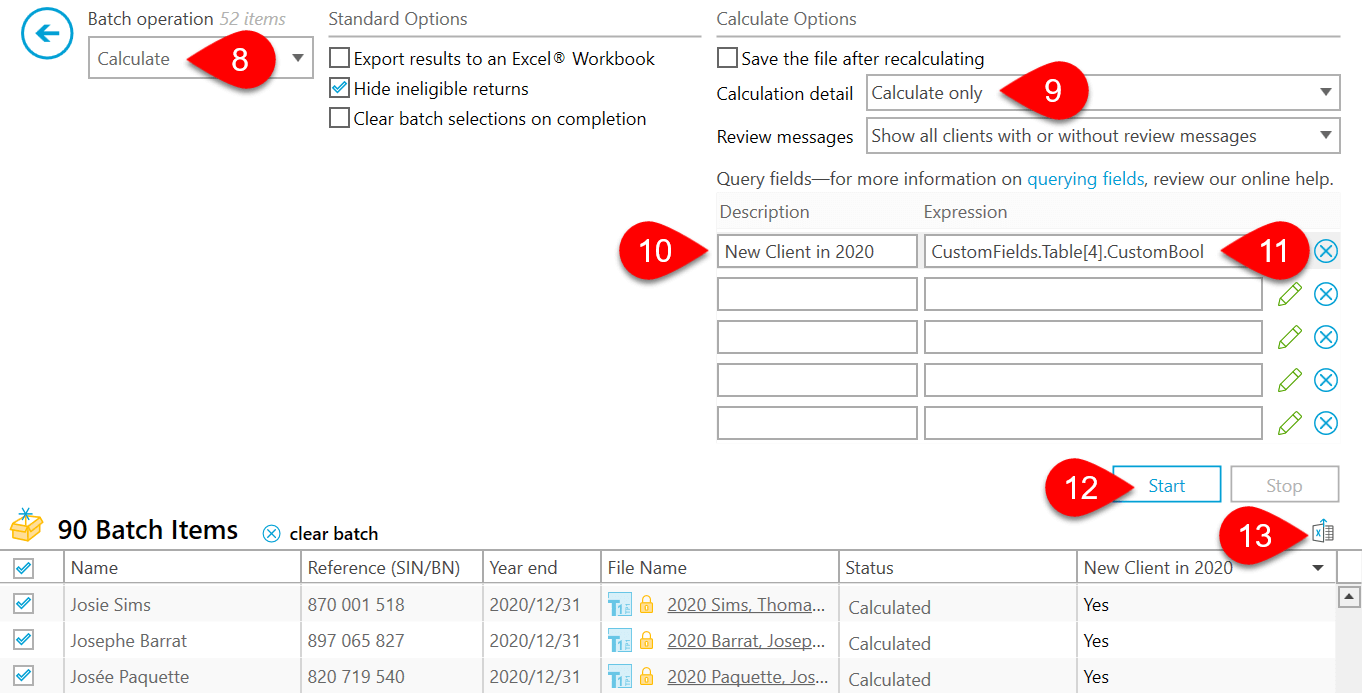
Query the Client Manager Using a Yes/No Field
You can use the Batch Calculate function in the Client Manager to identify clients based on a Yes/No customer field. Then, you can export the results to Excel.
- Go to the CustomFields worksheet.
- Place your cursor in the Yes/No check box.
- At the bottom of the window, hold down Ctrl+Shift and click on the field code to copy it to your clipboard. (Holding down these keys removes the {{}} curly braces and the CurrentClient. prefix from the code.)
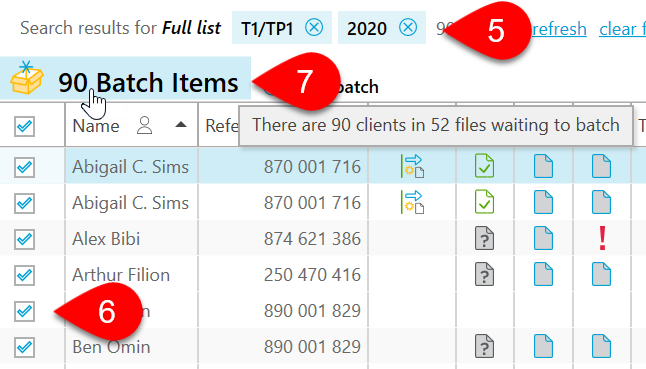
- Go to the Client Manager (F3).
- Filter the results to return type and years that contains the field you need. For example, 2020 T1 returns.
- Check the boxes in the column at the far left to add to batch. Or, to select all the boxes in the column, check the box in the heading of the column.
- Click the Batch Items to go to the batch screen.
- Select Calculate.
- Select Calculate only from the Calculation detail field.
- Enter a Description for the query field. This appears in the column heading.
- Paste the field code into the Expression field. (Remember to remove the {{}} curly braces and the CurrentClient. prefix from the code.)
- Click Start to run the batch calculation.
- Export the results to an Excel workbook.