TaxCycle

Create an Organization Options Profile

Changes to the organization profile are made online. See Organization Settings to learn more.

If you need a group profile, read the Create a Group Options Profile help topic. For more information on options profiles in TaxCycle, read the Options Profile help topic.

Create a New Organization Profile

  1. To open Options from the TaxCycle Start Screen, click Options on the left side. If you have a file open, go to the File menu, then click Options.

  2. Click Add Profile.

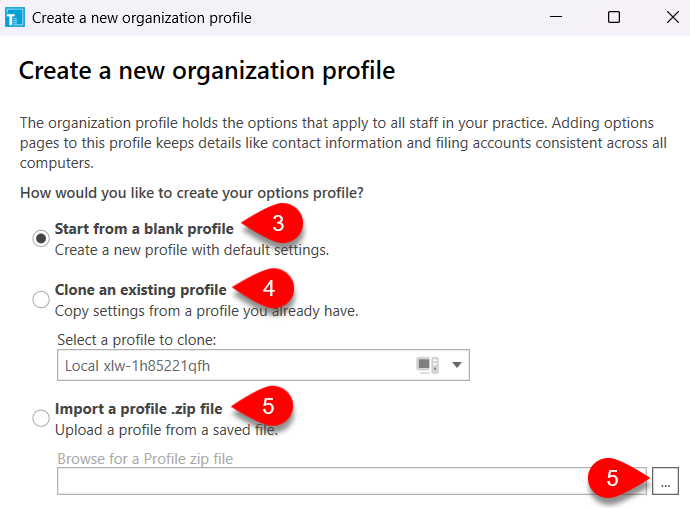
  3. Select Start from a blank profile to create a new profile with TaxCycle’s default settings.

  4. Select Clone an existing profile to use another profile as a starting point. Select the profile you’d like to clone from the dropdown menu.

  5. Select Import a profile .zip file to upload a profile from a saved file. Browse to the folder where the options ZIP file is saved on your computer or network and double-click it to load it.
    Screen Capture: Create a new options profile

  6. Click Next.

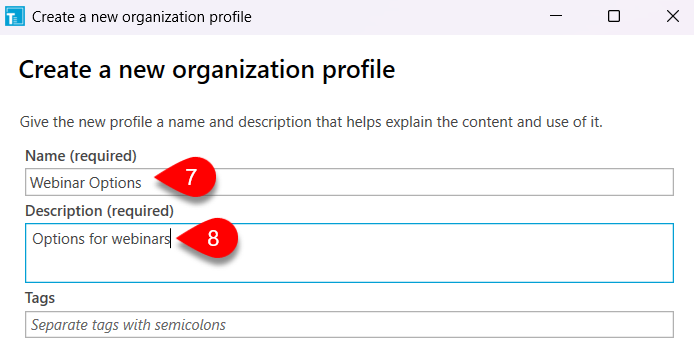
  7. Enter a name for the profile.

  8. Enter a description.
    Screen Capture: Profile name and description

  9. Click Next.

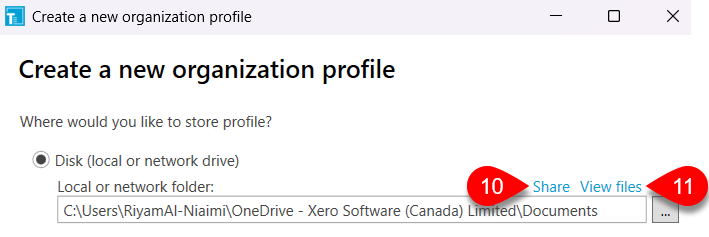
  10. Browse to the folder where you want to save the profile on your computer or network. To share it on the network, click Share or enter a full network path. For example,\\mycomputer\sharedfolder.

  11. To see what is already in the folder you selected, click View files.
    Screen Capture: Store options profile on disk

  12. Click Next.

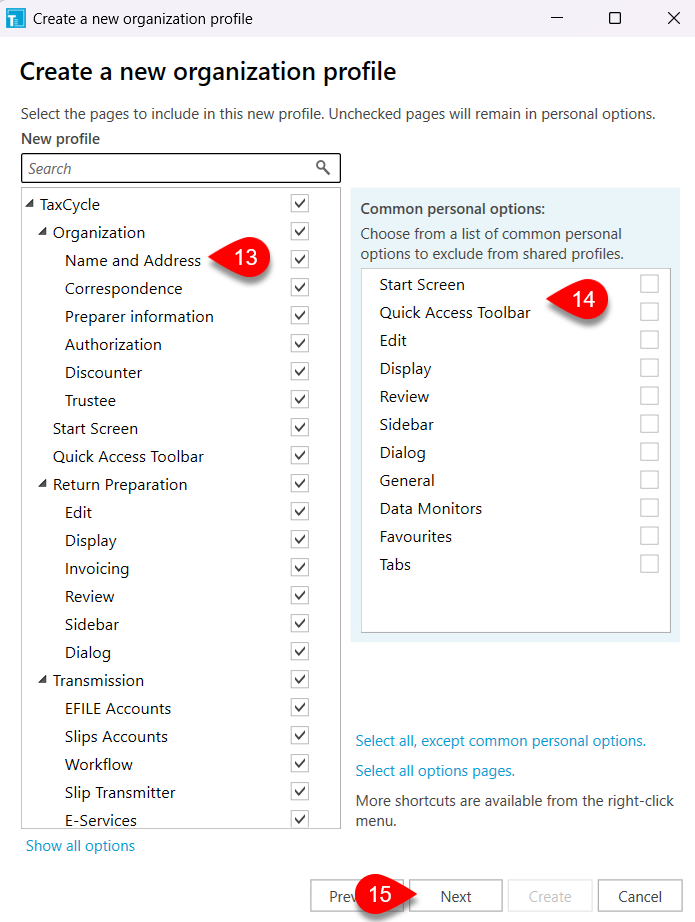
  13. Check boxes in the tree on the bottom left to include pages of options in the profile. This allows you to share only the options you want. Clear the boxes in the tree on the bottom left to exclude pages of options from the profile. Anyone using the shared profile can set Local options for pages not in the profile. 

  14. On the right, choose from a list of common personal options to exclude from shared profiles.

  15. Click Next to review the details of your profile.
    Screen Capture: Select options pages to include

  16. Click Create to complete the profile.