Updated: 2023-02-13
The Pre-Authorized Debit (PAD) web service offers preparers an electronic method to submit a payment to the CRA on behalf of a taxpayer. Use it instead of printing the T7DR(A) which requires your client go to their bank to make a payment.
The service is available for paying an amount owing on current year T1 tax returns. It is not to be used to pay any other amount due to CRA, such as a balance due on prior year returns.
You can use PAD to make multiple payments for a taxpayer; however, only one request can be active at a time. You cannot make another request until the payment date of the active request has passed. Any attempt to do otherwise will generate an error message.
The preparer must keep the signed T185 from on file should the CRA request it. To cancel or make changes to a PAD agreement, you must go online to the CRA My Account or Represent a Client.
EFILE Number and Password
To file electronically with the CRA, you must have an EFILE number and password:
- To register for EFILE and receive these credentials, go to the CRA's EFILE for electronic filers page.
- If you already have an EFILE number, you must complete a yearly renewal to receive a new password for the latest T1 tax season. Always use the latest password given to you.
The registration or renewal process includes a suitability screening. This process may take up to 30 days. To allow enough time for the review of your application before the filing season starts, we encourage you to renew your application as soon as possible.
Enter the CRA EFILE number and password in TaxCycle options:
- If you have a file open, go to the File menu, then click Options. To open Options from the Start screen, click Options in the blue bar on the left side. (You can also access these EFILE options any time by clicking on the wrench icon in the Transmit sidebar.)
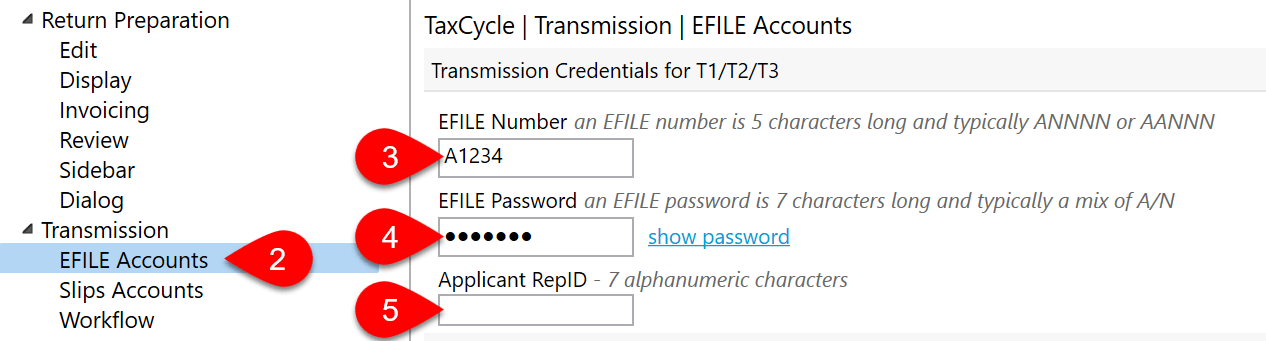
- On the left side of the screen, expand Transmission, then click on EFILE Accounts.
- Enter your CRA EFILE Number.
- Enter your current CRA EFILE Password. (As soon as you renew your account, you can use it to transmit returns.)
- (Optional) Enter your CRA RepID. This field is optional for the 2023 filing season; leave it blank if you do not have a valid RepID within the list of EFILE applicants.
Complete Form T185
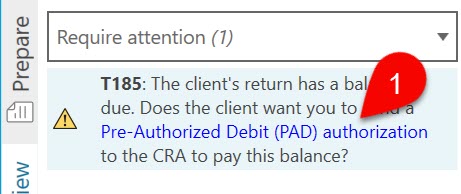
- When a taxpayer has an outstanding balance on their tax return, TaxCycle displays a review message suggesting making a PAD request in the Pre-Authorized Debit (PAD) box in the Transmit sidebar. Click the link in the message to open form T185, Electronic Filing of a Pre-authorized Debit Agreement.
- TaxCycle completes Part A of the T185 based with details from the Info worksheet.
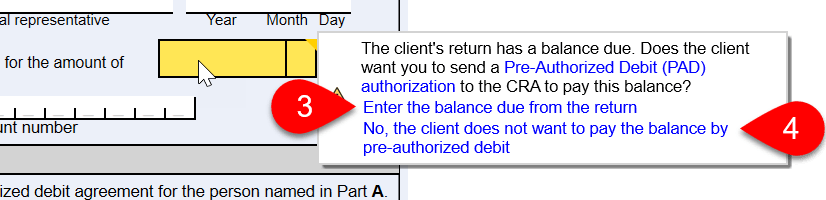
- In Part B, hover over the amount field to choose how to respond to the review message. Click the link to Enter the balance due from the return. TaxCycle inserts the amount into the field, but you may still edit it. The taxpayer can choose to pay different amount (less or more) if he/she wishes.
- If the taxpayer does not want to pay by PAD, then click the link No, the client does not want to pay the balance by pre-authorized debit.
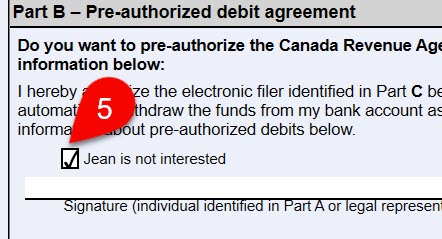
- If you indicate that the taxpayer does not want to use PAD, TaxCycle checks the not interested box on the form.
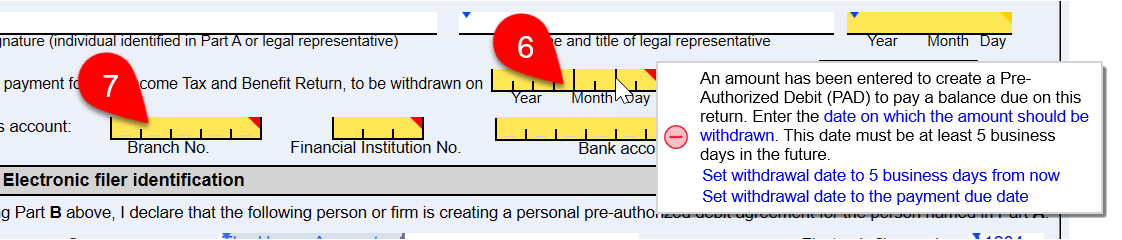
- Enter the withdrawal date, which must be at least five business days in the future but cannot be over a year in the future. TaxCycle includes a Quick Fix message to help you enter a valid date.
- Carefully enter the taxpayer's banking details. Errors may delay the request.
Signing the T185
The taxpayer must sign the T185 before you can transmit the PAD agreement. The CRA permits electronic signatures on this form. When collecting an e-signature, the T183 form must report the date and time the form was electronically signed. This information is then transmitted to the CRA through T1 EFILE. To learn how to send a document for signature, see the Request Signatures via TaxFolder from TaxCycle and Electronic Signatures With DocuSign® help topics.
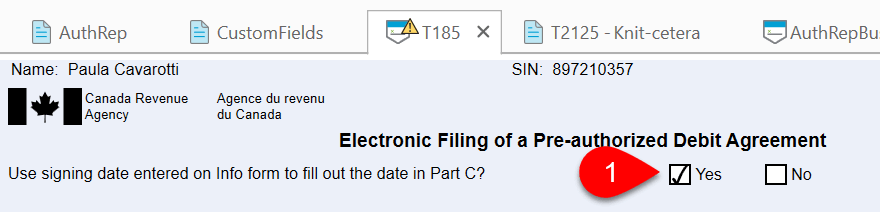
TaxCycle provides several options for entering the signing date on this form:
- Answer Yes to the question at the top of the T185 to insert the current date when printing the form and TaxCycle will insert the date when printing the form. This is most useful when you have a client in your office to sign documents. If you answer No to the question at the top of the T185, you must type the date into the field on the form.
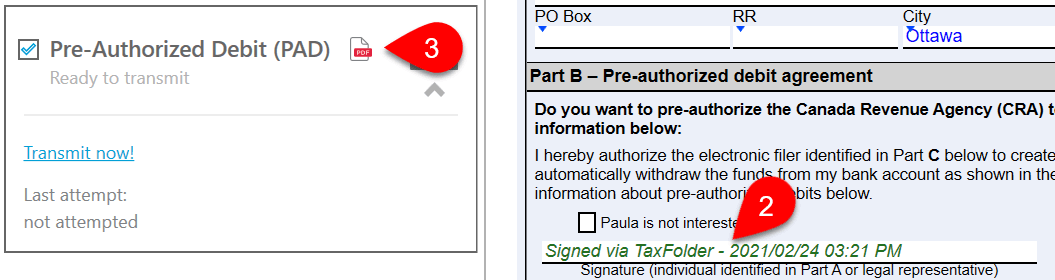
- If you send the form for electronic signature through TaxFolder or DocuSign®, TaxCycle automatically records the signing date and time when the document was signed.
- You can download a signed copy of the form by clicking the PDF icon in the Transmit sidebar.
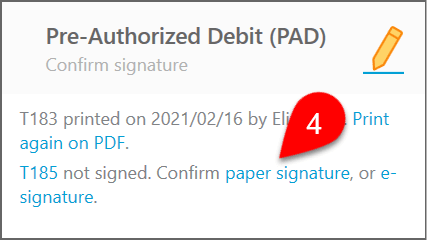
- If you collect a signature by any other method, such as collecting a signed scanned copy or using Adobe® Reader, TaxCycle does not record the date and time the document was signed. Once you have a signed T185 on file, click the paper signature or e-signature link. TaxCycle records the signing date and the name of the person who confirmed the signature.
It is very important that you keep this signed form in your files should the CRA ask for it. They regularly check with preparers. However, you can disable the signature confirmation step. This skips the confirmation step, but will still see links to print and optionally log the T185 signature before transmitting. To learn how to do this, see Disable Signature Confirmation section in the Transmission Options help topic.
Transmit a PAD Request
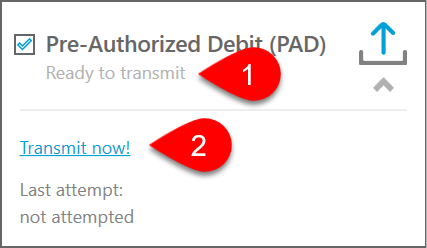
- Once you confirm the signature, the request is Ready to transmit.
- Click the Transmit Now! link to begin the transmission.
You can also transmit PAD requests at the same time as you EFILE using Transmit family or Transmit multiple. Learn how in the following help topics: Transmit Family and Transmit Multiple.
Successful Transmission Results
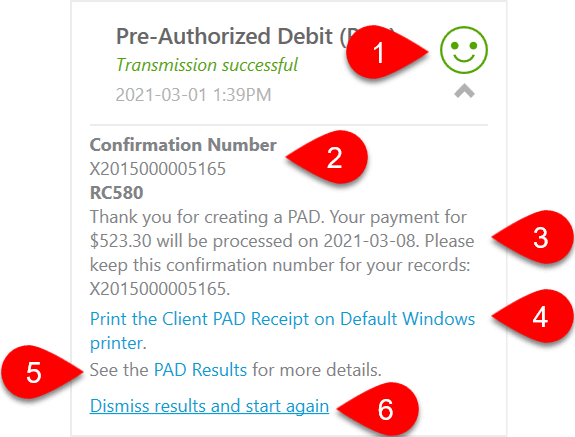
- If a transmission is successful, you will see the words Transmission successful in green text and a green happy face. This is the same symbol that appears in the Client Manager for a successful transmission, and it also appears (white on blue) in the blue bar at the bottom of the window of any open tax return, so you can quickly see the current status.
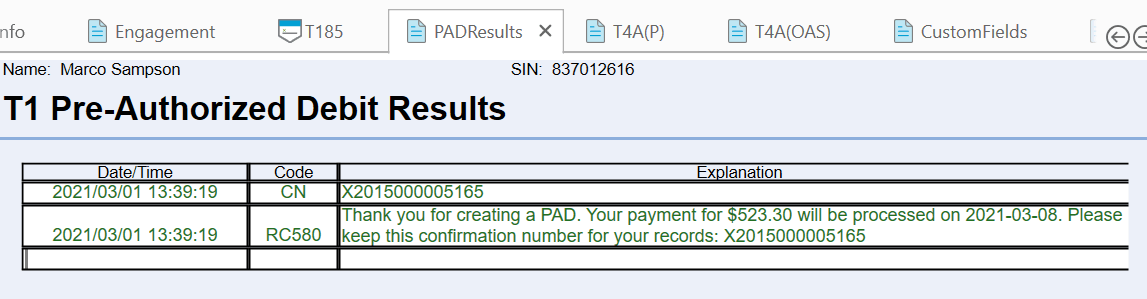
- The box also shows the Confirmation number for future reference.
- Any messages returned from the CRA appear in this box. They begin with the number.
- Click the Print the Client PAD Receipt link to give a copy of this information to your client.
- Click the PAD Results link to view the worksheet which contains a full list of the results from all PAD transmission attempts.
- If you wish to transmit a new PAD request, click Dismiss all CRA messages and start again. Please be aware that after successfully transmitting a PAD request, you cannot make another request until the payment date has passed. Any attempt will generate an error message.
- If a transmission is rejected, you will see the words Transmission rejected and a red sad face. Any error messages received from the CRA also appear in this box. When you have resolved the issue, click Dismiss results and start again to retransmit.
PAD Results Worksheet
The PAD Results worksheet lists the results of any attempts to electronically submit a PAD request. Regardless of a successful or failed transmission, TaxCycle records the time and the result of the transmission, so you always have a complete record of transmission attempts and returned messages, even if you have to retransmit the return.
Transmission History
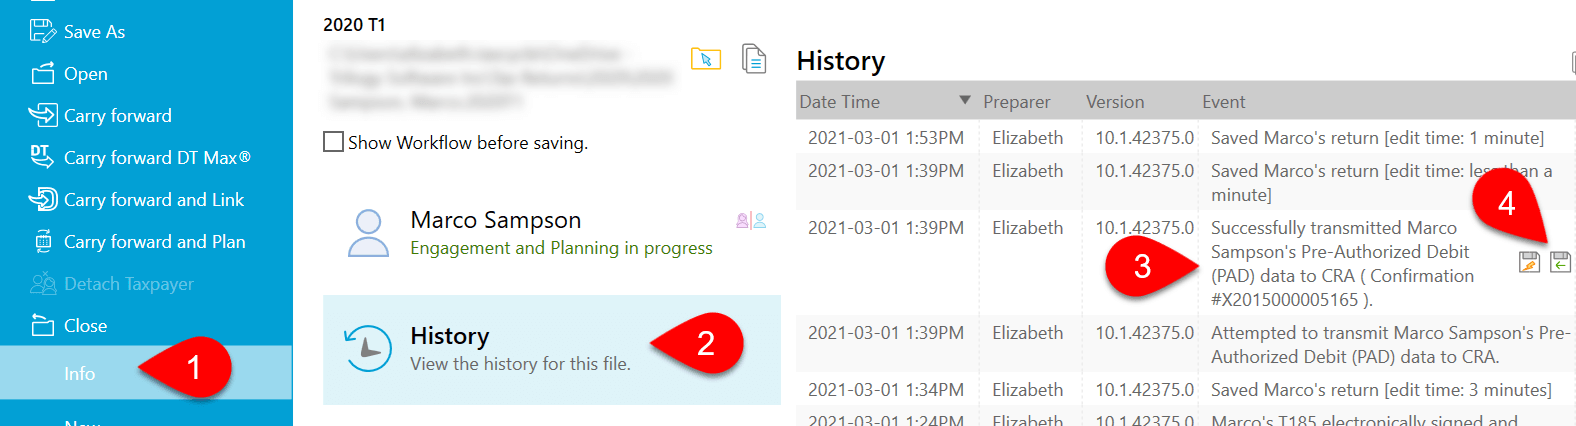
Each transmission attempt is recorded in the file history:
- Go to the File menu, then click on Info.
- Click on History.
- Find the record of the transmission in the list.
- Click the first save button (the one with the lightning bolt) to save a copy of the XML file that was transmitted to the CRA.
- Click the second save button (the one with the green arrow) to save a copy of the response sent back from the CRA.
- TaxCycle also updates the workflow information for the taxpayer. (See the Workflow Groups and Tasks help topic.)
Default the PAD to "Not Interested"
A New File option allows you to default the Pre-Authorized Debit (PAD) field on the T185 to "not interested." To set this option:
- From the Start screen, click Options in the blue bar on the left side. If you have a file open, go to the File menu, then click Options.
- On the left, expand T1/TP1 and click on New File to apply the settings to all years. To set different options for a particular year, expand the section and click on a year.
- On the right, scroll down to the section for T183 Default values and select Taxpayer does not wish to use Pre-Authorized Debit.
- The not interested box in the PAD section of the T185 will be checked by default on new files whether blank or carried forward. If this option is different than what is set on the form, a review message appears in any existing files.

Disable PAD Transmissions
If you do not wish to arrange pre-authorized debits for your clients, you can disable PAD transmissions from TaxCycle entirely in options:
- If you have a file open, go to File menu, then click Options. To open Options from the Start screen, click Options in the blue bar on the left side. (You can also access these options any time by clicking on the wrench icon in the Transmit sidebar.)
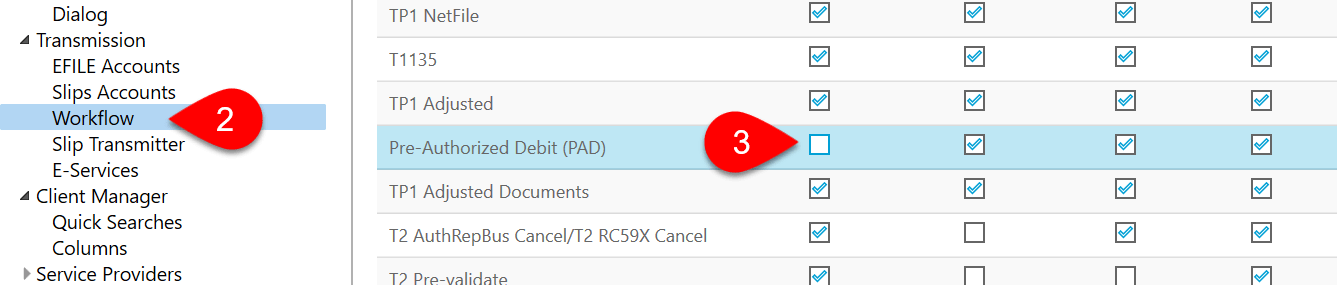
- On the left side of the screen, expand Transmission and then click on Workflow.
- On the right-hand side of the window, scroll to the table. In the row for Pre-Authorized Debit (PAD) transmissions, clear the check box under the Can Transmit column. This hides the PAD box from the Transmit sidebar and any related review messages.