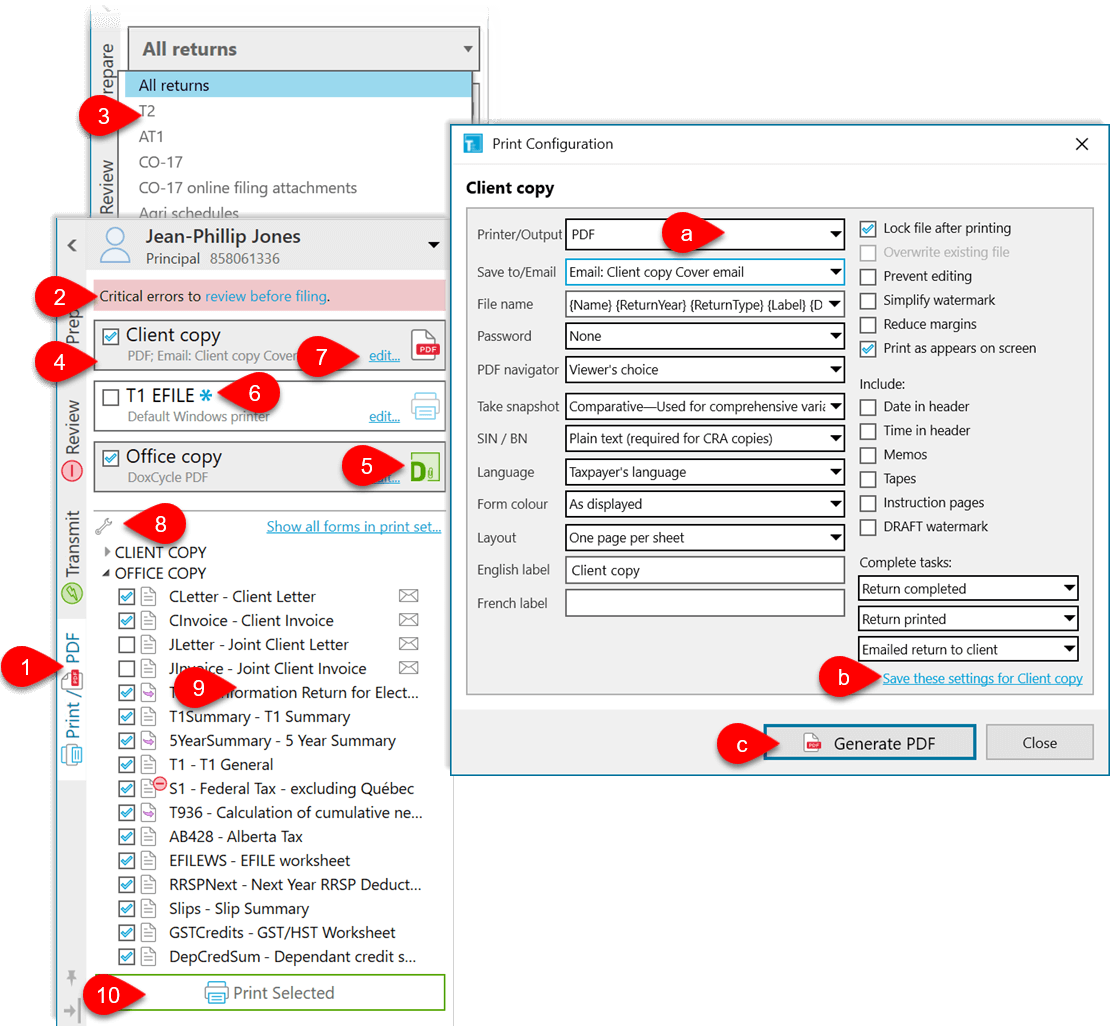
If the return contains outstanding review messages, a warning displays at the top of the pane. Click on the link to jump to the Review message list and resolve them.
For some tax return types—such as T2 or slips returns—there is an additional drop-down menu that allows you to restrict the list of print sets by type or return.
At the top of the pane, each box represents a single print set.
Each print set can output to its own printer or document type. Click the button on the right to quick print an individual print set.
TaxCycle determines which print sets to print based on which forms are used and the condition associated with the print set in Print/PDF Options. Check the sets you want to print. If you change the selection, a blue asterisk indicates you have overridden the default. Click on the asterisk to revert to the default print set.
To change print and output settings, click the edit link. This opens the Print Configuration dialog box:
The list of forms at the bottom displays in the order the forms will be printed, grouped by print set. TaxCycle decides which forms appear in the list based on what is used in the return and what is configured for each print set. To learn how to make changes to this section, see the section “Choose Which Forms to Print” below.
When you’re ready, click the Print Selected button. Printing always occurs in the background, so as soon as you set the job going, you can move on to other work.
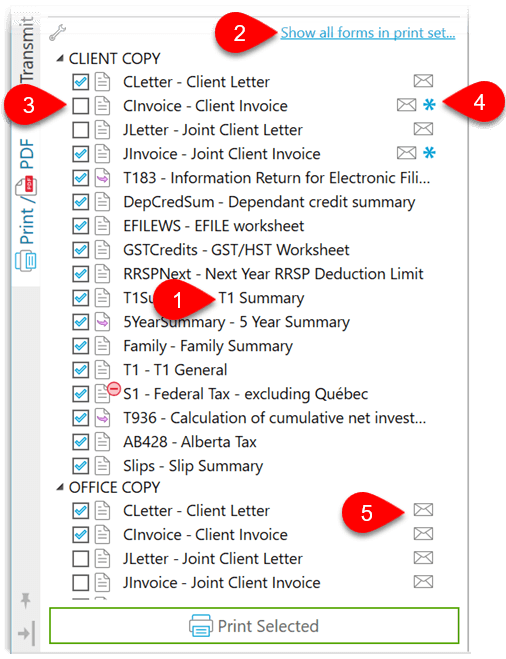
Choose Which Forms to Print
The bottom of the Print/PDF sidebar shows the list of forms that will be printed. These forms display in the order they will print and are grouped by print set. Expand or collapse a print set to change the view. Click on any form to view it or make changes before you print.
Click Show all forms in print set at the top of the forms list to see all available forms in each print set. This allows you to check more forms to print, even if they weren’t selected by print by default. When you’re done, click the hide link to show only the forms that will be printed.
Check or clear the check marks next to forms to modify what will print.
If you modify the default form selection, a small blue asterisk appears to the right of the form name. Click on this asterisk to restore the default.
Click envelope next to correspondence items to create an email from them in our default email program.