Updated: 2024-01-09
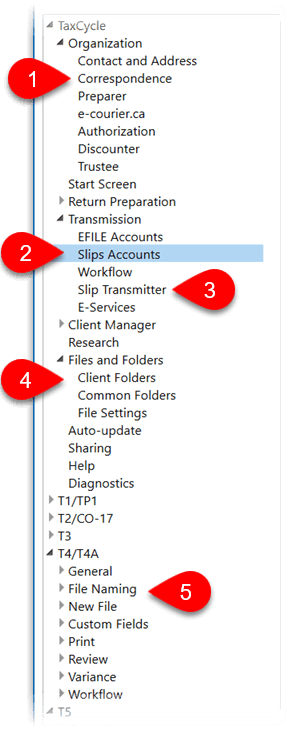
Before working on slips returns, set or review the following options. To open Options from the Start screen, click Options in the blue bar on the left side. If you have a file open, go to File menu, then click Options.
- Set the options under the Organization to add contact information for preparer and firm name. This is the same information used on all return types (T1, T2, etc.).
- Specifically for electronic filing of slips returns, set the Transmission options for Slips Accounts and Slip Transmitter (see below).
- Under Files and Folders and then Common Folders, configure the default folders where you want to save each type of slips return. You can configure a different folder for each module and year. If you change these folders after setting up the Client Manager, remember to add them to the list of Monitored folders in the settings Client Manager.
- Each slips module has its own set of options. Expand each section to set General, File Naming, New File, Custom Fields, Review, Variance, Workflow and Print options for each year and slip type.
Transmission Options
There are two pages of transmission options for slips: Slips Accounts and Slip Transmitter.
These options are transferred to the Transmitter section on the Info form when you create a new slips return. If you edit them there and they are different than in Options, TaxCycle will prompt you to update the information from Options.
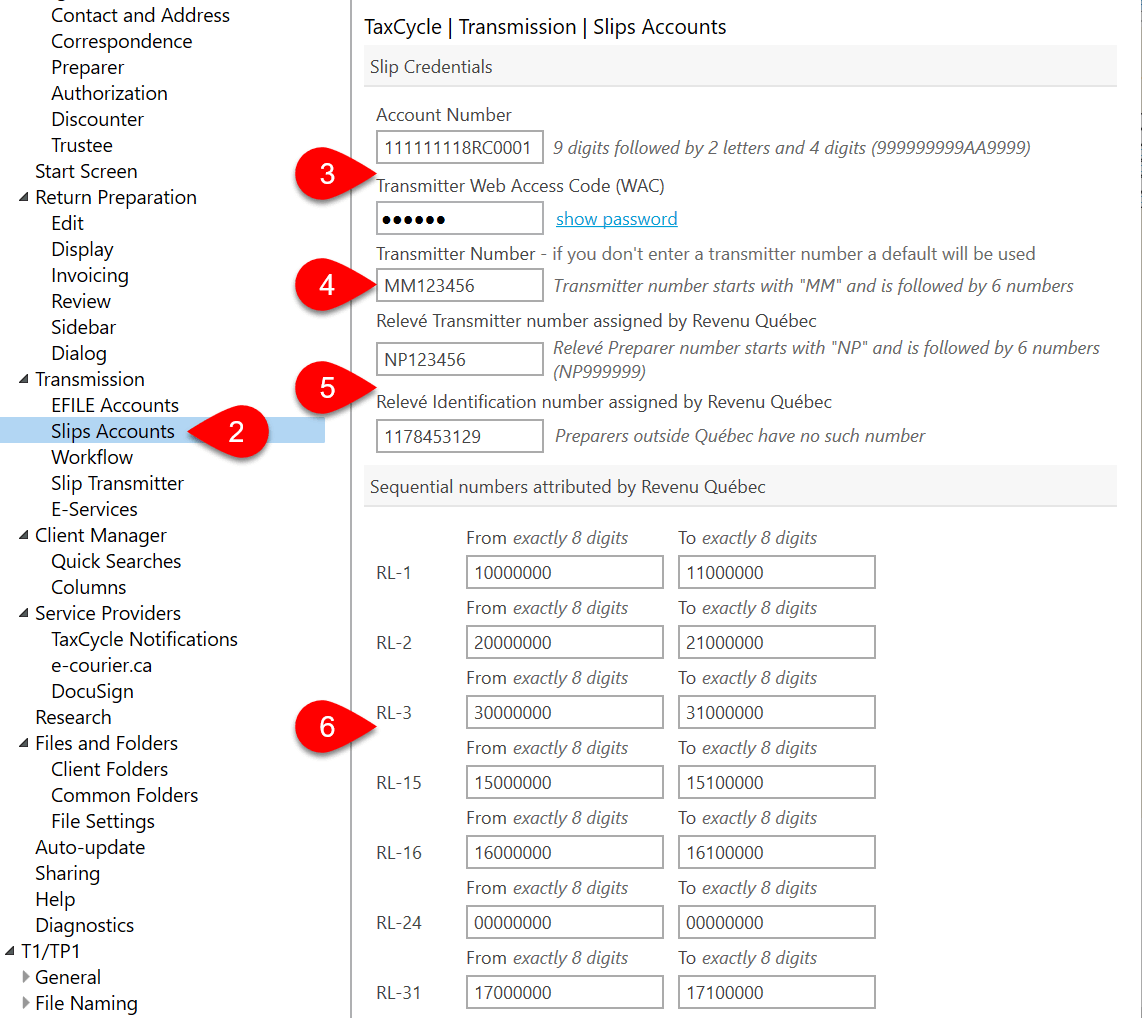
Slips Accounts
The Slips Accounts page sets up options for transmitting returns to the CRA using the Internet File Transfer (XML) web pages, and for transmitting the Québec Relevés to Revenu Québec.
- To open Options from the Start screen, click Options in the blue bar on the left side. If you have a file open, go to File menu, then click Options.
- On the left side of the screen, expand the section for Transmission and click on Slips Accounts.
- Enter a CRA Account Number and Transmitter Web Access Code (WAC). These are used to log in to the transmission website and must be related to one another. You can use the preparer’s Account Number and WAC, or the slip issuer’s Account number and WAC, as long as they relate to each other. But, if you use the issuer’s WAC, you must change it for each client in Options. Visit the CRA website to request a Web Access Code (WAC).
- If you have one, you can enter a Transmitter Number. This is used in the T619 data that is sent to the CRA. However, if you don’t have a Transmitter Number, TaxCycle will insert a default number instead.
- If you are filing Québec Relevés with Revenu Québec, enter the Relevé Transmitter number and Relevé Identification number assigned to you or your firm by Revenu Québec.
- In the boxes below, enter the series of sequential numbers Revenu Québec assigned you for each type of RL slip.
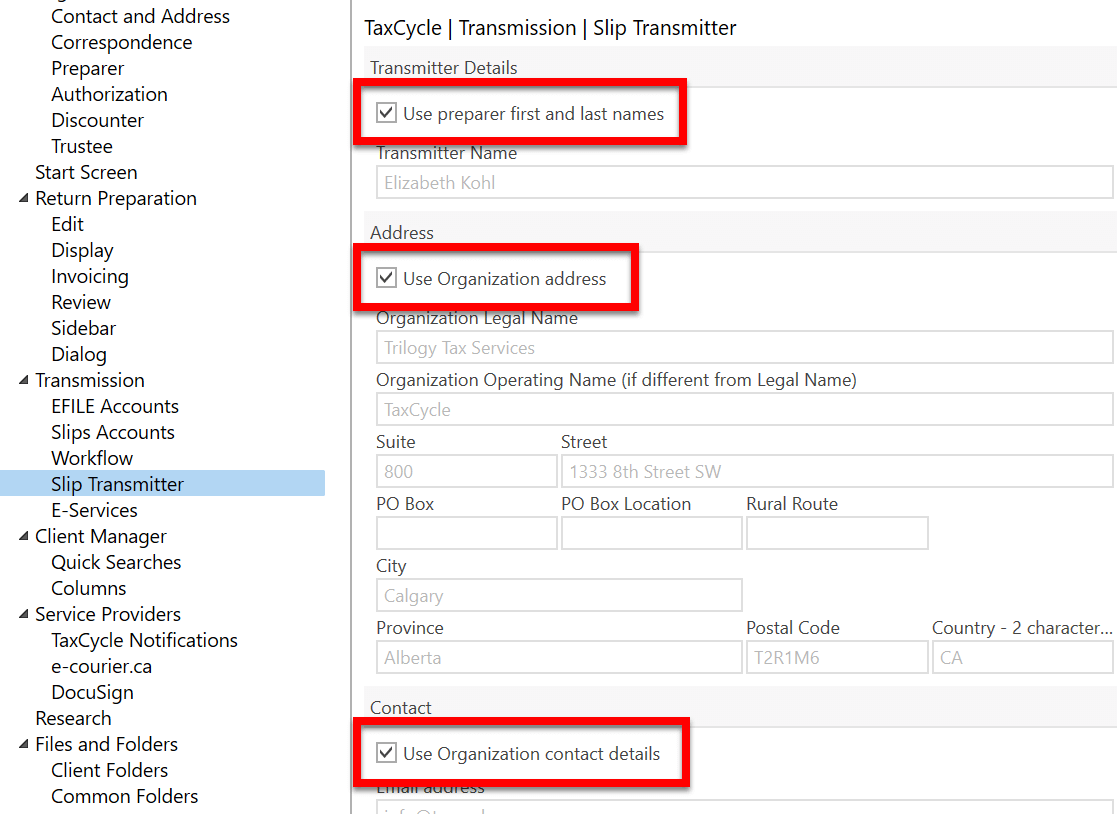
Slip Transmitter
The Slip Transmitter page in Options allows you to enter different contact information than is set in the Preparer and Organization options. These details flow to the Transmitter section on the Engagement worksheet.
To edit any of these options, clear the boxes to Use preparer first and last name, Use Organization address or Use Organization contact details, depending on which fields you wish to change.
General options for slips
- To open Options from the Start screen, click Options in the blue bar on the left side. If you have a file open, go to File menu, then click Options.
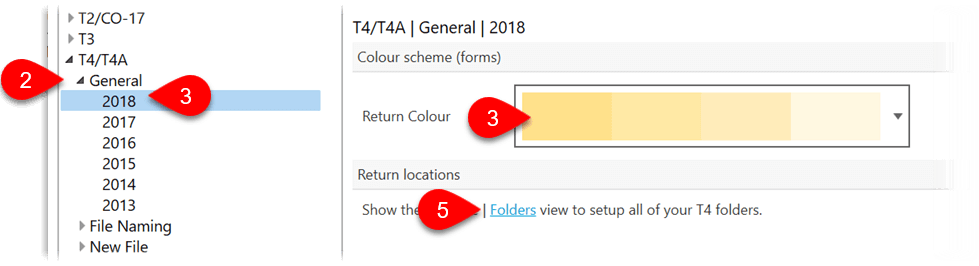
- On the left side of the screen, expand the section for a particular slips module, such as T4-T4A, T5, T5018, or NR4. Then click on General to set the options for all years of slips.
- Expand General and click on a particular year to set different options for a particular slip year.
- Choose a colour to display the background of the form when editing the slips return.
- If you have set the default folders for saving slips returns, click the Folders link to jump back to the Folder options.
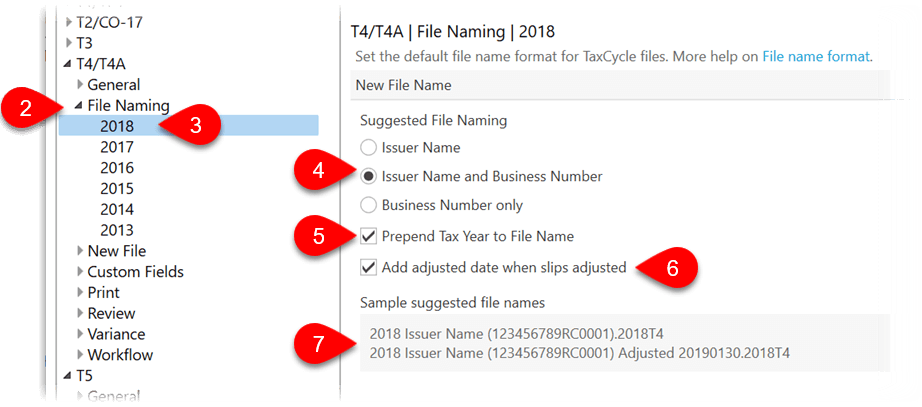
File Naming options for slips
- To open Options from the Start screen, click Options in the blue bar on the left side. If you have a file open, go to File menu, then click Options.
- On the left side of the screen, expand the section for a particular slips module, such as T4-T4A, T5, T5018, or NR4. Then click on File Naming to set the options for all years of slips.
- Expand File Naming and click on a particular year to set different options for a particular slip year.
- Choose the contents of the file name: Issuer Name (default), Issuer Name and Business Number, or Business Number only.
- To add the tax year to the beginning of the file name, check Prepend tax year to file name.
- To add the date to the file name when the slips return is adjusted, check Add adjusted date when slips adjusted.
- At the bottom on the page, as you change these options, you will see a sample of what the file names will look like.
New File options for slips
- To open Options from the Start screen, click Options in the blue bar on the left side. If you have a file open, go to File menu, then click Options.
- On the left side of the screen, expand the section for a particular slips module, such as T4-T4A, T5, T5018, or NR4. Then click on New File to set the options for all years of slips.
- Expand New File and click on a particular year to set different options for a particular slip year.
- Check Carry forward prepare checklist (default) to carry forward the selections in the Prepare sidebar if you use it as a checklist. You can enable this option on the Sidebar page under the TaxCycle Return Preparation options.
- Set the default language of correspondence for all returns of that type: No default, English or French.
- For T4 returns only, set the adjustment options that will appear on the T4AdjustmentOptions worksheet. Learn more about these options in the T4 adjustments to CPP, EI and PPIP help topic.
